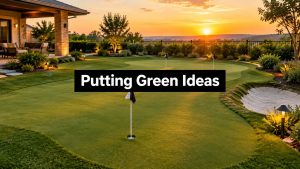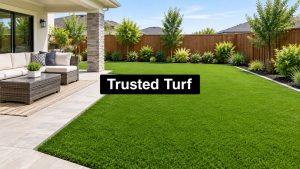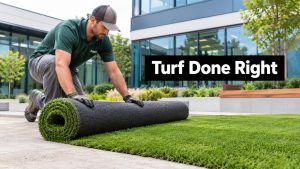

You can already see the finished project in your mind. It's Sunday morning in Austin, the coffee is hot, and you're rolling putts across a clean backyard green instead of driving across town to practice. Then the first summer arrives, the surface develops soft spots, water sits after a storm, and a putt that should track straight starts wandering for no obvious reason.
The turf is visible, but the decisions underneath it determine whether the installation feels like a practice facility or an expensive lawn feature. Putting green installations succeed through site assessment, excavation, drainage, compaction, and careful material selection, not through turf color alone. The following guidance reflects the issues that matter before you schedule work, from Austin soil and access constraints to warranty language and the questions a trustworthy installer should answer.
Why Most Backyard Putting Greens Fail Before They Succeed
A homeowner usually notices failure at the surface. The ball slows in one lane, hops in another, or turns sharply across a seam. The base feels spongy underfoot, moss or organic debris collects in damp areas, and turf edges begin to separate. In Austin, heat and expansive clay can expose weak preparation quickly, especially when an installer treats the project like ordinary landscaping.

The failure often happened weeks earlier. Someone skipped a soil percolation check, assumed the yard would drain through native soil, or spread a thin layer of aggregate over undisturbed ground. Another buyer chose turf because the green looked convincing in a showroom, without asking how its fibers, backing, and infill would affect ball speed. A general landscaper may know how to install lawn turf but still lack the grading discipline required for a surface where a shallow depression changes the putt.
Practical rule: If the proposal focuses on the turf face and barely explains the ground below it, ask more questions before signing.
The shortcuts that create expensive repairs
The most common shortcuts are easy to understand:
- Skipping soil evaluation: Clay, compacted fill, and poorly draining pockets need different preparation.
- Underbuilding drainage: Water can remain trapped above an unsuitable layer even when the surface appears permeable.
- Selecting by appearance: Color and realism matter, but the turf must also support a predictable roll.
- Using green installation methods: A putting green needs controlled grades, stable edges, accurate seams, and a base that won't settle.
A green doesn't need to copy every detail of a championship course, but it does need the same basic respect for water movement and surface stability. USGA-style construction guidance specifies a stable subgrade, drainage network, at least 4 inches of gravel, and about 12 inches of sand-based root-zone material, with drain laterals spaced no more than 15 feet apart and continuous pipe slope of at least 0.5% to the outlet. Those benchmarks describe a natural grass construction profile, but they make the central lesson clear. A playable surface is engineered from the ground up. USGA putting green construction guidance explains why drainage geometry and layered construction matter.
For artificial greens, the assembly differs, yet the principle remains. Native soil must be removed or corrected, aggregate must be placed and compacted in controlled lifts, and the finished grade must direct water away from structures and low points. A useful reference on artificial turf drainage problems can help homeowners recognize warning signs before they become visible surface defects.
The market's scale also shows why this deserves more care than a novelty project. The modern putting green installation market was estimated at about USD 10.6 billion in 2023, with projections of USD 11.52 billion in 2024 and USD 22.4 billion by 2032, implying an expected CAGR of about 8.67% across the forecast period. The same breakdown separates residential and commercial uses and defines small installations as under 100 square feet, medium installations as 100 to 500 square feet, and large installations as over 500 square feet. Wise Guy Reports' putting green market breakdown reflects how the category has moved beyond golf courses and into installed residential and commercial amenities.
Assessing Your Site and Choosing the Right Design
A first property visit should begin away from turf samples. Walk the yard after rain if possible, identify where water travels, and look at the relationship between the proposed green, the house, fences, trees, irrigation, and access points. A design that looks attractive on a drawing can become difficult and costly if machinery can't reach the work area or if the layout blocks natural drainage.
Start with grade, water, and access
Slope determines how much earthwork the property needs. Grades above 2% usually require significant cut-and-fill work if you want a comfortable putting surface, while a nearly flat area still needs a deliberate pitch, commonly around 1%, to move water toward an approved outlet. The finished green shouldn't become a dam that redirects runoff toward a foundation, retaining wall, or neighbor's property.
Access changes the labor plan just as much as slope. Measure gate openings, note steps and narrow side yards, and identify whether a compact loader, mini excavator, plate compactor, and aggregate delivery can reach the site. Tight access may require smaller equipment, extra handling, and more labor to move spoil and base material. That's one reason two greens with similar footprints can receive very different proposals.
The professional landscape design process should account for the whole yard, not just the outline of the green. Good planning keeps drainage, planting, pathways, shade, and maintenance access working together.
Choose practice value over unused area
Residential greens commonly fall between 300 and 800 square feet, but size should follow how you practice. A smaller green with multiple pin positions, purposeful breaks, and a usable fringe can offer more variety than a large, flat rectangle. If you want chipping, leave room for approach shots and a rough or fringe transition. If putting is the priority, spend the available footprint on contours and landing zones rather than empty perimeter.
Austin's live oaks and cedar elms deserve special attention. Their roots can interfere with excavation, while shade, leaf litter, sap, and surface moisture influence maintenance. Removing or damaging established trees isn't a casual design adjustment. Work around major roots where practical, keep the green clear of heavy debris fall, and consider how afternoon shade affects comfort and turf temperature.
Single-tier designs suit many backyards because they're easier to drain and maintain. Multi-tier layouts create more shot variety but demand stronger grade control, carefully placed retaining details, and a drainage plan that handles each elevation change. Bunkers and chipping areas can add useful practice, but they also increase excavation, edging, and maintenance complexity.
The best green doesn't look dropped into the yard. It follows the property's natural lines and gives every contour a reason to exist.
Excavation, Base Preparation, and Drainage Done Right
The base is where a putting green installation earns its performance. In Austin, excavation depth depends on soil composition, organic material, existing fill, and the design's drainage needs. A practical excavation range is 8 to 14 inches, with expansive clay often demanding deeper correction and more substantial aggregate than a stable, well-draining soil.
The first pass removes vegetation, roots, loose organic matter, and unsuitable soil. Leaving decomposing material below the green creates voids and settlement later. Once the area is open, the subgrade should be shaped, cleaned, and checked for soft pockets rather than covered immediately.

Build the profile in controlled layers
A reliable artificial green assembly typically includes a geotextile separator over the prepared subgrade, followed by 4 to 6 inches of compacted crushed limestone or decomposed granite. The finish layer can use about 2 inches of finely graded granite dust, screeded to the intended contours and tolerances. The separator keeps native soil from migrating into the aggregate and protects the base's drainage capacity.
The material must be placed in lifts, not dumped once and lightly tamped. Compacting in 2-inch lifts with a plate compactor gives each layer a chance to achieve consistent density. A thin blanket of base over native clay may look firm during installation, but it won't provide the same resistance to settlement, moisture movement, and repeated foot traffic.
The USGA profile provides a useful performance benchmark. Its sand-based construction uses about 12 inches of root-zone material above a gravel drainage layer, with drainage mains aligned to the maximum fall and laterals spaced no more than 15 feet apart. Artificial turf doesn't require that exact natural grass root-zone profile, but the benchmark demonstrates why a green needs a designed drainage path rather than hope that water disappears.
Give water a defined route
French drains belong at low points or along areas where groundwater and surface runoff converge. Channel drains can intercept water near hardscape, patios, or the uphill side of a green. The outlet must be legal, stable, and protected from erosion. Tying into an existing stormwater system requires checking capacity, elevation, and local requirements rather than cutting into a pipe and assuming the connection will work.
Drain pipes should maintain a continuous slope to the outlet. Current USGA-related guidance allows flat drain pipe only when it conforms to ASTM D7001 and is at least 12 inches wide, while geotextile-encased tubing is prohibited in the cited standard update. These details matter when a contractor proposes a low-profile drainage solution.
Material gradation is another control point. University turf guidance based on USGA-related standards recommends keeping total fines at no more than 10% by weight in drainage-critical mixes, with less preferred when drainage is the priority. Excess silt and clay can trap water above the gravel interface. University of Nebraska turf guidance on aging golf greens also emphasizes clean trench floors, removed spoil, and verification of pipe diameter, trench width, slope, and root-zone particle distribution.
After base placement, laser-level grading checks the entire surface, not just the edges. The goal is a smooth transition through every contour, with no abrupt ridge that deflects the ball or low area that holds water. Details on synthetic grass base material can help you compare what an installer proposes with the preparation your site needs.
Selecting Turf, Infill, and Edging for Austin Conditions
Turf selection should start with playability, then move to appearance. Nylon, polypropylene, and polyethylene each have a place in an outdoor installation, but they don't perform identically under Austin heat, ultraviolet exposure, and repeated foot traffic.
Nylon generally offers the strongest resilience and heat resistance for the putting surface, which is why it's often the preferred choice when consistent recovery and long-term playability matter. Polypropylene can make sense for fringe or rough areas where the ball-roll demands are lower and the material budget needs to stay controlled. Polyethylene offers a softer visual and tactile feel, but the correct product still depends on backing, density, and intended use.
Compare materials by the job they need to do
| Material Type | Heat Resistance | Durability | Playability | Relative Cost |
|---|---|---|---|---|
| Nylon putting turf | High | High resilience | Consistent, firm roll | Higher |
| Polyethylene fringe turf | Moderate to high, product dependent | Good for general use | Softer, less exact roll | Moderate |
| Polypropylene rough turf | Moderate | Suitable for lighter-duty areas | Better for fringe and rough than precision putting | Lower |
| Silica sand infill | Stable in outdoor use | Supports fiber stability | Firm, predictable roll | Moderate |
| Crumb rubber infill | Can retain heat | Cushioned underfoot | Softer feel, less suited to precise putting | Moderate |
| Coated sand blend | Designed to resist compaction | Good retention and stability | Can balance firmness and speed | Higher |
Silica sand is the straightforward choice for a firm, consistent putting surface. Crumb rubber adds cushioning but can change the feel and response of the green. Coated sand blends can resist compaction and help maintain a more controlled playing surface when the product and application are matched correctly.
Infill depth affects firmness and speed. Typical application guidance for artificial putting greens falls around 2 to 4 pounds per square foot, but the correct amount must follow the turf manufacturer's specification. Too little can leave fibers unsupported and the backing less stable. Too much can make the surface overly firm, alter ball speed, and interfere with drainage.
Select an edge that tolerates movement
Pressure-treated timber provides a familiar border, but Austin's expanding and contracting soils can shift it over time. Composite bender board creates smooth curves and resists decay, though it still needs careful anchoring. Concrete curbing offers a rigid, clean edge for high-use commercial areas, while natural stone integrates well with premium designs but requires precise setting and a stable supporting base.
For a residential backyard, nylon putting turf with silica or a compatible coated sand infill, paired with composite edging, often balances playability, appearance, and maintenance. A commercial installation may justify nylon across the primary surface, a more durable edging system, and an infill selected for repeated traffic and easier service. The trade-off is straightforward. Upgrading materials can improve durability and consistency, but it won't rescue a poorly compacted base.
Austin homeowners comparing turf products can also review guidance on heat-resistant artificial turf before approving a surface that will receive direct afternoon sun.
Understanding Costs, Timelines, and Warranty Coverage
A credible proposal should show how the price is built. Homeowners are more likely to trust an itemized estimate than a lump sum because it separates excavation, base work, drainage, turf, edging, infill, labor, and design features. Clear language and visual references also make it easier to compare proposals without assuming that the lowest total includes the same scope.
The cost range for basic residential greens is about $15 to $25 per square foot, while custom designs with undulations, bunkers, and premium turf can reach $30 to $45 or more per square foot. These figures are driven by the amount of material and labor involved, not the turf footprint. Site access, slope correction, drainage complexity, contouring, hardscape integration, and material upgrades can all change the final price.
Timelines depend on preparation
A standard 300 to 500 square foot backyard green may take 3 to 5 days, while a complex multi-tier design with extensive hardscape integration may require 7 to 14 days. Those ranges assume normal access, material availability, and appropriate working conditions. Weather, drainage changes, concrete curing, and adhesive requirements can extend the schedule.
A homeowner considering the trade-offs can review hire a pro or do it yourself before deciding whether the project's precision and physical demands fit their experience. DIY may suit a simple, accessible layout, but drainage corrections and rework can erase the savings quickly.
Warranty language deserves the same scrutiny as the construction scope. Artificial putting green coverage usually has two separate layers:
- Turf material warranty: Independent guidance describes common residential coverage of 8 to 15 years against specified material problems such as UV degradation or fiber breakdown.
- Workmanship warranty: Installer coverage commonly runs 1 to 3 years and may address seam separation, wrinkles, lifting edges, or base settling.
- Infill provisions: Some installers provide retention or performance guarantees, but the details must be written into the contract.
Read exclusions carefully. Improper maintenance, pet urine, standing water caused by later changes, and unauthorized modifications may fall outside coverage. Ask who handles each warranty claim, what documentation is required, and whether repairs include labor or only replacement material.
Austin Climate Considerations and Scheduling Your Installation
Austin's climate rewards preparation and exposes weak installations. Summer temperatures exceeding 100°F can make artificial turf surfaces uncomfortable during direct sun, even when the material itself is designed for outdoor use. Shade from existing trees, properly selected infill, and a layout that offers relief from afternoon exposure can make the green more enjoyable to use.
Lighter-colored infill may reduce the visual and thermal intensity of the surface, while shade structures can create a more practical practice window. The surrounding area matters too. A green under heavy leaf drop may need more frequent clearing, and organic debris can work its way into infill if it isn't removed regularly.
Plan water use and approvals together
A natural grass green of about 400 square feet may require 2,000 to 3,000 gallons monthly during peak summer, while artificial turf eliminates irrigation for the playing surface. The cited Austin-focused guidance frames that as potential annual savings of $300 to $600, subject to actual water rates, irrigation practices, weather, and site conditions. Current putting green trend coverage also highlights why drainage, contour shaping, excavation, and precision grading deserve more attention than surface appearance alone.
Permit questions depend on the scope, not just the presence of turf. Many residential greens under 500 square feet may not require a permit, but significant grading, retaining walls over 4 feet, or drainage modifications may trigger city review. Confirm requirements with the relevant Austin authority before excavation begins, especially if the project changes runoff or includes structural work.
For scheduling, March through May and September through November often provide more manageable working conditions for base compaction and adhesive curing than the hottest part of summer. Choose a date based on the full construction sequence, not just the day turf arrives. Golfers planning an at-home practice setup may also find golf launch monitor tips useful when deciding how the green should fit into broader practice goals.
Trust should be established before the first load of aggregate arrives. Ask for a current certificate of insurance, applicable state or local licensing, workers' compensation coverage, and a surety bond. A surety bond is a financial guarantee that the job will be completed if the contractor fails to finish it, as explained in this home renovation trust and credential guide. Request an itemized proposal, drainage plan, material specifications, warranty terms, and a clear schedule. Modern Yard offers site preparation, drainage-conscious artificial turf work, custom putting greens, and maintenance across the Austin area, so homeowners can evaluate those services alongside other qualified contractors.
Modern Yard Landscapes can assess your Austin property, plan the drainage and base system, and install a custom putting green around your space, access, and practice goals. Visit Modern Yard Landscapes to review the service options and schedule a site consultation before committing to a design.