
You're looking at a patchy Austin lawn, muddy paw prints by the back door, and another weekend of yard work. Artificial grass sounds appealing, but you don't want to trade those problems for standing water, visible seams, or a surface nobody wants to touch on a summer afternoon.
The artificial grass installation steps that matter most happen before the green rolls arrive. A dependable installation starts with the right excavation, a stable drainage base, and a realistic heat plan. Here's how to judge the work, including the checkpoints worth inspecting yourself and the stages best handled by a professional crew.
Artificial Grass Installation Steps at a Glance
| Phase | What Gets Done | Typical Time | Check Before Moving On |
|---|---|---|---|
| Site assessment | Measure, mark utilities, check slope and access | Half a day | Fall direction and delivery route confirmed |
| Removal | Strip sod, roots and topsoil | 1 day | Subgrade free of organic matter and roots |
| Grading and drainage | Set finished grade, install drain pipe or trench | 1 to 2 days | Fall correct and drain flow tested with a hose |
| Base build-up | Geotextile, aggregate in lifts, compaction | 1 to 2 days | Base compacted and level within tolerance |
| Turf laying | Roll out, orient, cut and seam | 1 day | Seams flat and turf free of unintended tension |
| Edging and fastening | Secure perimeter with spikes and edge restraint | Half a day | Edges locked and nothing lifts underfoot |
| Infill and brushing | Spread infill, brush fibers upright | Half a day | Even infill depth and fibers standing |
| Final cleanup | Remove debris, rinse, walk-through | Half a day | Surface clear and drains open |
Treat these times as planning allowances for sequential phases, not a guaranteed production schedule. Added together, they allow roughly six to eight working days once the site is ready. Crews can overlap some tasks, while restricted access, drainage corrections, or unsuitable soil can extend others.
Commercial work requires additional planning for deliveries, pedestrian routes, and phased access. A business entrance cannot become an open excavation without providing an alternative route.
Weather also controls the schedule. Rain can stop grading and compaction because working saturated soil creates ruts rather than a dependable foundation. Adding workers won't make wet ground ready.
The checkpoints worth attending
Inspect the finished base before turf placement, then inspect seams and perimeter fastening before infill hides the backing. The base should be smooth to its intended slope, not necessarily horizontal.
Practical rule: A green surface isn't proof of a finished installation. Ask to see the work before the next layer covers it.
You can contribute without operating machinery. Walk the yard after rain before construction, review where water should exit, and look along dry-fitted seams before final brushing. Those simple checks make the work easier to understand and the final handover less uncertain.
Assess the Yard, Sun Exposure and Removal
Start with a measured sketch, not a turf sample. A homeowner can usually assemble a useful first assessment in about an hour, although utility locating and a proper drainage evaluation require separate arrangements.
- Measure the footprint. Draw the lawn shape and mark beds, trees, patios, fences, and gates. For irregular spaces, the Barefoot Organics square footage tips explain how to break the area into manageable shapes. Measured lawn area isn't automatically the order quantity because roll layout and trimming create offcuts.
- Record water movement. After rain, photograph puddles and mark any flow toward the house. Include runoff entering from neighboring ground or a downspout.
- Locate buried services. Call 811 before digging, and arrange to trace private sprinkler lines separately. Don't assume a utility mark identifies every irrigation pipe or private service.
- Protect trees. Mark exposed roots and the likely root zone. Get an arborist's guidance before cutting substantial roots, and don't grind roots into material that will remain beneath the base.
- Check delivery access. Measure gates and identify steps, tight corners, and surfaces that need protection. Turf rolls and excavated soil must travel through that route.
- Map afternoon sun. Mark west-facing exposure and the shade provided by trees, fences, or a pergola. Position seating, play space, and hose access with summer use in mind.
Plan for surface heat before excavation
The temperature underfoot matters more than the temperature on a weather app. A systematic review summarized by Canada's National Collaborating Centre for Environmental Health found artificial-turf surface temperatures 9.4–33.7°C higher than natural turf, while nearby air temperatures were 0.5–1.2°C higher.
That distinction matters for children sitting on the lawn and dogs standing on it. Cooling infill doesn't remove the need for shade, surface checks, or avoiding exposed turf during peak afternoon heat. Keep a hose accessible for cleaning and temporary cooling, without treating rinsing as a permanent heat solution.
Remove organic material, then inspect the ground
Mark the perimeter with marking paint, cut and lift the sod, and strip the topsoil and organic material. An initial 3 to 4 inches may remove that surface layer, but it isn't a universal final excavation depth.
Austin-area clay can swell when wet and shrink when dry. Sticky ground that holds water needs closer evaluation than freely draining sandy loam.
Good exposed ground feels firm underfoot and contains no buried debris, decaying roots, or soft pockets. Don't cover a questionable patch with stone and hope compaction will solve it.
How to Grade the Base and Build Drainage That Holds
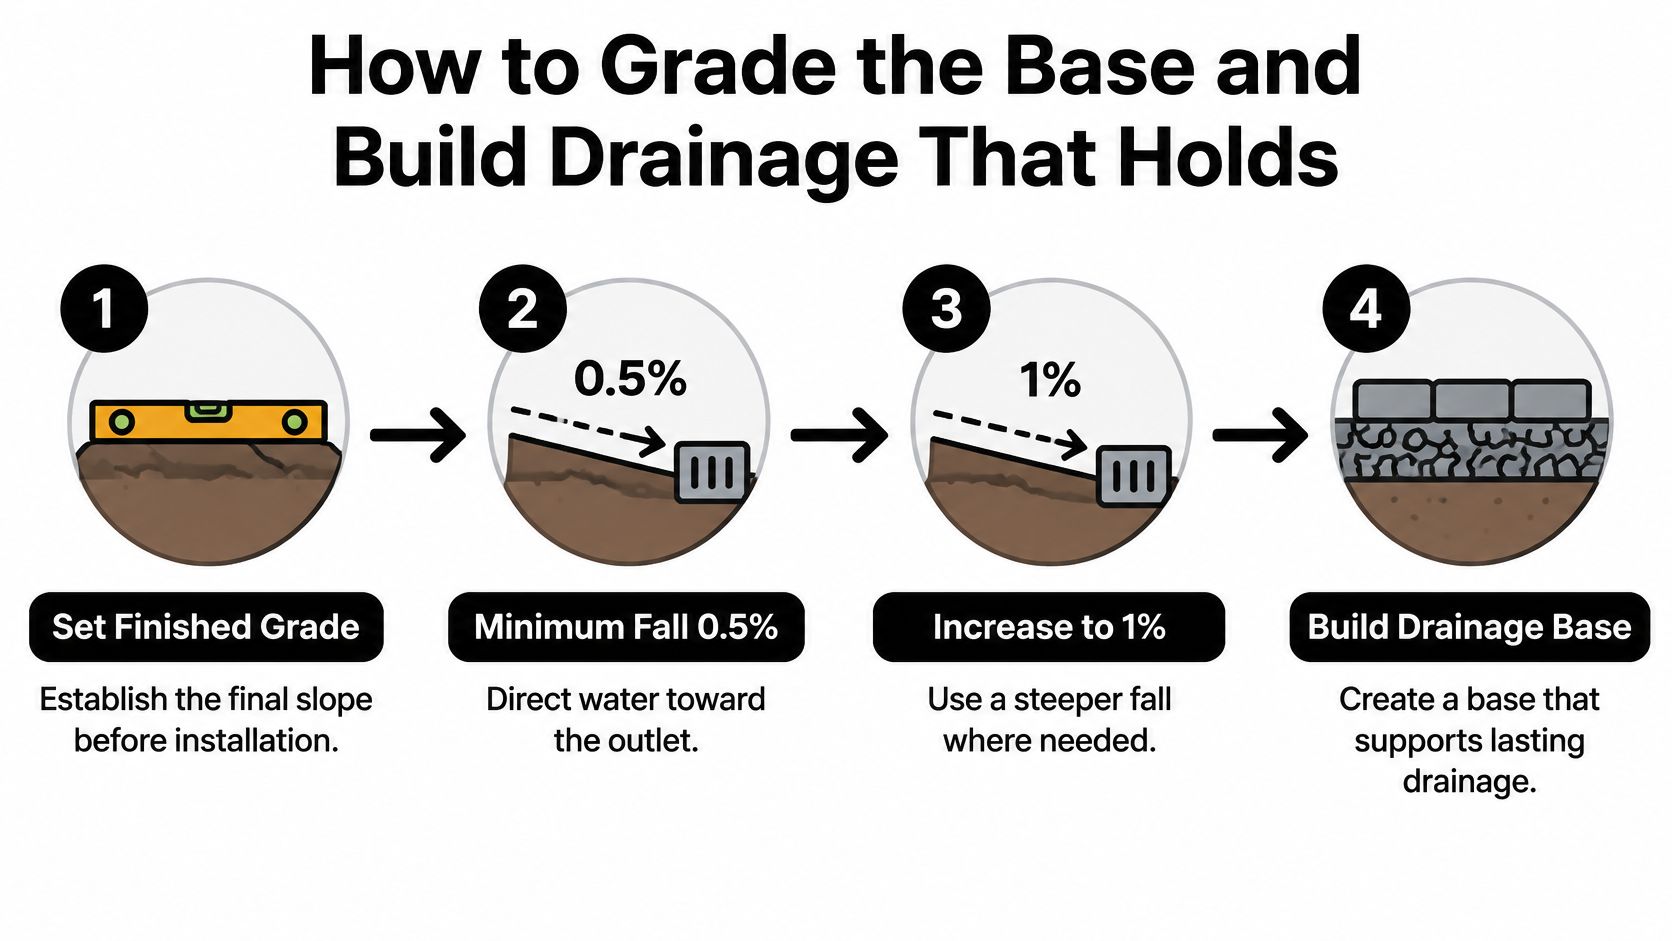
Set the finished elevation before choosing the excavation depth. Account for the turf, the aggregate section, and transitions to patios or paths. Water must move away from the foundation toward an outlet that can receive it.
The Ohio environmental guidance on synthetic turf fields provides a useful reference for layered drainage construction and clean, angular aggregate. The following section is a representative build-up, not a prescription for every residential yard.
| Layer | Depth or Rule | Purpose |
|---|---|---|
| Drainage fall | At least 0.5 percent, toward 1 percent in heavy rain | Moves water to the outlet |
| Geotextile | Over soil where migration is likely | Keeps clay out of the stone |
| Large angular stone | 4 to 6 inches, compacted in lifts | Main drainage and load layer |
| Small stone | 2 to 3 inches, compacted | Leveling layer |
| Fine finish layer | Thin, screeded flat | Final grade before turf |
Build and verify the section
- Excavate for the complete assembly. The stone layers shown total 6 to 9 inches, before the finish layer and turf. Work backward from the required finished height rather than stopping at the sod-removal depth.
- Install perforated drainage pipe or a collector trench where needed. Connect it to a suitable daylight outlet or approved drainage connection, not an arbitrary low corner.
- Place separation geotextile where soil migration is likely. Keep it flat and maintain continuity at transitions.
- Add washed, angular aggregate in controlled lifts. The base recommendations from R E and Sons offer additional context for comparing base materials.
- Compact each lift with a plate compactor, then screed the fine finish layer. Don't try to compact the entire section from the top after placing it all at once.
- Check grade and flow. Use a long straightedge and level, repair depressions, and run a hose test before covering the base.
Reject drainage shortcuts
A New Jersey technical review of synthetic turf identifies subgrade planarity as critical and describes drainage-trench grading within approximately ±0.5 inch of the specified plane. That trench tolerance isn't a blanket allowance for depressions across a backyard.
Excessive fines restrict flow. Repeated wheelbarrow trips can rut the prepared surface, while construction traffic on exposed subgrade can reduce infiltration. Keep a designated access route and recheck disturbed areas.
Our guide to drainage for artificial grass explains the relationship between the surface and the outlet. A hose test helps reveal installation defects, but it doesn't certify storm capacity.
No premium turf can correct ponding, odor, or movement caused by an unsuitable base. Hire a professional crew when outlet elevations, retaining structures, or persistent clay drainage are involved.
How to Lay, Seam and Secure the Turf
The turf stage rewards patience more than speed. Clean cuts, matching pile direction, and controlled positioning matter more than pulling the material as tight as possible.
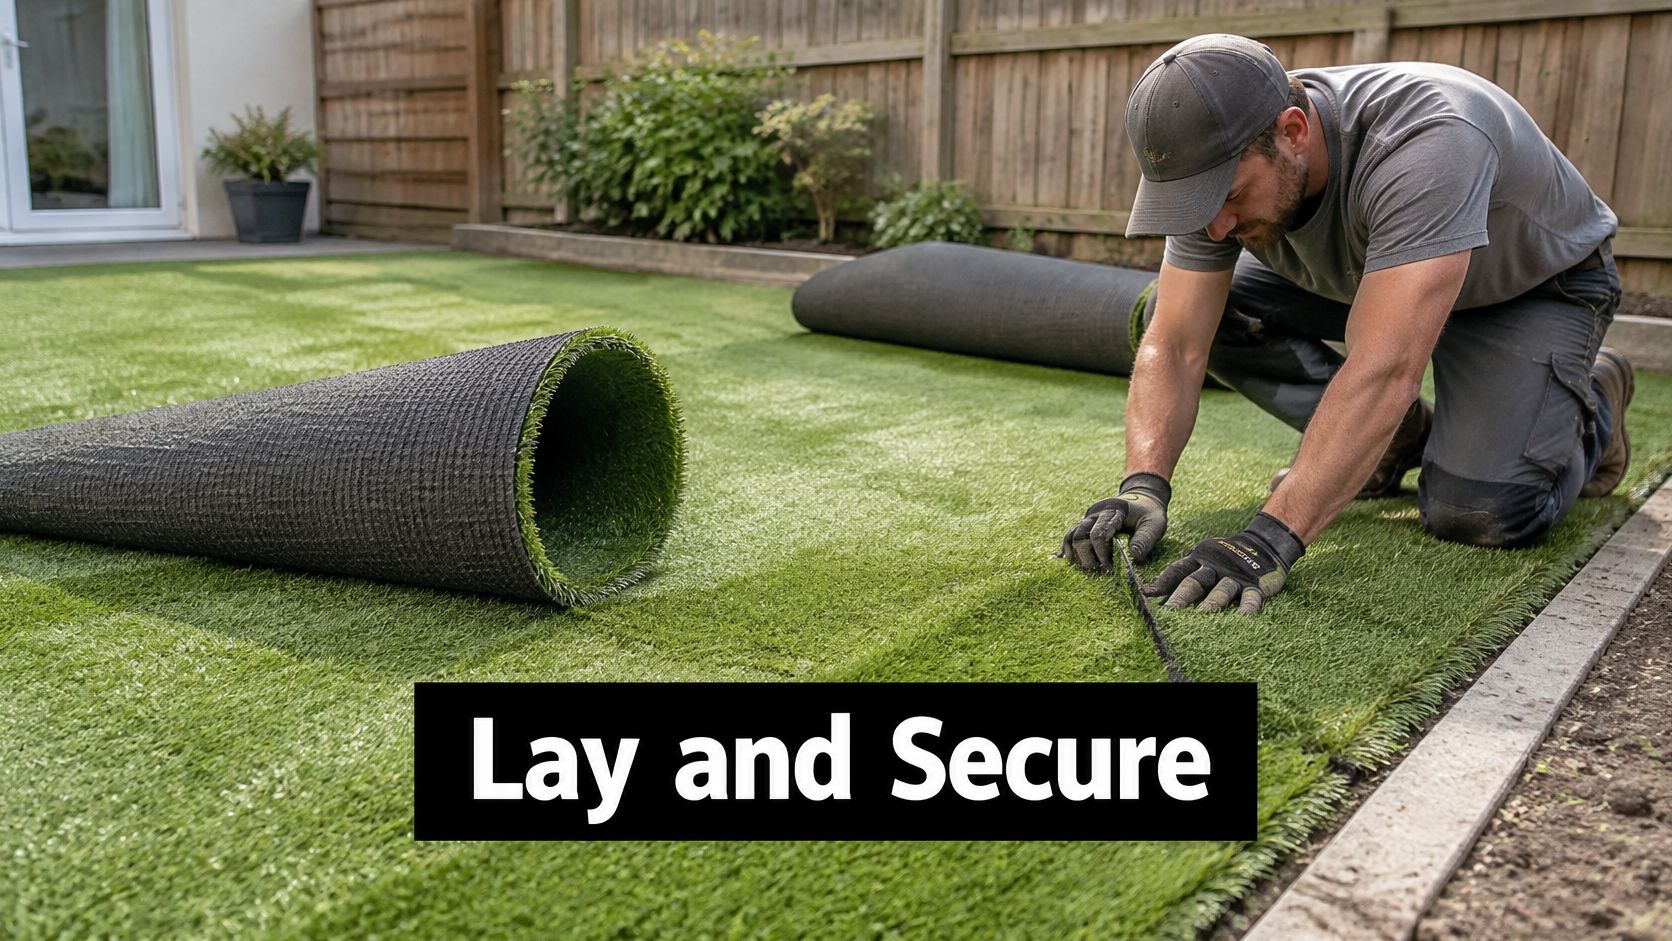
- Unroll and relax the material. Allow about 30 to 60 minutes in the sun as an initial working allowance, then assess whether creases have released. Follow the turf manufacturer's conditioning requirements if more time is needed.
- Match every roll's direction. Lay the fibers toward the chosen viewing point consistently. Dry-fit adjoining pieces before opening adhesive, because mixed pile direction can make identical turf appear different colors.
- Work from the center outward to remove slack and puckers. Use controlled positioning rather than aggressive stretching, which can distort the backing and load the seams.
- Join the seams. Trim from the backing with a sharp utility knife, center the joining tape, and apply compatible adhesive. Roll or press the joint as specified, keeping fibers out of the glue.
- Cut carefully around posts, pavers, and retained sprinkler heads. Leave a clean, supported finish, not a ragged gap you expect infill to conceal.
- Fasten the perimeter. Where the specified system calls for it, galvanized spikes about every 4 to 6 inches provide a starting fastening layout. Install steel or aluminum edge restraint securely, avoid buried services, and keep spike heads from trapping fibers or dimpling the backing.
Correct the defects before adding weight
These are important callback risks to inspect:
- Overlapping seams: Backing laid over backing forms a ridge. Recut and dry-fit the joint so the edges meet cleanly without overlapping.
- Loose perimeter sections: Widely spaced or poorly seated fasteners allow lifting under foot traffic. Correct the anchoring system instead of hammering random spikes through the pile.
- Unresolved slack: Creases and uneven restraint can leave waves as the material responds to Austin's July heat. Reposition the turf before permanent fastening rather than relying on infill to flatten it.
Our artificial turf seams guide covers what to look for at adjoining rolls. We use professional-grade seaming materials, but the workmanship still matters: adhesive compatibility, clean backing, and proper curing all need attention.
A professional crew earns its keep at this stage. Once the adhesive has cured, correcting a badly fitted seam becomes much harder.
Choosing Infill and Finishing the Surface
| Infill | How It Handles Heat | Best Use | Trade-off |
|---|---|---|---|
| Silica sand | Heats up in full sun | Light residential lawns | Lowest cost, can compact and need topping up |
| Coated sand | Similar to sand; some coatings address odor | Pet areas | Higher cost than plain sand |
| TPE (thermoplastic elastomer) | Can run cooler than rubber; product-specific | Pet and play areas | Higher cost, check the spec sheet |
| Cryogenic rubber | Gets hot in direct sun | Sports and heavy-use fields | Heat and odor concerns, not usual for backyards |
| Cooling-additive infill | Marketed as cooler; results vary | Hot, fully exposed areas | Claims vary, verify with the supplier |
Infill supports the fibers and adds ballast. It also changes how the surface feels and how easily you can clean it. Choose a material approved for the turf system and intended use rather than buying by bag price alone.
For pets, odor-resistant infill is only one component. Remove solid waste promptly and maintain a practical rinse route. The University of British Columbia review of artificial turf identifies runoff, contaminant leaching, and plastic pollution as concerns, so contain loose infill and keep waste out of drainage outlets.
Finish in light applications
- Spread evenly with a broadcast spreader or carefully by hand. Sand-type systems may specify about 1.5 to 2 pounds per square foot, but the selected product's written loading requirement controls.
- Brush in two directions with a suitable stiff broom or power brush to move granules between the fibers.
- Repeat light applications and brushing until the specified loading is reached. The fibers should stand upright without being buried.
- Clear debris, rinse where appropriate, and walk every seam, transition, and edge.
Our artificial grass infill guide helps distinguish the options before installation.
More infill isn't automatically better. Stop at the specified loading, not when the remaining bags are empty.
Over-infilling makes the surface stiff and can worsen its hot underfoot feel. Under-brushing leaves material sitting on top and fibers matted beneath it. Finish with open drains, clean edges, and even distribution through high-traffic areas.
What to Get in Writing Before Work Starts
A trustworthy proposal lets you compare construction methods, not just totals. The Federal Trade Commission's home-repair guidance recommends at least three written estimates, including the work, materials, completion date, price, and contractor contact information, and advises asking why bids differ rather than automatically choosing the lowest.
A low price may reflect less excavation, omitted drainage, or a different turf specification. Those aren't equivalent bids.
Make the scope measurable
- Removal and disposal: Identify the excavation assumptions, organic-material removal, hauling, and how unsuitable soil will be handled.
- Base and drainage: Specify aggregate materials, compacted thickness, finished falls, outlets, and responsibility for drainage corrections.
- Surface assembly: Record turf quantity and product, seam construction, perimeter restraint, and infill type and loading.
- Job logistics: Include labor, cleanup, access protection, and change-order approval. Commercial sites also need phased access, traffic control, and work-hour limits.
The FTC's home-improvement contract checklist calls for contractor identification, contact details, a license number where required, estimated start and completion dates, payment terms, and promises made during discussions. It also explains the generally applicable three-business-day cancellation right for qualifying contracts signed at home or away from the seller's permanent business location.
Read the warranty responsibilities
Separate the turf manufacturer's material coverage from the installer's workmanship obligations. Ask what happens if a seam opens, an edge lifts, or settlement develops, and make sure exclusions and maintenance duties are written down.
Our artificial grass installers information gives you context for evaluating the installation process. We're fully insured, but insurance doesn't replace a detailed scope.
Keep the signed contract, product specifications, payment records, and approved changes together. Written commitments give both sides a clear reference if site conditions require a decision during construction.
Book a Free Consultation Before You Dig
A consultation should help you understand your yard before you commit to construction. Modern Yard offers a free turf consultation, so you can discuss the site and the intended use without starting with excavation.
We've been installing premium synthetic turf for 15 years. For an Austin property, the useful conversation starts with where water goes, how the ground behaves, and where people or pets will use the surface during hot weather.
Bring what helps us assess the site
- A rough measurement: Include the lawn footprint and any separate dog run or putting-green area.
- Rain photographs: Show puddles, downspout discharge, and water near the foundation.
- Use requirements: Explain whether the priority is pets, play, entertaining, golf practice, or commercial foot traffic.
- Scheduling notes: Bring your preferred start window and any gate, parking, or access restrictions.
You don't need a finished design. A sketch and useful photographs give us a stronger starting point than a turf color preference alone.
Leave with a scope you can compare
Use the visit to clarify removal, base depth, drainage work, turf layout, seams, edging, infill, cleanup, and warranty responsibilities. Ask which site conditions remain uncertain and how any additional work would be approved.
The turf installation quote request form asks for square footage and your ideal date for an estimate. Use your rough measurement if you're still planning, and make the preferred appointment date clear so the conversation starts with the right information.
Modern Yard provides a free turf consultation to help you plan the base, drainage, and surface details before installation begins. Visit Modern Yard Landscapes and submit the quote request form with your square footage and preferred estimate date.