
You've picked out a corner of the backyard for putting practice, but after the last storm, that same corner held water while the rest of the lawn dried. You want a green ready for summer, not an expensive surface covering a drainage problem. A reliable outdoor putting green installation starts by figuring out what's happening beneath your feet and where you'll want to play when the Austin sun is overhead.
Why Outdoor Putting Green Installation Starts With the Site
Consider a familiar Austin yard: clay-heavy ground, a low spot against the fence, and a patio where you'd like to step outside with a putter. The tempting approach is to outline the green, choose turf, and ask how soon installation can begin. The better approach is to walk the property before deciding whether that outline belongs there.
A low corner may look convenient because it's unused. But unused space and suitable construction space aren't the same thing. If water already collects there, covering it with aggregate and synthetic turf doesn't establish a reliable route out.
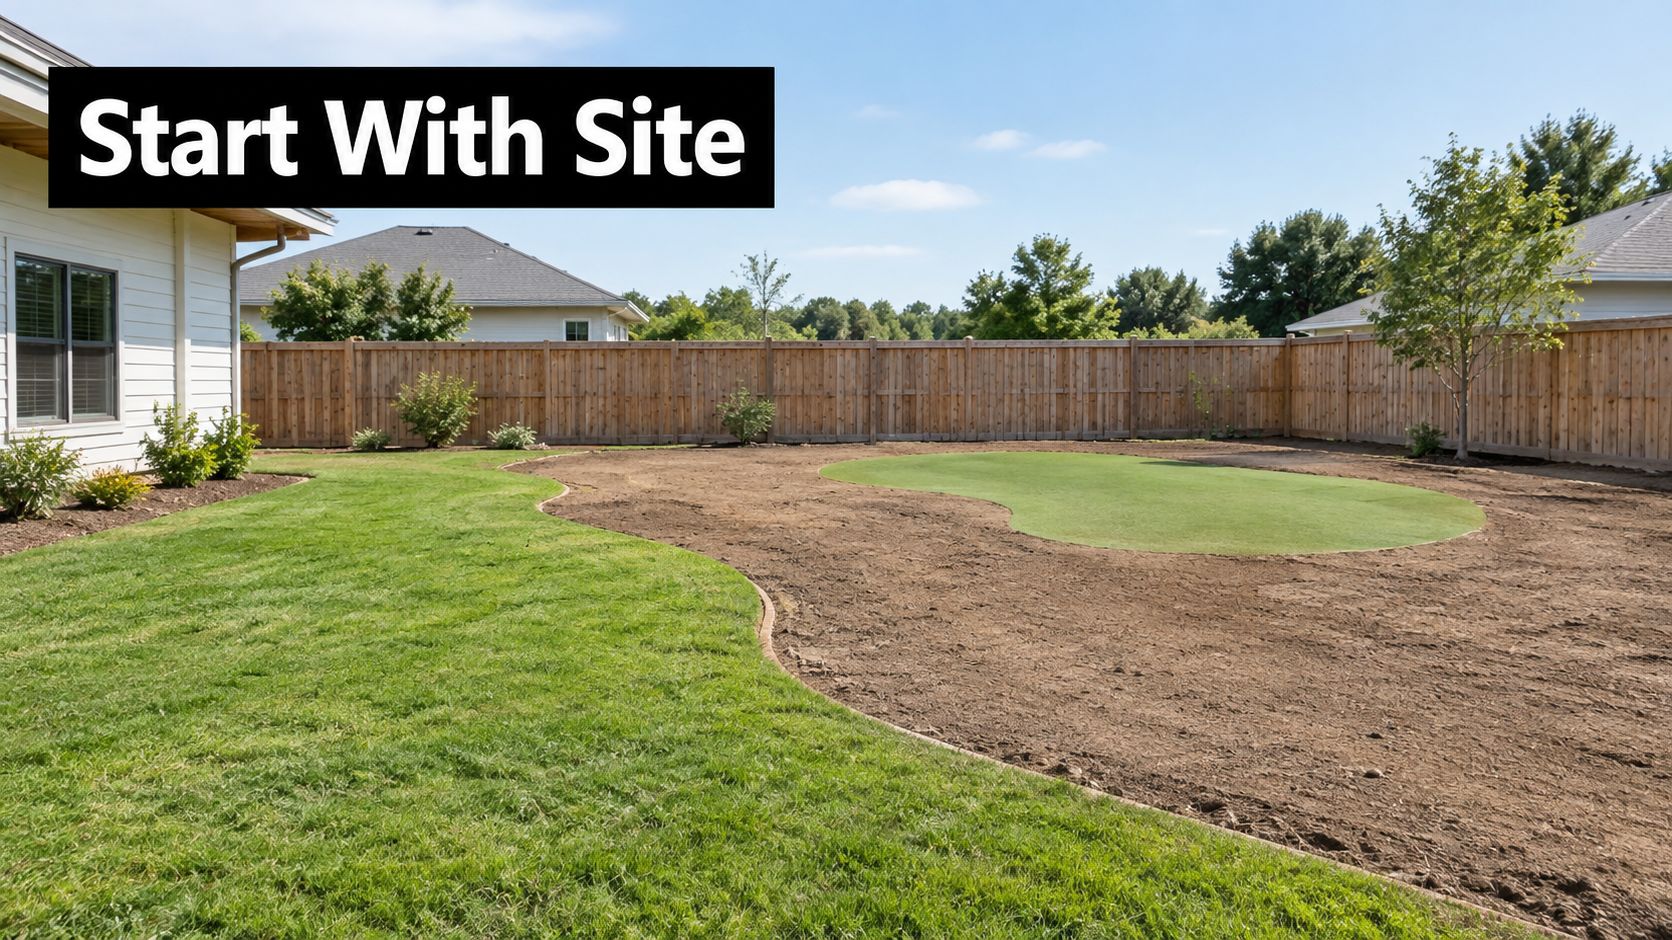
Start With the Decisions You Can't See
Before recommending a surface, an installer should be able to discuss the site in practical terms:
- Water movement: Where does rainfall enter the proposed green, and where can it safely leave?
- Ground stability: What preparation does the existing soil need to support the finished contours?
- Summer usability: Will the planned practice area be comfortable during the hours you expect to use it?
Those questions should influence the footprint, not merely appear as qualifications after you've approved a design.
Take a green planned beside the house. Adding more surface slope might appear to solve ponding, but it's not a solution if the revised grade sends runoff toward the foundation. Moving that runoff toward a neighbor's fence without understanding its destination isn't an acceptable substitute.
Playable Doesn't Mean Perfectly Flat
The design challenge is to reconcile golf with the surrounding environment. You want intentional putting breaks, secure footing, and smooth transitions, while the installer needs workable elevations and a drainage outlet. Those requirements sometimes call for a different location or a smaller green.
Practical rule: Don't approve the turf layout until the installer can explain the water's route from the green to its discharge point.
A trustworthy contractor should also be willing to say the site isn't ready. An unresolved outlet, unstable ground, or problematic elevation beside a structure deserves attention before materials arrive. Choosing the turf is enjoyable, but it shouldn't commit you to a location that needs a different drainage or grading plan.
Evaluating Your Yard Before You Commit
Walk the proposed area in dry weather, then return after rain. Bring your phone, a tape measure, and a rough property sketch. You're gathering useful observations, not trying to replace a professional drainage assessment.
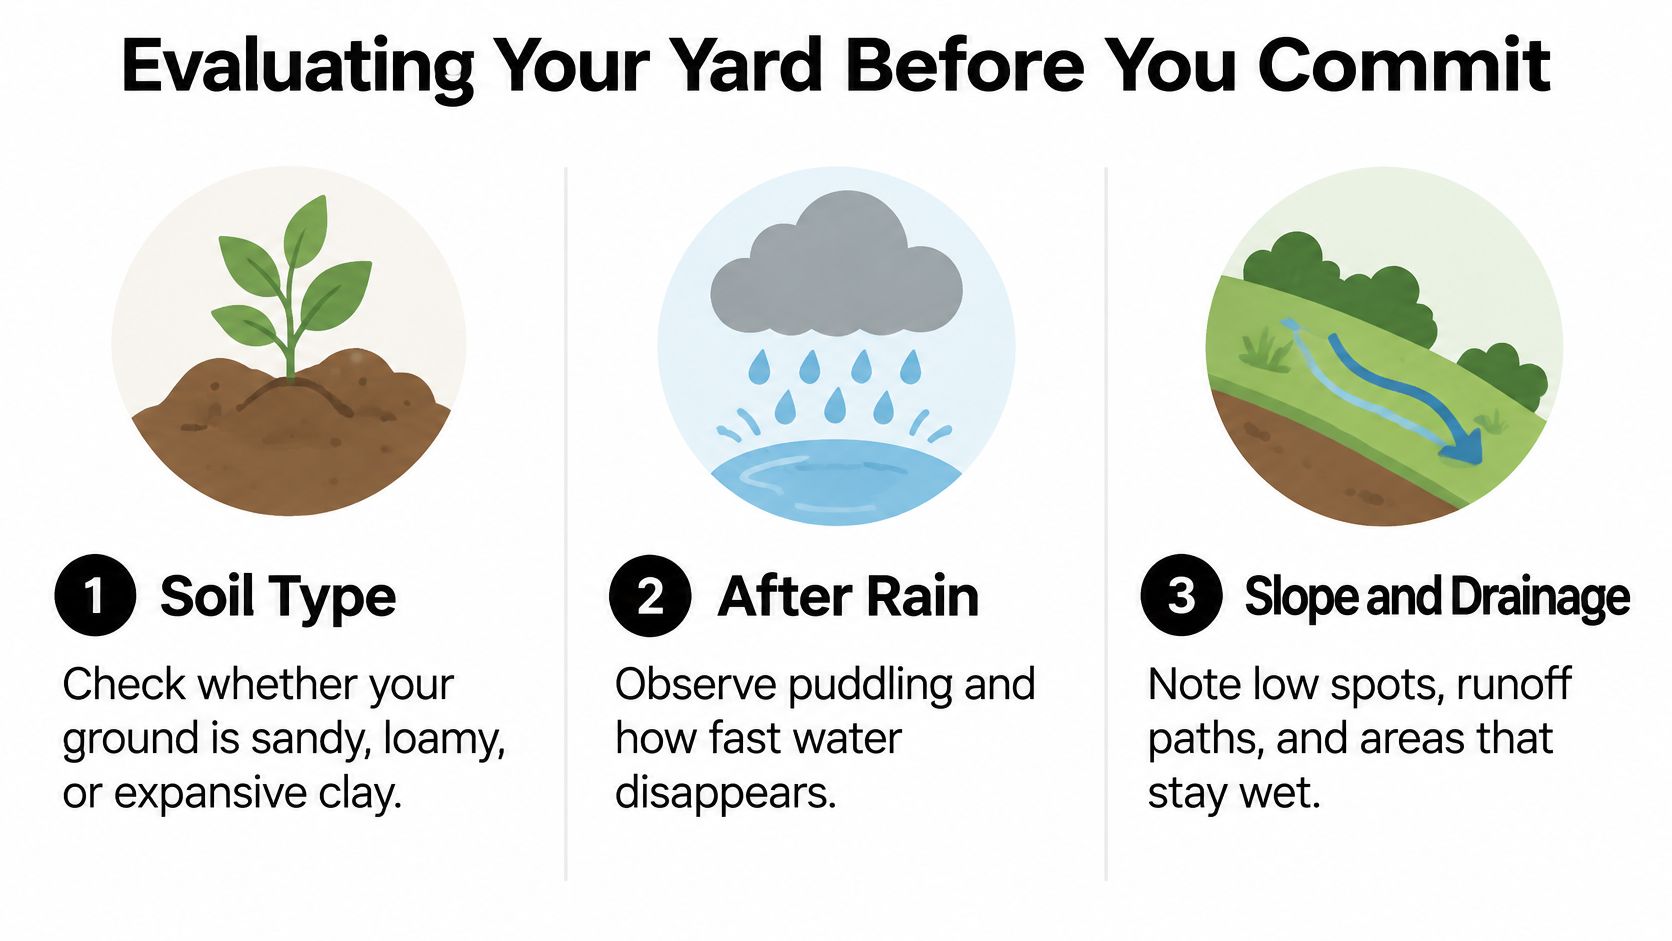
Read the Soil and the Rain
Handle some damp soil from the intended installation area. Note whether it feels gritty, crumbly, or sticky and cohesive. Sticky soil and visible cracking are reasons to ask about expansive clay, not enough evidence to diagnose the entire site yourself.
After rain, photograph standing water and mark its boundaries on your sketch. Watch whether water arrives from the roof, patio, uphill lawn, or an adjoining area. Note where the ground remains wet after nearby areas have dried.
Persistent wetness can warrant investigation for perched water, where water collects above a less-permeable layer. Don't assume a dry-looking surface means the underlying profile has drained.
The University of Arkansas Extension's putting-green guidance advises against placing a green in a depression, warns against water-holding pockets, recommends shedding water in more than one direction, and calls for subsurface drains less than 10 feet apart when building on native soil.
Check Access and the Surroundings
Measure the gate opening and identify the route crews would use to remove excavated material and bring aggregate into the yard. Flag narrow side yards, steps, irrigation equipment, and surfaces you want protected. Access belongs in the estimate because the contractor needs to explain how the work will happen.
Observe sunlight during your likely practice hours. Also identify any proposed discharge destination, but ask the installer to confirm whether it's permissible and workable. An open-looking area beyond the fence isn't proof of a legal outlet.
If a patio will border the green, HomeProBadge's guide to hiring pros for brick patio installation is a useful companion when planning that separate part of the project.
Before your appointment, collect:
- Site photographs: Include wet spots, the house, fence lines, and surrounding grades.
- Basic measurements: Record the proposed footprint and access openings.
- Use preferences: Explain where you'll stand, practice, and enter the green.
- Known concerns: Identify buried utilities, previous drainage work, and recurring puddles.
That information gives an installer a better starting point than a photograph of attractive turf alone.
Grading, Drainage, and the Base Layers That Carry the Green
Grading and drainage aren't interchangeable. Grading establishes elevations and contours. Drainage design determines how water is collected, conveyed, and discharged. On a difficult site, you need both.
A useful construction reference is the USGA method for natural-grass putting greens. It provides measurable benchmarks, but it isn't a universal synthetic-turf recipe.
What the USGA Benchmark Actually Specifies
The USGA putting-green construction method uses a stable subgrade, a minimum 4-inch gravel drainage layer, and a sand-based rootzone installed at a uniform 12-inch depth, with a tolerance of plus or minus 1 inch; drainage laterals are spaced no more than 15 feet apart, pipes maintain a continuous minimum 0.5% slope toward the main drain, pipes are generally at least 4 inches in diameter, and trenches are at least 6 inches wide and 8 inches deep.
Each part serves a different purpose. The subgrade supports the construction above it. The rootzone provides a consistent growing and playing profile, while the gravel layer allows excess water to move into the drainage network so the green can return to playable conditions after storms.
Removing a component without redesigning the system changes how the profile works. A drainage layer can't compensate for an outlet that doesn't function, and attractive contours can't correct an unstable foundation.
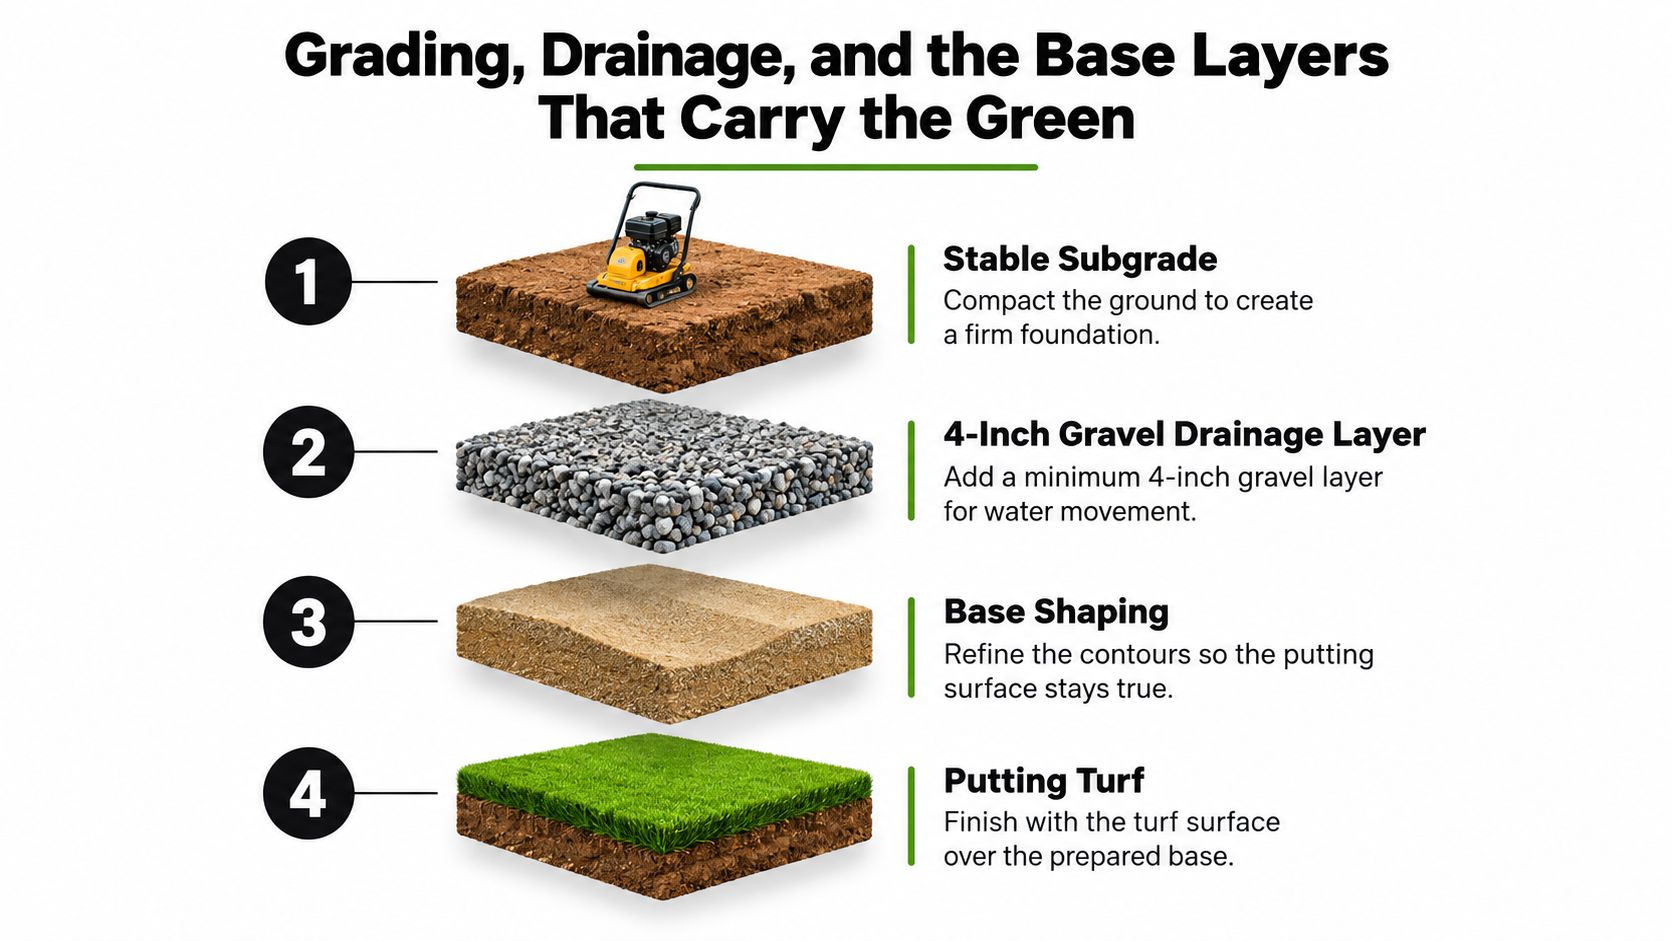
Match the System to the Site
For a residential synthetic green, ask for a project-specific aggregate base specification, rather than automatically requiring a natural-grass rootzone. The illustration is a simplified overview, not evidence that every artificial green needs the complete USGA profile.
The drainage approach should follow the observed problem:
- Perimeter drains: Consider these when water enters from adjoining ground before reaching the green.
- Under-green laterals: Discuss these when the prepared profile needs internal collection and conveyance.
- Catch basins: Evaluate them where concentrated surface runoff requires collection.
- Raised construction: Consider it when existing elevations make a recessed installation unsuitable, provided transitions and discharge remain workable.
These are design options, not interchangeable add-ons. Ask the contractor why the selected approach fits your soil, runoff path, and available outlet.
A review of yard grading and drainage should establish finished elevations, collection points, and the discharge route together. If the proposal only says “grade for drainage,” ask for enough detail to understand what the crew will build.
Choosing Turf, Infill, and Edging for Austin Heat
Choose materials around the way you'll use the green, not just how a sample looks indoors. A homeowner practicing before work has a different exposure problem from someone who expects to putt during summer afternoons. The putting surface and the surrounding turf also deserve separate specifications.
The Turfs Up backyard putting-green guide acknowledges excessive heat as a synthetic-turf consideration and suggests morning sun with afternoon shade. Treat that as a siting consideration, not a guarantee that any particular product will remain comfortable.
Compare Complete Material Systems
A proposal should identify the turf product, fiber construction, backing, and infill. UV-resistant or high-denier fibers describe material characteristics, but they don't replace a discussion of putting performance or heat exposure. Ask what each specification contributes to this installation.
Infill deserves the same scrutiny. Ask how the proposed material relates to ball roll, maintenance, and heat retention, and request product-specific support for cooling claims. Don't accept a generic “cooling infill” description without knowing what's being installed.
Putting Green Design Decisions and Their Trade-Offs
| Decision | Option A | Option B | What It Affects |
|---|---|---|---|
| Exposure | Open, sunny location | Afternoon-shaded location | Practice comfort, visibility, and drying |
| Shade source | Nearby trees | Designed shade structure | Debris, roots, placement, and usable space |
| Surface selection | Dedicated putting turf | Separate fringe turf | Intended shot response and transitions |
| Infill | Standard specified system | Product with cooling claims | Documentation, maintenance, and cost |
| Edging | Commercial-grade steel | Another specified restraint system | Perimeter support, anchoring, and detailing |
Commercial-grade steel edging is an option for holding the perimeter and resisting movement under repeated use. Its effectiveness still depends on anchoring, finished elevation, and how the turf meets adjacent surfaces. Ask to see that detail rather than approving edging by material name alone.
Design for Comfort Without Hiding the Trade-Offs
Natural-grass advice and synthetic-green design aren't identical. A synthetic practice area needs a deliberate balance among sun exposure, airflow, shade, and cleanup access. Tree shade can improve comfort, but you should account for leaves, roots, and moisture-management needs.
Occasional rinsing may improve short-term comfort, but it uses water and doesn't resolve peak-sun exposure. If reducing yard water demand is a priority, don't build the operating plan around repeated cooling with a hose.
When reviewing heat-resistant artificial turf, ask direct questions:
- Product evidence: What supports the stated heat-performance benefit?
- Site relevance: Does that information reflect comparable exposure and installation conditions?
- Maintenance requirements: What brushing, cleaning, or replenishment does the system need?
- Use expectations: When should we realistically plan to practice in summer?
A candid answer is more useful than an unsupported promise of a permanently cool surface.
The Installation Sequence and Quality Checkpoints
The proposal should describe the build in the order the crew will perform it. That gives you meaningful opportunities to inspect work before the next layer conceals it.
The USGA's explanation of what distinguishes a USGA green provides a useful reminder: a sand-based surface alone doesn't establish compliance with a complete construction method. For a backyard project, the practical lesson is to require defined components rather than rely on a broad label.
Verify the Work Before It's Covered
Excavation and subgrade preparation come first. The crew should establish the approved footprint and elevations, remove unsuitable material, and prepare stable supporting ground. Ask how they'll handle soft areas discovered during excavation and whether that work requires a change order.
Drainage trenching follows the approved plan. Before backfilling, verify the specified pipe size, trench dimensions, spacing, and continuous fall. Photograph the installed network and outlet while you can still see them.
Gravel placement and base shaping need their own inspection. Confirm material type and installed depth against the proposal. For a synthetic green, use the agreed aggregate-base tolerances; don't substitute the natural-grass rootzone specification discussed earlier.
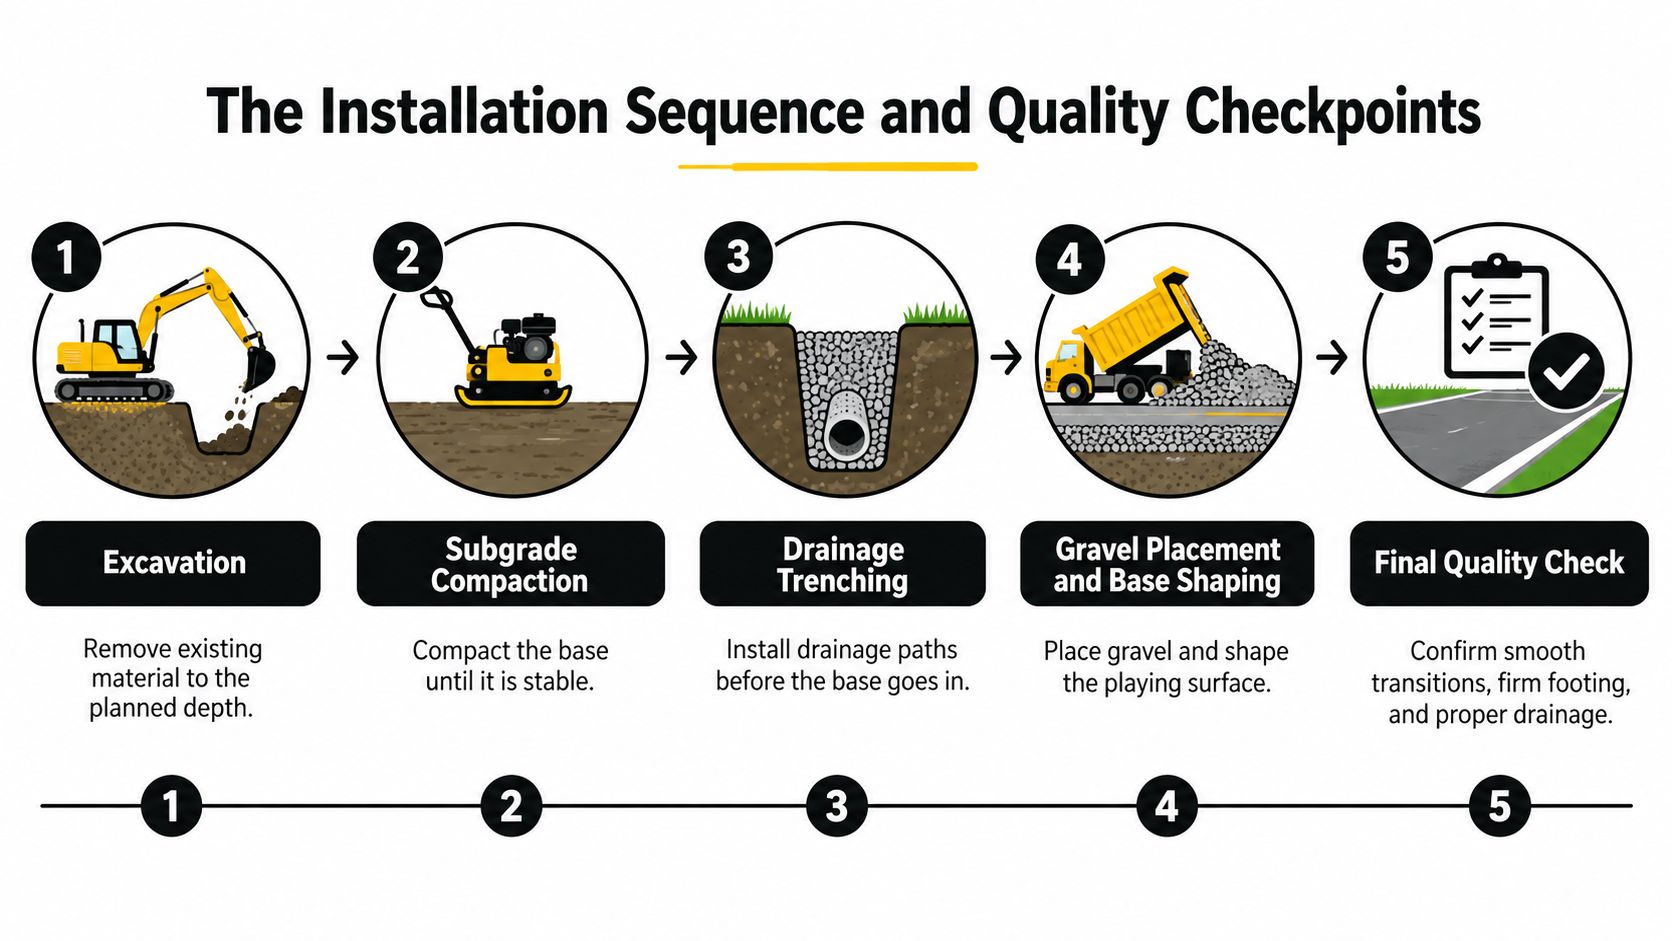
Finish the Playing Surface Deliberately
The crew should plan cup locations and sleeves before completing the surface, then coordinate turf layout, cutting, seaming, and final cup setting. Ask whether seams can be kept away from your primary putting lines and inspect joins for gaps, ridges, or distracting changes in roll.
Infill application should follow the selected turf system's requirements. Final brushing and rolling should be followed by putting tests from different directions, not just a visual inspection from the patio.
For more context on the concealed assembly, review the proposed artificial turf layers alongside the scope. The names, materials, and depths should agree.
Your handover check should include:
- Playing response: Try straight putts and intended breaks across different parts of the green.
- Transitions: Walk the fringe, perimeter, and access points.
- Drainage access: Locate outlets and any collection points you'll need to maintain.
- Project records: Keep material specifications, concealed-work photographs, and care instructions.
Don't wait until handover to ask what went beneath the turf. Make concealed-work checks part of the agreement.
Custom features belong in the original scope, too. Additional cups require planned locations and supporting details, while chipping areas and fringe transitions extend the prepared footprint. Each addition should have a clear base and drainage treatment, not just a separate line for more turf.
DIY or Professional Installation for Your Putting Green
DIY can be reasonable when the site is accessible, already drains well, and supports a straightforward practice layout. If you're comfortable moving aggregate, operating a plate compactor safely, checking elevations, and following the selected turf manufacturer's instructions, the work may suit your skills.
The deciding question isn't whether you can cut and secure turf. It's whether you can verify the construction underneath it.
Recognize When the Risk Changes
I'd approach a simple, single-cup practice area differently from a recessed green on expansive clay beside a foundation. Low-lying ground, uncertain subsurface conditions, and an unresolved outlet are reasons to seek qualified help before excavation. Buying a kit doesn't answer those site questions.
A professional scope should define responsibilities that a materials package leaves with you:
- Site preparation: Excavation, access protection, unsuitable-ground decisions, and disposal.
- Drainage design: Collection locations, conveyance, discharge, and any required specialist input.
- Material selection: Identified turf, infill, base materials, and perimeter restraint.
- Coverage: Written workmanship terms, product warranties, exclusions, and the process for requesting service.
Ask whether the installer carries insurance and who is responsible if field conditions require a design change. Request a written explanation of what warranty coverage applies to seams, settlement, drainage, and materials rather than assuming a general guarantee covers everything.
Worth paying for: A contractor who identifies a problem before construction gives you a decision. A contractor who covers it leaves you with a repair.
Professional installation should mean more than hiring someone to do the lifting. On a drainage-critical site, you're paying for a buildable plan, documented execution, and clear accountability.
Don't Assume a Putting Green Qualifies for a Rebate
Water-saving goals don't automatically establish rebate eligibility. Under Austin Water's residential WaterWise Landscape Rebate application, the program requires pre-approval before purchasing materials or installing work, applies to converting turf grass to native plant beds, requires at least 500 square feet of conversion, and offers up to $100 per 100 square feet, with a $3,000 lifetime maximum per property.
Those eligibility terms don't describe a synthetic putting green. If your broader yard plan includes native planting beds, ask Austin Water to confirm current eligibility before committing funds. Keep any potential reimbursement separate from the green's installation budget until you have approval.
Cost Factors, Timeline, and Keeping the Green Playable
In Austin, a low bid can become expensive if it leaves out the work that keeps water moving and the surface usable through summer heat. Compare estimates by scope: turf quantity and quality, excavation, equipment access, labor, drainage, and custom features. Antimicrobial treatments or cooling technologies should appear as optional line items with a clear explanation of their benefits. Use this putting green installation cost breakdown to compare what each proposal includes.
A realistic schedule depends on site conditions. Ask for milestones covering assessment, preparation, drainage and base approval, turf installation, infill, and handover. If grading or ground conditions remain unresolved, get them addressed before agreeing to a completion date.
Compare the Scope and the Care Plan
The USGA's account of its construction recommendations describes research and field testing dating back to 1960. Its method offers a comparison point, though a recreational synthetic green uses a different construction system. Ask bidders to state what their system is designed to handle, what work is included or excluded, and which benchmarks they will use.
Get maintenance instructions for the specific materials being installed:
- Surface care: Brush as directed, remove debris, and rinse when needed.
- After storms: Check accessible drainage outlets and collection points.
- Seasonal inspection: Look for loose edging, open seams, and changes in footing or roll.
Start with a site assessment, not a turf order. Have the installer evaluate drainage, equipment access, and topography before you settle on the location or scope.
Modern Yard Landscapes offers custom outdoor putting green design and installation in Austin, including site preparation, grading, drainage planning, base construction, turf, and cup placement. Visit Modern Yard Landscapes to schedule a site assessment, and bring your yard measurements and post-rain photographs so we can discuss a practical plan before you order materials.