
You've got the tape measure out, you've been watching putting green videos, and now you're staring at a patch of backyard grass wondering if this is a smart weekend project or a very expensive mistake. That's the actual starting point for outdoor putting green DIY work, not the turf roll itself. The surface can look simple from ten feet away, but the difference between a green that rolls true and one that drives you crazy usually comes down to what happens before the first blade of turf is laid.
A backyard green is not decoration. The USGA notes that putting greens account for 80% of the shots in a typical round, which is why speed, smoothness, and repeatable roll matter so much in the build USGA guidance on putting green data collection. That same guidance treats green-speed measurement as a 365-days-a-year job in many regions, which is a good reminder that a home green is really a performance surface with real maintenance demands, not just a patch of synthetic grass. If you treat it like a miniature golf feature from the start, you'll make better choices at every step.
Planning Your Perfect Backyard Green
The first decision is location, because location decides how much trouble you'll fight later. You want a spot that sheds water naturally, avoids constant foot traffic, and gives you enough room to work without boxing yourself into sharp corners. Full sun isn't ideal in the hottest part of the day, and low spots are a headache because water will always collect where the grade is weak.
Decide what kind of green you actually want
A lot of homeowners say they want a practice green, but the finished project tells a different story. If your goal is to sharpen pace control and short putts, design for practice realism. If the space is meant for family use and casual fun, you can prioritize a forgiving layout and easier maintenance over tour-style break and speed.
That trade-off matters because the design choices aren't the same. A realistic green can use subtle slope and contour, while a casual feature can stay simpler and easier to keep clean. The wrong decision here doesn't make the project fail outright, but it does make the result feel wrong every time you step on it.
Practical rule: design the green for the way you'll use it on ordinary weekdays, not the way you imagine it on a perfect Saturday afternoon.
Budget deserves the same honesty. Backyard putting green costs vary widely, and Angi reports a range of $2,500 to $75,000, with an average of about $4,300, or roughly $4 to $40 per square foot Angi backyard putting green cost guide. Other consumer guidance places many installs in the $3,500 to $9,000 range, while larger or more customized projects can reach $10,000 to $20,000+ Angi backyard putting green cost guide. That spread tells you exactly why planning matters.

A smart first pass is simple. Measure the space, sketch the perimeter, think hard about drainage, and decide whether you're building for serious reps or relaxed play. If you want another planning lens, this putting green design resource gives you a useful way to think about layout choices before any digging starts.
Gathering Your Materials and Tools
A good build starts in the yard supply aisle, not in the excavation trench. The short list looks manageable until you realize how many details hide inside each item, especially the base aggregate, the turf backing, and the seam materials. If those are wrong, the green will telegraph the mistake forever.
What belongs on the shopping list
You need artificial putting turf, crushed stone or gravel for the base, leveling sand or decomposed granite, weed barrier fabric, edging, cups, staples, infill, and seam supplies. The turf matters more than most homeowners expect, because pile height and density affect ball roll and how much maintenance you'll be doing later. If you want a deeper look at turf options, this guide to artificial grass types is a practical place to compare surfaces before you buy.
The tools are just as important. A tape measure, utility knife, level, shovel, rake, wheelbarrow, and gloves are standard. A plate compactor is the tool you rent, not the one you improvise, because base compaction is where cheap shortcuts get exposed fast. A sod cutter helps if you're removing existing lawn, and a seam roller makes the finished join far cleaner than hand pressure alone.
The expensive part of a DIY green usually isn't the turf, it's the labor hidden inside the base and the seam work.
That's why buying everything at once matters. Mid-project runs slow you down and increase the odds that you'll accept a bad detail because you're tired and the sun is going down. If you're weighing turf samples, infill choices, edging styles, or the physics of the site, use the same disciplined thinking you'd use for a patio build, because this project has a lot more in common with hardscape work than lawn renovation.
Building a Rock-Solid Foundation
The base is the project. Everything on top is only a surface layer. If the foundation settles, traps water, or has soft spots, the turf will copy those flaws and you'll feel them on every putt.
Excavate with drainage in mind
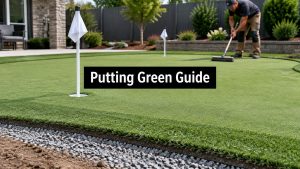
A backyard putting green usually starts with excavation deep enough to make room for drainage material and a sand-based leveling layer, then the grade is shaped so water has somewhere to go backyard putting-green base guidance. One guide recommends a 2% slope for drainage and playability, while another suggests a one-inch drop for every 12 feet of run so water sheds instead of pooling backyard putting-green base guidance. The exact method depends on the yard, but the rule does not change, water has to move.
If your soil is heavy clay, do not assume the turf layer will hide the problem. Clay holds water and creates trouble below the surface, so soil amendment guidance for clay is worth reading before you lock in a grade strategy. A detailed resource on compost application for clay can help explain why site conditions matter before you build over them.
For a detailed walkthrough on site preparation, see this guide on how to prepare ground for artificial turf.
Once the excavation is open, remove every root, clump of organic matter, and loose pocket. Soft fill settles later. That settlement is what turns a green into a repair project.
Compact in lifts, not wishes
Home Depot's DIY guidance calls for a 4 to 5 inch crushed-rock base, with compaction and cup-leveling needed for a smooth surface Home Depot DIY backyard putting green guide. In practical terms, that means building the base in layers, compacting each pass, then checking level before you add more material. The goal is a firm, even platform that does not move underfoot.

A good field habit is to level-check around cup areas over a 3-foot radius so you do not create lip inconsistencies or ball-catching edges Home Depot DIY backyard putting green guide. That small detail matters more than many homeowners expect, because the cup is where every surface flaw gets exposed.
If the base is off by even a little, turf will not save it. The surface may look flat, but the ball will tell the truth right away.
Laying and Seaming Your Turf Flawlessly
This is the point where the project starts to look finished, and it is also where a DIY green starts exposing mistakes. Clean seams are hard to fake. Lifting edges, visible joins, and awkward cuts around corners usually mean the base was not tight enough or the adhesive work was rushed.
Cut once, fit twice, then seam
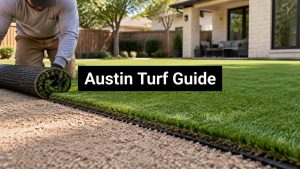
Dry-fit the turf first and let it relax before you cut anything. Turf holds shape from the roll, so forcing a tight fit right away usually creates stress at the joins. Trim from the backing side so the knife follows the line you want instead of pulling the face fibers out of place.
Seam quality comes down to clean factory edges, seam tape under the join, and adhesive spread evenly with the right notched trowel. One installation guide gives a practical adhesive benchmark, roughly one standard tube for every 10 to 15 linear feet of seam tape, which helps you estimate materials without starving the seam JCTurf putting green installation steps. The same installation guidance, along with the matching adhesive demo, also stresses using adhesive that explicitly bonds polyethylene and polypropylene, and cutting seam tape into 3- to 4-foot sections tucked partly under the edge for a stronger bond JCTurf seam adhesive video.
Practical rule: if a seam looks acceptable before brushing, it probably will not look acceptable after the first few weeks of play.
Perimeter control matters just as much. The same installation guidance recommends perimeter staples every 12 to 18 inches and careful X-cuts at cup centers so the hole stays smooth and flush JCTurf putting green installation steps. That spacing helps the edge stay locked down through temperature swings and foot traffic, which is exactly where a DIY edge usually fails first.

If your design has curves, do not bully the turf into shape. Make small relief cuts and let the backing settle naturally. Forced curves create tension, and tension opens seams later. If you want a cleaner finish and easier maintenance after the install, use Modern Yard Landscapes' guide to cleaning artificial turf as part of your upkeep plan. For the seam itself, high-quality butyl sealing tape gives the joint extra holding power where weather and play put the most stress.
Finishing Touches and Long-Term Care
A green that's almost right is still a green that feels wrong. The final details, cup flushness, infill balance, brushing, and cleanup, are what separate a surface that photographs well from one that puts well. This is the part where precision pays you back every time you step outside.
Cups and infill decide how the green feels
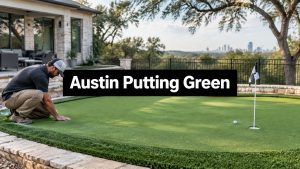
Cup installation has to be clean enough that the rim sits flush and doesn't create lip-outs or little catching edges. The surface around each cup should stay level, because even a minor depression changes how the ball drops and how the hole wears over time. If the cup looks slightly sunken or proud of the turf, fix it before you move on.
Infill is where speed and feel start to settle in. Silica sand is the standard choice for putting greens, and it needs to be brushed in evenly so the fibers stand up and the ball rolls consistently. Too little infill leaves the turf unstable. Too much makes the green feel overly firm and can change speed in a way you won't like.
If you want a clean sealing detail on seams, take a look at high-quality butyl sealing tape. It's the kind of material that matters more than it sounds, because the right tape helps the join stay tight under weather and play.
Maintain it like a playing surface, not a lawn
A home green doesn't need constant attention, but it does need repeatable care. Brush the fibers regularly, remove leaves and debris, and watch for edge lifting or infill displacement. If you let organic material sit too long, it works down into the fibers and changes how the surface rolls.
For a deeper cleaning routine, this artificial turf cleaning guide is useful when pollen, dust, or general buildup starts dulling the surface. The cleaner the fibers stay, the more predictable the roll remains.
The honest truth is that a green lasts when the owner respects it as a performance area. That means brushing, rinsing occasionally, and checking the cups and seams after bad weather. It's not hard work, but it is regular work.
DIY Triumph or Time to Call the Pros
A capable homeowner can absolutely build a backyard putting green, but not every site deserves the same DIY confidence. Straightforward yards, modest sizes, and clean drainage conditions are where self-installation makes the most sense. Once the project starts involving major slope correction, awkward access, or a shape that refuses to cooperate, the job changes from a weekend build into a construction problem.
Know the point where the math changes
The biggest risk isn't the turf. It's the hidden work under it. A bad base, a weak seam, or poor drainage can create a green that looks finished on day one and disappointing by the first season. That's why a lot of homeowners who start with DIY intentions end up spending twice, once on the original build and again on the corrections.
Professional help becomes the smarter move when the site is complex or the result needs to feel dialed in. That's especially true if you want a better answer for grading, cup placement, edge detailing, or drainage transitions than trial and error can give you. For some projects, the most expensive decision is insisting on doing every step alone.
Good rule: if you already know the site is going to fight you, don't let pride become the reason the green never rolls right.
For homeowners comparing options, a team like Stultz Plumbing's construction team is a reminder that specialized site work matters most when water, grade, and installation complexity overlap. In Austin, Modern Yard Landscapes handles custom turf installation, putting greens, and site prep with a total satisfaction guarantee, which is the kind of support that matters when the job needs to be right the first time.

If you're still excited to build it yourself, that's a good sign. If you're also realizing the site is more complicated than expected, that's a better sign to get an expert involved before the first shovel hits the ground.
If you want a backyard putting green that rolls true instead of just looking finished, Modern Yard Landscapes can help with planning, site preparation, and full turf installation in the Austin area. Visit Modern Yard Landscapes to talk through your space and get a solution built around how you want to use it.