
You're standing in a new backyard green at dusk, putter in hand, expecting the first roll to feel like golf. Instead, the ball hops, takes an odd break, and stops short of the cup. In Austin, that result usually has less to do with the turf you can see and more to do with the base, slope, drainage, infill, and installation work underneath it.
A custom putting green isn't ordinary turf with a hole cut into it. It's a precision golf surface designed for consistent ball roll, reliable cups, and practice that remains useful through Texas heat, UV exposure, clay soil, pets, and sudden downpours. Here's what Austin homeowners need to know before they approve a quote.
What a Custom Putting Green Really Is
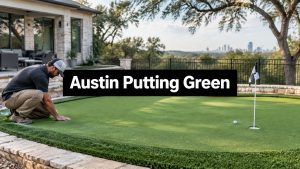
At sunset, a finished backyard green should feel simple. You step onto the surface, line up a short putt, and watch the ball track toward the cup before stopping just past it. The experience looks effortless, but that roll depends on a carefully built system below your feet.
A custom putting green uses synthetic turf engineered for golf practice, not general outdoor use. Putting turf typically has a tighter stitch gauge, denser face weight, shorter pile, and more controlled blade response than ordinary lawn turf. Playground turf is built for cushioning and durability under play, while standard turf prioritizes appearance and foot traffic. Neither automatically produces a dependable putting surface.

Two greens can serve completely different golfers
An entertainment green may include a generous fringe, multiple playful cup locations, undulating contours, and an integrated chipping pad. It's a strong choice for family use, parties, and casual practice where variety matters more than repeatability.
A training-focused green needs a different design. It should provide straighter putts, predictable breaks, consistent speed, and enough room to practice distance control. A golfer who wants to improve scoring shouldn't spend every session compensating for random bumps or exaggerated contours.
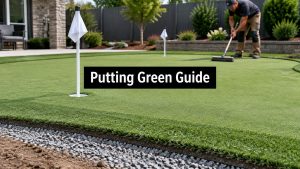
The visible turf is only one layer. A credible installation includes:
- Prepared subgrade: The soil is excavated and shaped to support the finished profile.
- Compacted aggregate base: This creates stability and helps water move through the system.
- Separation fabric and drainage elements: These reduce contamination between soil and aggregate while directing water away.
- Pad, turf, and infill: These control feel, blade support, and ball response.
- Cup and edging system: These finish the playing surface and keep the design intact.
The broader synthetic turf market grew partly because converted areas can eliminate irrigation. A western water-conservation report estimates that an 1,800-square-foot turf lawn can save about 99,000 gallons of water annually, while golf-course-scale synthetic fields can save roughly 500,000 to 1,000,000 gallons per year. Those figures come from the Western Resource Advocates artificial turf report, and they help explain why water avoidance matters so much in drought-prone markets.
My rule: If the quote talks only about turf color and square footage, it isn't a putting-green specification yet.
Designing for Performance, Not Just Looks
Start with the golfer, not the outline. A green shaped like a dramatic resort hole may photograph well, but if every putt breaks sharply, you'll practice reading unusual slopes instead of improving fundamentals.
Choose the playing target first
For a true practice surface, technical guidance commonly places putting-turf pile height around 12 to 19 millimeters, with realistic backyard speeds around 8 to 10 feet on the Stimpmeter. Professional-style greens may target 10 to 13 feet, according to technical golf-turf guidance from Mighty Grass. The shorter, denser surface supports a more predictable roll than ordinary lawn turf.
The required design choices are straightforward:
- Set the speed. A casual green can be slower and forgiving. A training green should have a stated speed target, not a vague promise that it will roll “like a real green.”
- Control the slope. Gentle grades support repeatable practice. Stronger contours add entertainment value but make straight-putt work harder.
- Place cups with purpose. One cup near a straight approach, one on a modest break, and another near a longer distance can create more useful practice than scattering cups randomly.
- Add fringe only where it earns its space. Fringe improves approach-shot practice and makes the green blend into the yard, but it also expands the footprint and installation scope.
- Separate chipping from putting. Chipping turf needs different performance characteristics than a tight putting surface. Combining both without a transition plan produces a green that does neither job especially well.
Contours create a deliberate tradeoff
A flat green isn't automatically better. Austin homeowners often want elevation changes, breaking putts, and a resort-style appearance. That's reasonable, but every contour adds grading precision, drainage responsibility, and more opportunities for a ball to behave differently from one roll to the next.
A useful design begins with a primary practice lane. Give yourself a section where a straight putt behaves consistently, then place more interesting breaks around it. That layout serves both serious practice and backyard entertainment.
Shape and size should follow the number of golfers and the intended use. A narrow green can work for short-putt repetition, while a broader layout supports longer distance control, chipping, and multiple players. The putting-green design planning guide can help organize those choices before a contractor measures the site.
The infographic supplied for this guide uses different comparison values, including 0.4 to 0.5 inches for practice pile height and 10 to 12 for practice stimp. Treat those as design references, not substitutes for a written product specification. Your installer should state the actual pile geometry, infill plan, and intended roll speed for the turf being proposed.
Materials, Infill, and Edging That Hold Up in Texas Heat
Austin puts every outdoor material through the same unforgiving test: intense sun, high summer temperatures, active pets, and rain that can arrive faster than compacted clay can absorb it. A putting green needs materials selected for those conditions, not products chosen from a display because they look lush.
Turf fibers and backing
Nylon is usually the strongest candidate for the putting face because it holds blade position and supports a tighter, more stable surface. Polyethylene works well for fringe and chipping areas where a softer appearance and broader use matter. Polypropylene can fit some applications, but I wouldn't choose it for the primary performance zone without reviewing the complete turf construction.
A quality specification should identify fiber type, backing construction, tuft bind, UV stabilization, and drainage behavior. Cheap coatings can chalk and deteriorate under repeated exposure to hot Texas sun. The failure often appears first at seams, edges, and heavily trafficked paths, then spreads into a surface that no longer looks or rolls as it did on installation day.
Infill changes how the green plays
Fine silica sand, often around 30 to 50 mesh, fits tightly between dense putting fibers and helps stabilize the pile. Rounded quartz can provide a smoother feel and may be easier to manage in pet areas. Rubber and acrylic-coated blends can alter firmness, speed, and blade support, but the installer should explain the tradeoff rather than treating all infill as interchangeable.
For pet households, ask how the infill handles odor, cleaning, drainage, and ingestion risk. Pet-safe design is a system decision that includes drainage and cleaning access, not just a label on one bag of material.
| Material | Best Use | Heat/UV | Pet-Safe | Cost |
|---|---|---|---|---|
| Nylon putting turf | Primary putting face | Strong when properly UV stabilized | Depends on infill and drainage | Premium |
| Polyethylene turf | Fringe and chipping areas | Good with outdoor-rated construction | Suitable with appropriate infill | Moderate to premium |
| Fine silica sand | Blade support and firmness | Stable mineral option | Review household pet needs | Moderate |
| Rounded quartz | Pet-conscious zones and smooth infill behavior | Good | Often preferred for pet areas | Moderate to premium |
| Acrylic-coated blend | Stability and controlled roll | Product dependent | Confirm coating and maintenance requirements | Premium |
| Commercial edging | Perimeter retention and clean transitions | Strong when properly installed | Safe when securely finished | Moderate to premium |
Edging choices include bender board, concrete curbing, decomposed granite collars, and timber. Concrete gives the cleanest permanent boundary, while decomposed granite creates a softer transition. Timber can look attractive but needs closer attention to moisture and movement.
For a broader look at material selection for harsh summers, review this guide to heat-resistant artificial turf. The same principle applies here: choose the construction, not just the color.
What a Custom Putting Green Actually Costs in Austin
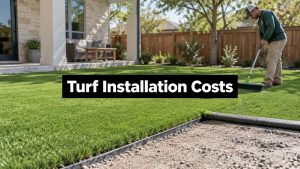
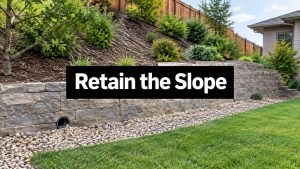
A realistic Austin quote starts with the site, not a generic online price. A 400-square-foot green on flat, accessible ground may run about $18 to $25 per square foot, while a comparable green on a sloped Hill Country lot with restricted equipment access and added drainage can climb past $35 per square foot. Those planning ranges reflect how quickly excavation, access, grading, and drainage change the job.
A cost guide places standard base preparation on a flat site with good natural drainage at about $4 to $6 per square foot, while poor drainage can require perforated pipe and add roughly $1 to $3 per square foot, as detailed in this turf-cost breakdown. Complex excavation, roots, demolition, or contaminated soil can add 30% to 50% to labor, and enhanced drainage can add 15% to 20% to material and labor costs, according to this installation budget guide.
What moves the quote
- Access: A narrow gate or long material path increases handling time.
- Excavation: Removing unsuitable soil costs more than preparing a stable grade.
- Base depth and compaction: Clay-heavy sites need disciplined preparation, not a thin cosmetic layer.
- Drainage: Surface water may require underdrains, outlets, or corrected grades.
- Design complexity: Multiple cups, fringe, chipping pads, bunkers, and contours add layout and finishing work.
- Material quality: Higher-grade turf and UV-stabilized backing cost more upfront but can reduce premature replacement risk.
| Project Type | Size (sq ft) | Cost Range per sq ft | Typical Total |
|---|---|---|---|
| Compact practice green | 250 | Site dependent | Quote required |
| Flat-access practice green | 400 | $18 to $25 | $7,200 to $10,000 |
| Larger entertainment layout | 500 | Site dependent | Quote required |
| Sloped or drainage-intensive green | 400 | Past $35 | Past $14,000 |
These totals are arithmetic planning examples, not promises. The Austin putting-green installation cost guide is useful for framing a conversation, but only a site visit can account for clay, access, grade, disposal, and existing irrigation.
The cheapest bid often removes the work you won't notice until later. Poor compaction creates settlement, weak seams open under heat, and inadequate drainage turns a premium turf surface into a wet-weather problem. A manufacturer-facing preparation guide warns that improper preparation can lead to a refused installation or a voided warranty, while warranty requirements for artificial turf commonly include depth, gradation, compaction, and positive drainage.
How Installation Actually Works From Dirt to First Putt
A serious crew doesn't roll out turf and hope the yard behaves. Austin installations need a controlled sequence because clay soil, existing roots, irrigation lines, and sudden rainfall can expose shortcuts quickly.
The six phases that matter
- Survey and slope marking: The crew checks elevations, identifies low points, locates access, and plans the finished grade. A putting green commonly uses about a 1% to 2% slope, equal to roughly 0.12 to 0.24 inches of fall per foot, to move water without creating obvious ball-roll distortion. The drainage guidance from FusionTurf explains why the grade has to serve both water and play.
- Excavation: Artificial turf requirements commonly call for removing existing material to a depth of 3 to 4 inches, followed by a comparable substrate layer, according to Foster City's artificial turf requirements.
- Separation and weed control: A properly placed geotextile helps keep native soil from migrating into the aggregate. It also creates a cleaner division between the clay subgrade and the constructed base.
- Aggregate base installation: The crew places angular aggregate or decomposed granite, compacts it in controlled lifts, and checks grade repeatedly. One oversized, poorly compacted lift can settle unevenly beneath the finished green.
- Turf layout and seaming: Turf is positioned so grain direction remains consistent, then seams are cut, joined, and secured with compatible tape and adhesive. A weak seam may look acceptable initially but separate after repeated heat exposure.
- Cups, infill, and grooming: Cups are set at the correct elevation, infill is distributed evenly, and the fibers are groomed so the surface reaches its intended playing condition.

What homeowners should inspect
Ask to review the exposed subgrade before base placement, the compacted base before turf installation, and the seams before infill covers them. You should also see how water leaves the site, not just hear that the turf drains.
Quality putting-turf backings may handle roughly 30 to 60 inches of water per hour, but that doesn't mean the entire installation can absorb water at that rate. The sub-base, fabric, outlets, and underdrains have to match the turf's drainage capacity. Residential benchmarks commonly call for 4 to 6 inches of compacted angular aggregate base and no standing water 20 minutes after heavy rain, based on the putting-green drainage guidance.
A 500-square-foot green may take 3 to 5 working days from breaking ground to the first putt, with more time required when drainage upgrades or irrigation tie-ins are involved. The backyard installation process should be documented in the scope, including the phases you'll inspect.
Benefits, Maintenance, and Pet-Safe Options
The strongest financial argument for a custom putting green is avoided maintenance. Synthetic turf eliminates irrigation for the converted area, and a western water-conservation report says turf transformations can produce average household water savings between 7% and 39%, while targeted irrigation upgrades can save 10% to 30% or more, depending on system design. Those figures are documented in the Western Resource Advocates report.
A European Commission sustainability project reports that improved golf-course water management can deliver at least one-third water savings, alongside fewer fungal and weed problems and lower pesticide use. Separate University of Arizona water-policy research notes that subsurface drip irrigation can reduce water use by 50% to 80%, which shows how long the golf industry has worked to reduce operating demand through construction and irrigation choices. The CORDIS golf sustainability project provides useful context for that broader shift.
Maintenance is light, not nonexistent
You'll still need to remove leaves and debris, brush the fibers and infill back into position, and inspect seams or edges when the surface shows movement. Pet areas need prompt waste removal and thorough rinsing, especially after hot weather. The green won't need weekly mowing, fertilizing, or routine pesticide applications, but neglect can still reduce appearance and play quality.
Pet-safe infill deserves a direct conversation. Standard silica sand may be appropriate for many installations, but some dog owners prefer rounded quartz or coated, antimicrobial options because they want easier cleaning and better odor management. Crumb rubber blends require even more scrutiny. Ask for the product composition, cleaning instructions, drainage plan, and manufacturer guidance before allowing pets onto the surface.
DIY kits can appear manageable because the turf itself is easy to cut. The difficult work is underneath it. Homeowners rarely have the same compaction equipment, grading controls, seaming tools, or drainage experience needed for Austin clay and summer heat. A professional installation costs more at the start, but poor base preparation can force an expensive rebuild.
Choosing the Right Austin Installer and Next Steps
An installer should earn your trust with specifications, not polished renderings. Use this checklist before you compare final prices:
- Hill Country portfolio: Ask for completed putting greens built on Austin-area slopes, clay soils, and constrained residential sites.
- Written performance specs: Require pile height, fiber type, infill, backing, and intended stimp speed in the proposal.
- Practice features: Confirm whether the layout includes straight-putt lanes, controlled breaks, fringe, chipping areas, or multiple cups.
- Warranty terms: Read what the warranty covers for UV exposure, seam failure, settlement, drainage, and installation defects.
- Local references: Speak with homeowners who can discuss drainage after rain, summer appearance, pet use, and service response.
Red flags that should stop the conversation
Be cautious if a contractor quotes without seeing the property, shows only turf projects, pushes one turf product for every yard, or provides a single square-foot number without line items. A credible consultation should include slope measurement, drainage assessment, sun exposure mapping, access review, existing irrigation checks, and a written scope of work.
The right quote explains what happens below the turf. It identifies excavation, base material, compaction, seams, cup installation, infill, edging, cleanup, and warranty responsibilities. It also separates performance upgrades from decorative extras, so you can spend on the features that improve practice instead of paying for novelty.

Schedule a no-obligation on-site walkthrough before you sign anything. You should leave with a ballpark range, a sample panel to take home, and a realistic timeline based on your actual yard.
Modern Yard Landscapes designs and installs custom putting greens with site excavation, grading, base construction, turf installation, drainage planning, and contouring for Austin homes. Visit Modern Yard Landscapes to schedule an on-site consultation, review material options, and get a clear project scope before your first putt.