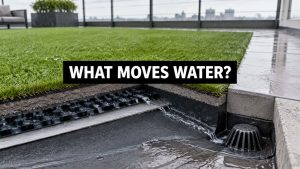

You're standing on the porch after a Texas storm watching muddy water cut a path down your bank, carry mulch across the patio, and pool where the kids or the dog should be playing. The grass never holds, mowing the incline is miserable, and every heavy rain starts the cleanup over. Artificial turf on a slope can fix the look, but it'll fail fast if we treat it like carpet for dirt. The slope is a drainage system first and a surface second. Get the water route, the base, and the anchoring right before anyone orders a roll, and the finished yard stays put.
Measure the Slope and Drainage Before You Buy Turf
Your yard can look almost flat from the porch and still shed water hard after a storm. That first walk in dry weather lies to you. On a slope, rain arrives faster at the low edge, picks up soil and infill on the way down, and finds every weak seam and unsecured border. Turf survives that load only when each layer underneath passes water along at a matching pace, so we measure before anyone talks about blade color or pile height.
Bring a tape, a string line and level or a phone inclinometer, and a notebook. Walk the property during or right after a heavy rain if you can do it safely. Wet footprints show paths that dry soil hides, and one summer thunderstorm will draw the drainage map for you.
What to Record Before Anyone Quotes the Job
- Slope angle: Record it in degrees or percent at the steepest point and again halfway down, not just at the easiest spot.
- Slope length: Measure from the top edge to the toe, where the incline flattens or meets concrete, rock, or a drain.
- Soil type: Note whether you're digging in Austin clay, sandy fill, limestone rubble, or loose topsoil that crumbles in your hand.
- Finished elevations: Mark high and low points from a simple survey, a laser level, or string lines so the finished grade isn't guessed.
- Outlet locations: Pin every place water can legally and safely leave, and note where it goes next.
- Incoming runoff: List downspouts, driveway spill, and any flow crossing the property line, because that water hits the top edge first.
That page changes the entire proposal. A short, gentle bank with sandy soil and a clean toe drain is a straightforward job. A long clay slope fed by two downspouts and ending at your foundation is an engineered drainage project with turf on top, and it prices accordingly.
Why Permeability Numbers Matter on an Incline
Don't assume water disappears because the backing has holes. The Federal Aviation Administration advisory circular on artificial turf states that artificial turf may produce stormwater runoff characteristics similar to paved surfaces and recommends hydraulic analysis for erosion protection on slopes and channels and for downstream conveyance capacity. The same guidance requires pre-installation testing of surface runoff drainage coefficients and permeability under ASTM F1551.
Those aren't airport-only concerns. Your low-side drain, patio edge, and foundation are your downstream system. If the carpet drains faster than the base, or the base drains faster than the outlet, water backs up, finds a side exit, and undermines the edge. Wet-season storms stack that pressure at the perimeter, which is where most sloped installs let go first.
Treat drainage as a spec you verify layer by layer, not a sales claim. Ask suppliers for lab test data covering the turf, backing, and infill as one assembly, and ask the installer what rate the base and subgrade below it are designed to carry. A product that "drains great" with no numbers attached tells you nothing about how it behaves on your grade.
Drainage checks for each layer of a sloped turf system
| Layer | What to verify | Job on a slope |
|---|---|---|
| Turf, backing and infill | Supplier test data for the full assembly | Lets rain pass through instead of running off the surface |
| Base and finish stone | Drainage rate that keeps pace with the layer above | Carries water to drains without washing out |
| Compacted subgrade | A continuous fall with no ponding on a hose test | Gives a uniform plane so water does not pond |
| Perimeter drain with silt trap | Capacity matched to your outlet and storm load | Collects runoff at the toe and keeps infill inside the boundary |
Notice what the table doesn't do. It doesn't let you pick a fast draining turf and skip the base. Each layer has to keep up with the one above it, and the subgrade and perimeter drain need site specific design built from your survey, your soil, and your outlet capacity. If a bidder can't answer those two rows for your yard, you don't have a drainage plan yet.
Flag any bank you struggle to walk up when it's wet, where soil is already slumping, or where water has cut rills into the surface. Turf alone won't hold that ground. You'll need grading, reinforcement, terracing, a retaining element, or a different finish, and pretending a heavier infill solves it just buries the problem.
Write down the angle, length, soil type, outlet location, and runoff path and bring that page to the first call. Add phone photos from the top, the toe, and any wet spots. If you want help sorting fall and outlet options before turf enters the conversation, start with our yard grading and drainage planning so the elevation decisions come first.
Measure first: if you can't say where a heavy rain enters the slope, how fast each layer moves it, and where it exits, you're not ready to buy turf.
Drainage Routes and Erosion Control for Sloped Yards
Water attacks a slope in three places at once. At the top it dives under a loose edge. Through the middle it saturates weak subgrade and carries fines downhill. At the toe it arrives all at once and overloads the drain, the patio joint, or the planting bed that was never built to be a creek.
Every source you miss becomes a load the finished system has to carry. Map them all before design. Roof downspouts concentrate a whole roof into one pipe. A driveway can send sheet flow across a side border. A neighbor's yard may deliver water you don't control. Then mark the lowest collection point and ask a blunt question. Can that point accept the full flow in a hard storm without backing up into the turf or against the house?
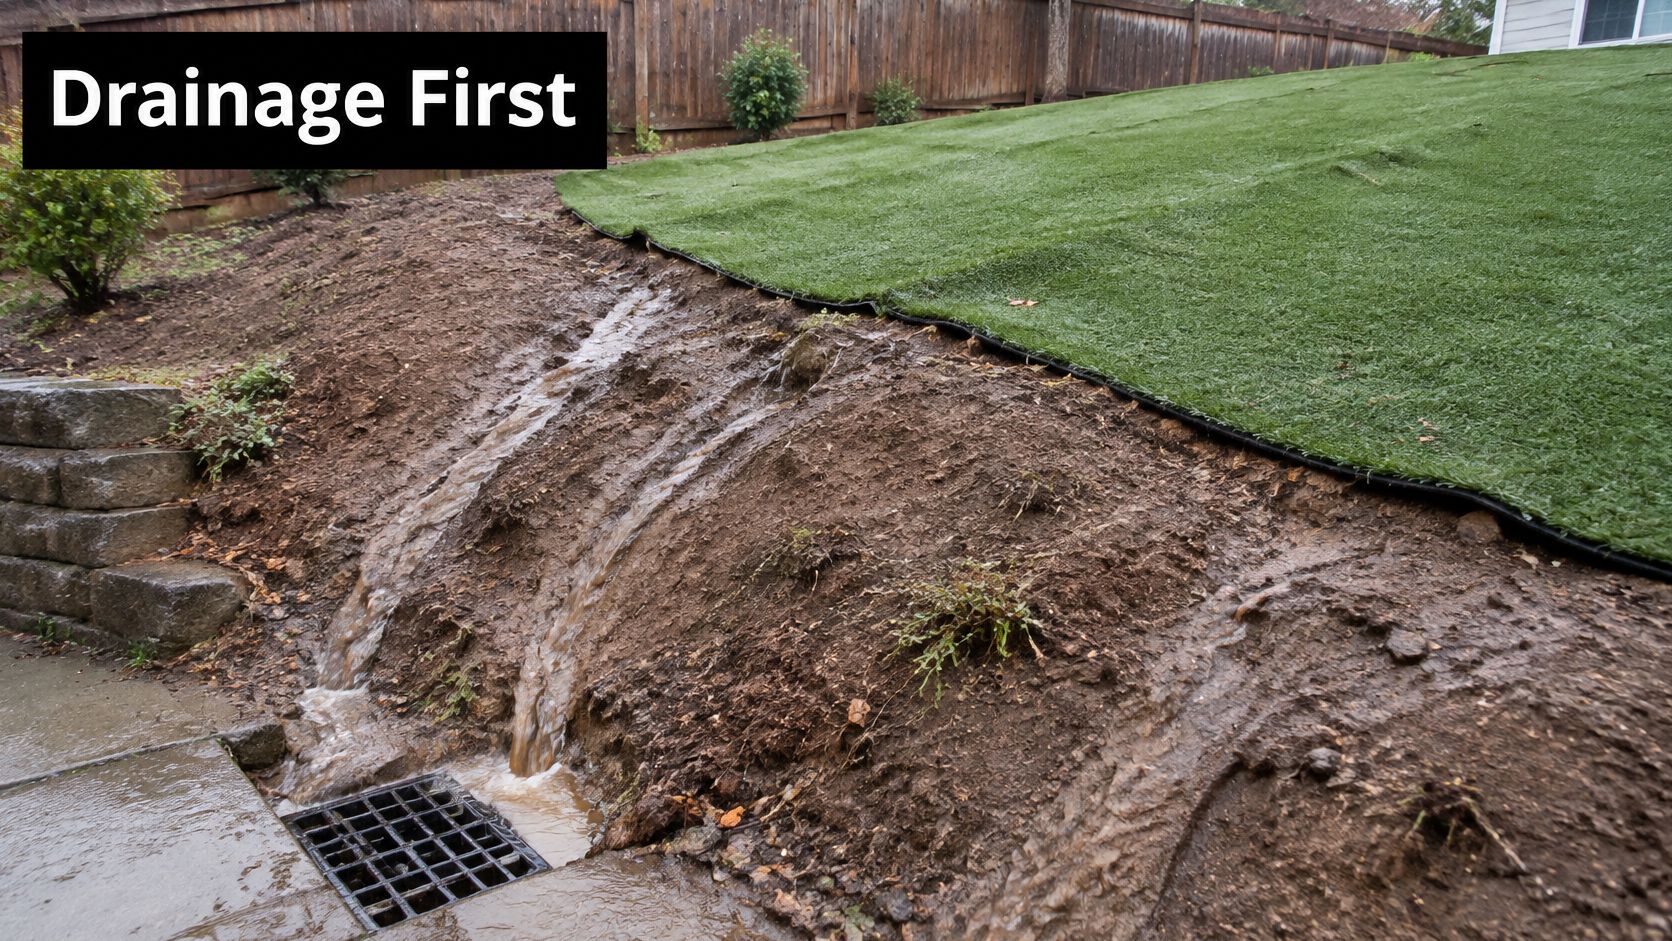
The photo below captures the failure pattern the drainage plan has to beat, with runoff reaching the low edge faster than the toe can carry it away.
Vertical Drainage Versus Horizontal Drainage
Vertical drainage lets water pass through the turf and aggregate base into underdrains below. It suits open, uniform slopes where the base stays porous across the whole area and each underdrain has a continuous fall to an outlet. The risk is a hidden one. If fines migrate into the stone or a pipe loses fall during backfill, you won't see it until ponding or soft spots appear on the surface.
Horizontal drainage uses a drainage mat to convey water sideways toward perimeter drains. It suits slopes with a clear toe, a solid border, or a base that can't carry all the water down through the profile quickly enough. You get accessible collection at the edge, which helps with cleaning, so long as the edge detail is strong. A weak toe becomes the failure point for the whole system.
I recommend choosing based on where you can inspect and maintain the system rather than material cost alone. Put drains where you can reach them. Fit a silt trap at every perimeter outlet so stormwater doesn't carry infill beyond the boundary, and give the toe positive fall so water leaves instead of sitting under the bottom edge. Discharge away from foundations, septic areas, ponds, and creeks, and inspect any cracked concrete aprons or displaced masonry at the toe before you bury the problem. A driveway or patio edge that already directs water into the slope needs repair before it becomes part of the drainage route, and a specialist service such as Atlanta Concrete Solutions residential repairs handles that kind of concrete and masonry fix.
Size outlets from local stormwater data, not from the diameter of pipe someone has on the truck. Austin downpours don't care about averages. Your system needs capacity for intensity, and the outlet has to handle that peak without surcharging back under the turf. A downspout that dumps a roof onto the top of the slope counts as another inlet, so either tie it into solid pipe or carry it past the toe before it can saturate the base.
Erosion Control Is Not a Blanket Promise
Stripped soil on a slope is vulnerable until the turf is fully anchored. Remove debris, regrade, compact in thin lifts, build drainage before the turf, and protect exposed soil through the work. Where an engineer identifies weak subgrade, a geotextile or geogrid can separate and reinforce layers so the base doesn't punch into soft clay.
The MDPI Sustainability review of geosynthetic slope materials reports that geosynthetic erosion control materials substantially reduced runoff and erosion compared with an unprotected sandy slope, while one geosynthetic study reported erosion reductions of up to 80% under tested conditions. Treat that as a tested result rather than a promise for your yard. Rainfall intensity, soil gradation, slope length, anchorage, and drainage capacity change the outcome, and a poorly anchored mat on a long slope can fail under the first concentrated flow.
Where your slope drains toward a pond, creek, drainage channel, or other water feature, ask for an erosion and separation plan in writing before anyone lays turf. Rooted vegetation holds soil in a way synthetic backing doesn't, so the edge near water may need rock, a planted buffer, engineered reinforcement, or a setback rather than turf running right to the bank. Our landscape erosion control work follows that same logic. We stabilize the ground and route the water first, then finish the surface. Skip either side of that work and the slope will bill you later, usually as a lifted edge or a drain full of infill.
How to Install Artificial Turf on a Slope Step by Step
A sloped yard works like a drainage channel with a surface on top. Water moves under the turf, the base carries it to an outlet, and wet-season runoff loads the edges long before it tests the blades. Build the sequence in the wrong order and gravity finds the shortcut you took. Drainage goes in before the base closes up, the top edge gets restrained before anything unrolls downhill, and seams lock before infill spreads.
Every stage below ends with the check that clears it. Sign off in order.
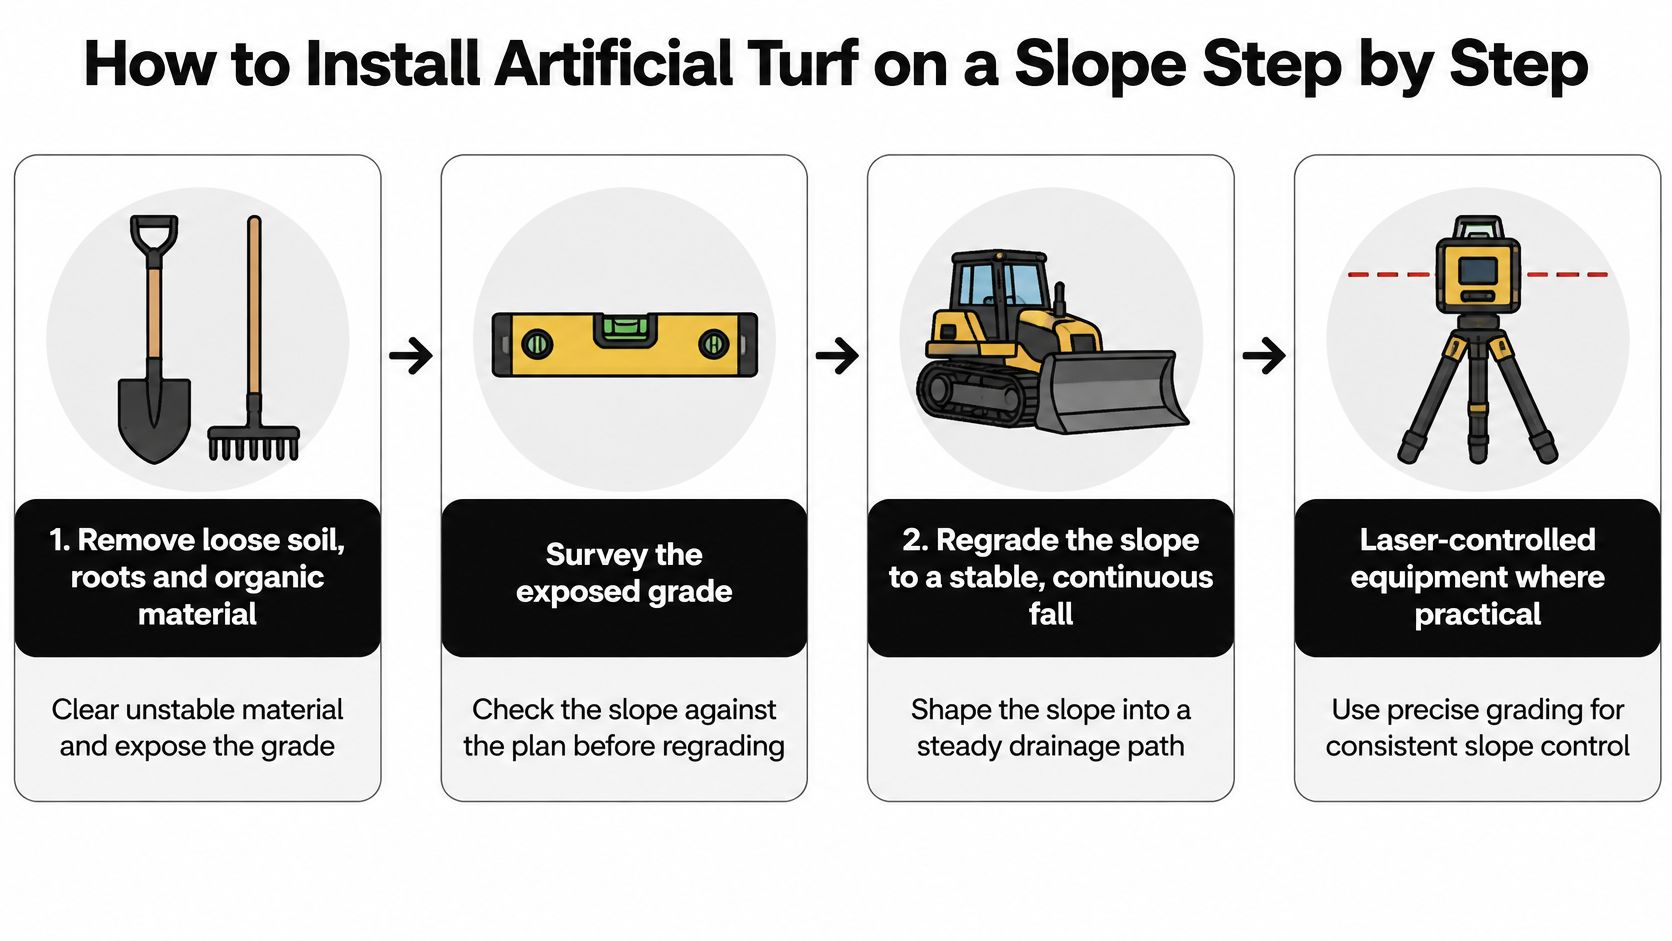
Remove loose soil, roots, and organic material, then survey the exposed grade. Organic material decays and leaves voids, so strip it to firm ground even when removal means hauling more spoil. Check exposed elevations against the plan before any stone arrives, because a hidden hump is cheap to scrape now and expensive to bridge later. Sign off when you can walk the slope without stepping into soft pockets and your string lines match the intended fall.
Regrade the slope to a stable, continuous fall with laser controlled equipment where practical. The Sports Turf Managers Association base system guidelines recommend beginning with a surveyed site plan, shaping the subgrade to a uniform plane, and using laser controlled grading where practical. A continuous plane removes reverse grades that pond water mid slope and overload one outlet downstream. Sign off by sighting along the grade, then flood a test area and confirm the water keeps moving.
Compact the subgrade in thin lifts, and add a geotextile or geogrid only where weak soil is identified. Thin lifts compact evenly with a plate compactor or roller. One thick layer feels firm on top and stays spongy below, and that hidden softness is what lets a base settle unevenly over a wet season. Reinforcement belongs where proof rolling, a probe, or an engineer shows pumping, rutting, or clay mixing into stone. Sign off when the surface holds under the compactor and the edges keep their shape after a pass.
Install the drainage system before any turf goes down. Lay underdrains or a drainage mat to continuous falls, connect perimeter drains, and fit silt traps at every outlet because stormwater carries infill beyond the boundary. Size outlets for the heaviest runoff the slope sees, since a wet season sends more water to the toe than a hose test suggests. Test each run with water before it is buried and photograph pipe locations for future maintenance. Sign off when water introduced at the high end reaches the outlet without surfacing or leaking at joints.
Place and compact the aggregate base to the drainage benchmark. The base does two jobs: it holds the surface flat and it moves water sideways to the drains. Build it in lifts, keep the finish stone clean, and compact without crushing the voids that carry flow. The surface must be smooth enough that you feel no stone ridges through the backing and firm enough that fasteners bite at the perimeter. Sign off with a straightedge, a level, and a check that falls still point where the drainage design expects them.
Anchor the top edge in a mechanical trench before unrolling anything downhill. The upper edge carries tension for the whole sheet, so terminate it in a secure trench with closely spaced fasteners and compacted backfill. Adhesive alone is not restraint on an incline, especially once rain adds weight and lubricates the backing. Sign off by pulling on the secured edge by hand. It should not creep, lift, or tear around fasteners.
Roll and tension the turf downhill from the restrained top edge, then seam it flat. Work wrinkles out as you go with a carpet kicker, stretcher, or controlled hand tension, and keep the sheet from dragging sideways across sharp stone. Use seam tape and adhesive on clean, dry backing, weight or roll the joint, and keep seams off the steepest fall line when the layout allows. Sign off when no wrinkles, bubbles, or open joints remain and the grain direction matches across every piece.
Spread and brush infill in controlled passes. Work in light applications with a drop spreader, then brush against the grain with a stiff broom or power broom so material settles into the thatch rather than migrating to the toe. Keep the finished surface as close to level as the base system allows, because gentler grades reduce infill migration and redistribution. On a steeper bank, lighter passes and thorough brushing matter even more, since loose infill behaves like gravel on a ramp. Sign off when the blade tips stand evenly and loose material does not collect at seams.
Test with a hose or rainfall run, then check the survey, anchor spacing, and seams. Run water at the top and at each incoming source, watch the toe, and time how the outlet handles the flow. Inspect fastener spacing at the trench, sides, and intermediate points, and press along seams for voids or movement. Sign off only when water reaches the drain at the toe and no infill appears at the outlets after the test.
Our crews run the same staged checks on every full artificial turf installation process we build, because an untested drain buried under finished turf turns a simple correction into a tear out. If a stage fails its check, fix it there. The next layer will not compensate for the one beneath it.
Anchoring, Failures and Fixes on Sloped Turf
Wet turf gets heavy. Rain fills the backing and infill, reduces friction against the base, and pulls the sheet downhill long after a crew has laid it flat. You won't always see a dramatic slide. More often you'll see longitudinal wrinkles, a lifted side edge, a seam that slowly opens, or infill collected at the toe after every storm.
Build anchoring as a mechanical system from day one. Terminate the turf in a secure top anchor trench, use closely spaced perimeter fasteners, add intermediate fasteners down the slope where the layout needs them, and never rely on adhesive alone. Set the top anchors before the first storm, not after the sheet has crept and the backing has taken a set.
Where Surface Anchoring Stops Being Enough
There's a limit that honest installers need to name out loud. A PMC review of synthetic turf history and systems notes that current base system guidance recommends synthetic turf surfaces generally not exceed a 1% slope, while 0.5% is a common high end construction maximum when supported by suitable base drainage. Those figures describe field like, high performance surfaces, not a universal residential rule. They still explain why steep banks often need retaining structures, terracing, subsurface drainage, or engineered transitions rather than turf stretched over uneven ground.
That distinction protects you as a buyer. A decorative bank you never walk on can be built differently from a play slope, dog run, or commercial common area. What you shouldn't accept is silence about the difference. Ask for the stabilization decision in writing. If the plan is turf and fasteners alone on a steep or long slope, the proposal should say why the soil, drainage, and length make that safe. If it can't say why, get a site engineer involved and compare terracing or a retaining wall against the cost of repeated re tensioning. Our slope stabilization techniques work is there for the cases where surface anchoring is the wrong tool.
History helps explain the trap. Early turf behaved more like carpet over a pad or soil, while modern systems are layered, porous assemblies where the base, drainage, infill, seams, and edge restraint work together. If one component isn't porous or isn't restrained, the others can't rescue it. Buyers sometimes judge only the sample in their hand. Ask instead how the entire section handles a wet season load on your specific incline.
Match the Symptom to the Cause Before You Patch
Don't brush infill uphill every month without asking why it moved. Don't glue a seam that opened because the top trench failed. Use the pattern in front of you.
Sloped turf symptoms, causes and fixes
| Symptom | Likely cause | Fix |
|---|---|---|
| Water pools mid slope | Reverse grade or poor compaction | Regrade to a continuous fall and recompact in thin lifts |
| Infill at edges or outlets | Inadequate drainage or unrestrained perimeter | Clean silt traps, check outlet capacity and brush infill back in |
| Wrinkles or bulging running downhill | Top edge not restrained, fabric creeping under wet loading | Re-anchor the top trench and re-tension downhill |
| Seams opening | Seam not secured or fabric moving | Reseam and fasten at tighter spacing |
| Sediment in drains | Drains not maintained | Clean drains and inspect after every major storm |
Timing changes the bill. A clogged silt trap can be a half day cleanout with a shovel, a bucket, and a hose. A collapsed or reversed drain under finished turf can mean cutting and lifting the surface, rebuilding base stone, and reseaming a large area. That isn't scare talk. It's labor logic. Everything buried costs more to reach.
The Michigan State University SportsTurf maintenance guidance recommends properly sloping the facility and correctly placing perimeter drains, with regular maintenance to keep those drains free of sediment and debris, and notes that drainage facilities below the synthetic surface can be very costly to repair if they fail. Apply that to a home or commercial site by planning cleanout access before installation. Put outlets where a hand and a hose can reach, label them on a sketch, and don't bury the only trap under rock mulch or a planting bed.
Perimeter water deserves the same attention as rain that lands on the turf. Keep runoff from adjacent slopes, roofs, and hardscape from dumping onto the surface at one unprotected point. Extend downspouts to a proper outlet, repair a patio joint that channels flow to the top edge, and keep irrigation overspray from saturating one seam line daily. Many anchoring failures begin as a drainage overload at a single entry point.
Seasonal Checklist That Catches Failures Early
- After the first major storm: Check outlets for sediment, look for infill washout, and walk every seam for separation or lifting.
- After freeze thaw cycles: Look for bulging, edge lift, and base softness where water sat and expanded in voids.
- After drought: Inspect clay subgrade edges for shrinkage gaps that leave the border unsupported before the next rain.
- Every maintenance visit: Clear silt traps, remove leaf mats that block drainage holes, brush infill back uphill in light passes, and tug gently at the top edge in several places.
Take dated photos from the same three positions. A wrinkle that grows between storms is data, not a cosmetic annoyance. Sediment that returns quickly to a trap tells you soil or base fines are moving somewhere uphill. A seam that opens in the same direction each time tells you the sheet is under tension it can't hold.
If the same symptom returns after the next storm, stop patching the surface and inspect the drainage and top anchoring underneath it.
Small fixes are worth doing promptly. Clean the trap, reseam a short opening while the backing is healthy, add fasteners where spacing was missed, and redirect a downspout that's punishing one corner. Repeated findings need a professional look, because the cause is usually below the green layer you're staring at. I would rather tell a homeowner that a bank needs terracing before installation than sell a surface that needs re tensioning after every wet month. That candor is the trust test. Ask your installer what would make them refuse to stretch turf across your slope, and listen carefully to whether they have an answer.
Schedule a Slope Assessment Before You Dig
If your bank is steep, long, wet, cracked, or already eroding, my direct recommendation is simple. Schedule a slope assessment before you order turf, rent a compactor, or hire a crew to start stripping soil. The assessment is where you find out whether you're buying a surface, a drainage system, a retaining solution, or a combination, and it's far cheaper to learn that on paper than under a failed installation.
You've already done useful homework if you've recorded the slope and watched the water. Bring the following to the call so we can give you specific answers instead of a generic square foot guess.
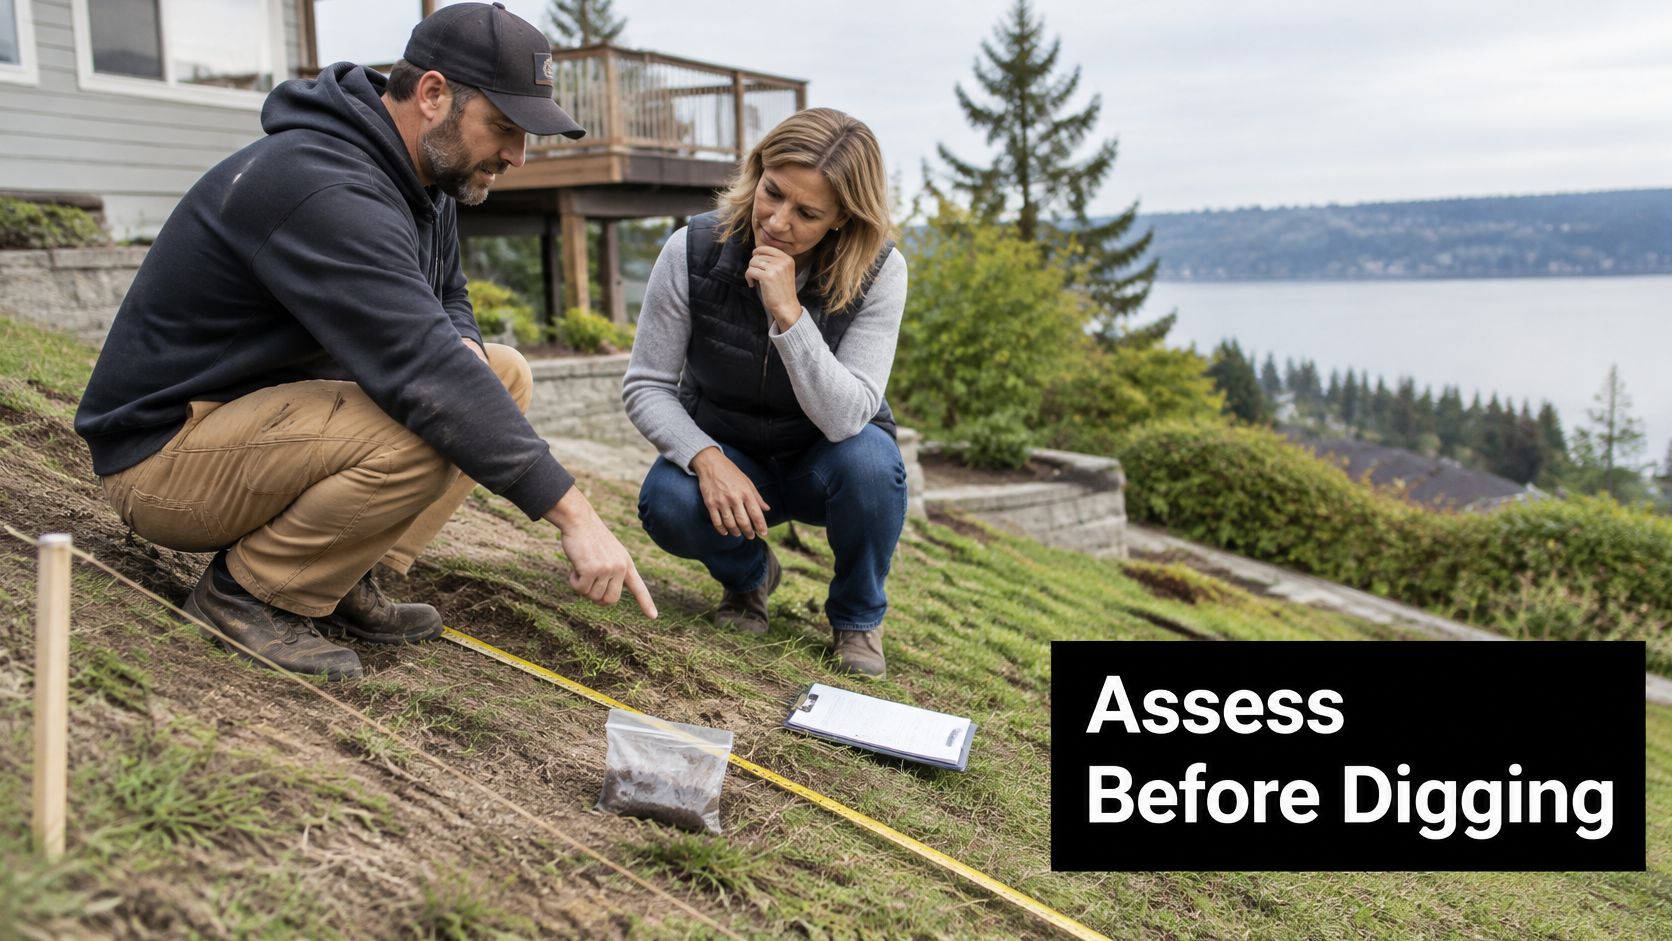
This image shows the kind of hands on site check that should happen before a crew commits to a section build.
- Slope angle and length: Include the steepest reading and the top to toe measurement.
- Soil type and condition: Tell us about clay cracking, loose fill, limestone, prior washouts, or soil that slumps after rain.
- Outlet locations: Mark existing drains and the place you believe water should exit.
- Photos during rain: Show incoming flow, ponding, toe conditions, and any water near the foundation.
- Past drainage problems: Mention flooded beds, muddy patio joints, neighbor runoff, and repairs you've already tried.
A proper assessment returns more than a price. You should receive a survey of the finished grade, a drainage plan that routes water to named outlets, an anchoring and edging plan for the top and sides, and a written proposal listing base preparation, drainage details, fastening, seaming, and infill distribution. If a retaining structure, terrace, or engineered transition is the safer answer, the assessment should say so plainly and price the alternative.
At Modern Yard in Austin, we prepare every artificial grass installation with groundwork that improves drainage and stability. Proper installation includes extensive soil preparation and compaction, precise grading for drainage, professional seaming, correct infill application and distribution, and proper perimeter securing, and commercial work receives the same attention to base preparation, drainage, and infill checks. We won't ask you to trust a promise. We'll show you the grade, the water route, and the anchor plan for your yard.
Call Modern Yard to schedule your slope assessment before the turf goes down, and book it before the next heavy rain turns a manageable bank into another washout. Bring your measurements and photos, ask us the hard drainage questions, and let us tell you whether artificial turf on a slope is the right finish for that ground.
Modern Yard surfaces builds slope ready turf systems in the Austin area with engineered grading, drainage, base preparation, and mechanical anchoring so your surface stays secure through heavy Texas rain. Visit Modern Yard Landscapes to schedule a slope assessment, share your measurements and rain photos, and get a written plan before you dig.