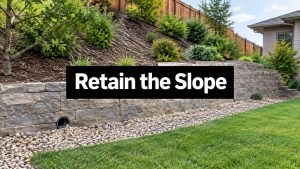

You usually notice a retaining wall only after it starts telling on itself. A slight lean. A stair-step crack. Blocks that don't line up anymore. Water hanging around after a storm. In Austin, that pattern is familiar because our soil and weather are hard on walls that were built with shortcuts hidden below grade.
The part most homeowners never see is the part that decides whether the wall lasts. It's the base. More specifically, the retaining wall base gravel, the trench it sits in, and the drainage system tied to it. If that foundation is wrong, the wall can look fine at first and still be headed for trouble. If it's right, the rest of the build has a chance to stay straight, drain properly, and handle what Texas weather throws at it.
Why Your Retaining Wall Is Only as Strong as Its Base
A lot of bad retaining wall advice starts with a generic recipe. Use some gravel. Dig a trench. Stack the block. Hope for the best. That's how people end up paying twice.
The bigger question is whether the base should change for the load and drainage conditions at your site. One industry article points out that many guides skip that question entirely, even though performance changes when a wall supports something like a driveway or sits in saturated clay soil, as noted in this discussion of segmental retaining wall planning. That's the core issue in Austin. Our expansive clay doesn't behave like predictable, free-draining soil, and our heavy rains expose every shortcut.
Generic advice fails in Austin
If the wall is holding back a planting bed on stable ground, the demands are different than a wall near a patio, parking area, fence line, or slope that stays wet. The base isn't just there to hold the first row of block. It has to distribute load, stay level, and work with drainage so the wall doesn't move as the site changes.
That's why a one-size-fits-all answer usually misses the mark. A retaining wall base gravel system has to answer practical questions such as:
- What is the wall holding back
- How wet does the area stay after storms
- Does the soil swell and shrink
- Is there extra load near the top of the wall
- Where will the water go once it reaches the back of the wall
A wall doesn't fail because the top looks weak. It fails because the base and drainage below it weren't built for the conditions above it.
The base decides whether the wall stays honest
When homeowners call us, they're often comparing block styles, heights, and finishes. Those matter. But the long-term cost of a wall usually comes down to the invisible work. If you're trying to budget realistically, it helps to look at the full picture of retaining wall cost in Austin, because excavation, base prep, drainage, and access often matter as much as the face material.
A straight wall on day one doesn't prove much. Plenty of walls look good right after installation. The test comes after rainfall, summer heat, and seasonal soil movement. In Austin, the essential part isn't the decorative face. It's the base that keeps the wall from settling unevenly and the drainage that keeps water pressure from building behind it.
Selecting the Right Gravel for a Rock-Solid Foundation
The right base material is angular, clean, crushed stone. Not smooth river rock. Not random fill. Not dirt-heavy material that packs like soil and holds water.
Industry guidance converges on 4 to 8 inches of free-draining gravel in the base trench, typically 3/8-inch to 3/4-inch ASTM No. 57 stone, with the trench built twice the width of the wall block, according to Unilock wall construction guidance. That matters because the base has to do two jobs at once. It must support the wall and let water move through the system instead of trapping it under the first course.

What to ask your supplier for
If you're ordering retaining wall base gravel, keep the request simple and specific. Ask for clean, angular crushed stone in the size range used for retaining wall base installations. The words clean and angular matter. Clean means it isn't loaded with fines that can clog drainage. Angular means the pieces lock together instead of sliding around.
Rounded gravel is the wrong material for this application because it doesn't interlock well. Dirt-heavy base material can be just as bad for a different reason. It may feel firm at first, but once water gets involved, it can act more like compacted soil than drainage aggregate.
A quick comparison that actually helps
| Gravel Type | Best For | Why It Works (or Doesn't) |
|---|---|---|
| Angular crushed stone | Retaining wall base trenches | Interlocks well, drains well, supports a stable foundation |
| ASTM No. 57 stone | Base and drainage applications where specified | Consistent size range, free-draining, commonly used in wall systems |
| Rounded river rock or pea gravel | Decorative ground cover, not structural base | Doesn't lock together well, shifts under load, poor choice for a wall base |
| Fine-rich mixed gravel | Situations where drainage isn't critical, not retaining wall foundations | Can trap water and behave more like soil than a drainage layer |
What works in the field
Homeowners often assume “gravel is gravel.” It isn't. Material choice shows up later in the form of movement, wet spots, and maintenance headaches.
The safest approach is to use material that does what the wall system needs it to do:
- Lock together under compaction so the first course doesn't rock or drift
- Drain freely so water doesn't sit under the wall
- Stay consistent enough that leveling isn't a fight during installation
Practical rule: If the stone is rounded, muddy, or full of fines, it doesn't belong under a retaining wall.
Material knowledge saves money. The wrong gravel can look cheaper on the invoice and cost more after the first wet season.
How to Plan and Excavate the Base Trench
After one hard Austin storm, the wall that looked straight on Friday can show a dip by Monday. In a lot of cases, the failure started before a single block went down. The trench was too shallow, cut into loose fill, or left out of level, and the wall directly followed the ground beneath it.
Base layout needs to match the wall, the slope, and the soil conditions on site. A simple residential wall often starts with a trench wide enough to fully support the block and the gravel base, with the first course buried below grade. That buried course matters even more in Austin clay, where wet periods swell the soil and dry periods pull it back apart. If the trench is skimpy, the wall pays for it later.

Dig to firm ground and keep the geometry honest
The trench bottom has to sit on undisturbed, competent soil. That means stripping out roots, mulch, buried debris, soft topsoil, and any old fill that breaks apart under a shovel. In Central Texas, one stretch of trench can hit dense native soil while the next turns into churned-up clay from an old outdoor improvement project. Treating both areas the same is how walls settle unevenly.
Layout errors cause trouble early. Set the wall line with string, stakes, or paint, then excavate to that line instead of eyeballing curves and corners. Keep the trench bottom level from side to side, and use stepped sections on a slope rather than forcing one long tilted run. The first course will copy every hump and dip in the excavation.
For homeowners familiar with base prep from other yard projects, the same principle applies here as it does with base material under synthetic grass. The surface work only performs as well as the excavation underneath.
If excavation gets deeper, tighter, or less stable than expected, stop and review site safety. Tight access, buried utilities, and collapsing sidewalls are real hazards. It helps to spend a few minutes understanding trenching and shoring before the digging gets ahead of the plan.
Bury the first course and leave full support under the block
Setting the first row too high is a common shortcut. It may look cleaner on day one, but it leaves the toe exposed and reduces the wall's resistance to movement. A properly buried first course gives the wall better restraint at the bottom and a cleaner finished grade once the area is backfilled.
Width matters just as much as depth. If the trench narrows where digging gets harder, the edge of the block can end up hanging over unsupported base stone or native soil. That weak edge usually shows up later as rotation, separation, or a low spot in the face of the wall.
A good trench often feels slow to cut. That is money well spent. In Austin's clay and rain cycles, careful excavation saves far more than it costs because it gives the base, drainage stone, and wall face one stable system to sit on.
Proper Compaction The Secret to a Level Wall
A lot of wall failures don't begin with the wrong block. They begin with base gravel that was dumped in, raked roughly level, and called done.
Professional specifications require the crushed rock base to be compacted to at least 95% density, and installers commonly get there by placing the base in 2- to 3-inch lifts and compacting each layer separately, as outlined in the Allan Block specification manual. That's the difference between a base that stays put and one that settles unevenly over time.

Dumping and leveling is not compaction
Stone settles into place only when it's compacted in manageable layers. If you place too much at once, the top may look firm while the lower portion stays loose. That hidden softness shows up later as dips, leaning, or face movement.
Compaction changes the wall in practical ways:
- It reduces voids that let the base shift later
- It keeps the first course level so each row above stays aligned
- It limits differential settlement where one section sinks more than the next
A hand tamper can help in tight spots, but wider residential trenches usually call for a plate compactor to get consistent results. The point isn't just force. It's uniformity across the entire trench.
Why this matters so much in Austin
Clay soil amplifies mistakes. When moisture conditions change, the soil around the wall can expand and contract. If the base wasn't compacted properly, those movements find weak spots quickly. One side settles, another holds, and the wall starts showing stress.
That's why thorough site prep matters in other outdoor systems too. The same principle applies when choosing base material for synthetic grass installations. If the base is inconsistent, the finished surface won't stay true.
Good compaction is boring to watch and expensive to skip.
Installers who rush this stage usually create problems they won't have to come back and fix until later. Homeowners are the ones left looking at a wall that never quite sat right after the first season.
Integrating Drainage for a Weatherproof Wall System
A lot of retaining walls in Austin look fine until the first stretch of hard rain. Then the calls start. Water builds behind the wall, the clay stays saturated, and the face begins to bulge or separate. The gravel under the first course matters, but it only works if the rest of the drainage path is built to match it.
For segmental walls, I treat the base, the backfill stone, the drain pipe, and the filter fabric as one connected system. If one part is missing or installed poorly, water sits where it should be moving. In Austin's expansive clay, that trapped moisture adds weight behind the wall and increases soil movement during wet-dry cycles.

The parts that have to work together
A wall drains well when each layer has a clear job.
- Base gravel under the wall supports the load and gives water a stable path at the bottom of the system
- Clean stone behind the wall creates open space for water to move instead of collecting in heavy, wet soil
- Perforated drain pipe intercepts that water and carries it to daylight or another approved outlet
- Geotextile fabric separates the stone from surrounding soil so fines do not migrate in and clog the drainage path
That last point gets overlooked all the time. Austin clay will wash into open stone faster than people expect, especially on sites with runoff coming off a roof, patio, or uphill yard.
Drainage has to leave the wall and go somewhere
A retaining wall is tied to the whole property. Downspouts, lawn slope, hardscape runoff, and neighboring grades all change how much water reaches the back of the wall. If the site sends water toward the wall, the drain system has to be sized and routed for that reality.
Homeowners sorting through yard drainage solutions for runoff and standing water should look at the wall and the yard together, not as separate projects. I have seen plenty of walls built correctly at the block face and still struggle because the surrounding grade kept feeding them water.
For a broader look at how water control choices affect foundations, grading, and long-term property conditions, this a comprehensive guide for Utah homeowners gives useful context. The climate is different, but the principle carries over. Water follows slope, collects at low points, and exploits every weak detail in the system.
Water pressure is what breaks a lot of retaining walls. The failure starts behind the blocks long before you can see it from the patio.
One local option can make sense in this context. Modern Yard Landscapes handles retaining walls and drainage tile as part of broader site development, which helps when the wall, yard slope, and runoff pattern need to be solved together instead of in separate phases.
Avoid These Mistakes or Call the Experts
Most retaining wall failures aren't mysterious. They come from a short list of avoidable decisions. Common failure modes include under-excavation, skipping compaction, and using fine-rich gravel that behaves more like soil, and those errors increase hydrostatic pressure and can lead to wall movement, especially for walls over 4 feet that often require engineered design, according to Gravelshop's retaining wall backfill guidance.
The mistakes that cost people the most
Some problems show up fast. Others take one rainy season.
- Using the wrong gravel leads to a base that shifts, holds water, or both
- Digging a shallow or uneven trench leaves the wall unsupported before the first block is ever set
- Skipping lift-by-lift compaction creates settlement that shows up as a lean or a dip
- Treating drainage as optional lets water build pressure where you can't see it
Homeowners who hire carefully usually avoid most of this. If you're comparing bids and credentials, even an out-of-market article like these tips for choosing Sacramento contractors can still be a good reminder to look for clear scope, insurance, process, and communication rather than just the lowest number.
When it makes sense to bring in a pro
There's a point where DIY stops being economical. Tight access, steep grade changes, clay-heavy subsoil, drainage problems, and walls carrying meaningful load all raise the stakes. If you want somebody local to evaluate the site, drainage path, excavation needs, and installation method, start with retaining wall contractors near you in Austin.
A good wall should feel uneventful after it's built. No movement. No puddling. No annual patch jobs. That result usually comes from doing the invisible work right the first time.
If your yard has a slope problem, a leaning wall, or a spot that stays wet after every storm, talk with Modern Yard Landscapes. We'll look at the site conditions, explain what the wall base and drainage system need to do, and give you a clear path forward so you can fix it once and stop worrying about it.