A lot of Austin homeowners notice turf damage the same way. You walk outside after a storm, or after a stretch of hard sun, and one small flaw catches your eye. Maybe it's a seam lifting near the edge, a flattened track where the dog runs every day, or a scorched patch where reflected light has been hitting the same spot.
That moment matters because artificial turf is a real investment. If you ignore a small issue, it can spread from cosmetic to structural faster than anticipated, especially in a place like Austin where heat, clay movement, runoff, and heavy backyard use all work against a clean finish.
Artificial grass repairs don't have to be mysterious, and they don't all require a crew. Some are absolutely manageable for a careful homeowner with the right tools and patience. Others look simple from the surface but are really base, drainage, or seam-alignment problems underneath. Knowing the difference is what protects your lawn and your wallet.
Your Austin Lawn's First Aid Kit
You spot a seam curling up by the patio after a hundred-degree week, or a worn path where the dog cuts the same corner every morning. In Austin, those small signs matter because heat, clay movement, and sudden downpours tend to turn a minor surface issue into a bigger repair if you leave it alone.
Start with one question. Is this just surface wear, or is the turf system underneath starting to move?
That distinction saves money.
What usually falls in DIY territory
Homeowners can often manage small, isolated problems when the base still feels firm and the turf has not shifted out of position:
- Matted traffic lanes: Blades are folded over from foot traffic, but the area still feels level and supported.
- Small burn or melt spots: Damage is limited to one tight area from reflected window glare, a grill ember, or hot equipment.
- A short loose edge or seam: One section has started to lift, but the surrounding turf sits flat and tight.
- Light infill loss: The spot feels less cushioned or looks thinner than nearby sections.
I tell Austin clients the same thing. Surface issues are usually fixable. Problems tied to movement under the turf are a different category.
What deserves a closer look
A repair stops being simple when the lawn changes shape. If a section feels soft, dips underfoot, rocks when you walk across it, or holds water after rain, the visible damage is often just the symptom. In this area, that can trace back to base prep, drainage, or soil movement below the turf.
If that sounds familiar, it helps to understand what sits under the grass. A stable install depends on the right synthetic grass base material as much as the turf itself.
The honest Austin answer
DIY makes sense when the damage is small, isolated, and easy to diagnose. It stops making sense when you are guessing.
Cutting into turf before you know why it failed is where homeowners get into trouble. I have seen people patch a seam that kept reopening because the base had settled, or brush up flattened fibers when the actual issue was infill loss across a larger section. The repair looked better for a week, then the problem came back.
Good turf does not stay perfect on its own, either. It needs regular attention, especially in high-use spots and yards that take full afternoon sun. If the issue is cosmetic and contained, a careful homeowner can often handle it. If the lawn feels uneven, drains poorly, or keeps failing in the same place, professional diagnosis is usually the cheaper call than repeating a repair that will not hold.
Before You Fix It Identify the Real Problem
The smartest repair starts with diagnosis, not glue. Turf can fail at the seam, in the fibers, in the infill layer, or in the base below it. Each one looks different once you know what to check.

Read the surface before you touch it
Start with a slow walk across the area. Look from two angles, not just from above. Turf problems often show up more clearly when the light hits across the grain.
Use this quick field check:
- Seam separation: You'll see a visible line, gap, or edge where two pieces no longer sit tight together.
- Melted fibers: The blades look shiny, fused, or curled down in one concentrated spot.
- Compacted infill: The turf looks tired and flat, but the area underneath still feels level.
- Drainage trouble: Water lingers, the turf feels heavy after rain, or one section stays damp longer than the rest.
- Base settling: The lawn dips underfoot, feels uneven, or develops a soft pocket.
If you notice repeated low spots or washout behavior, the issue may trace back to the install foundation. A stable base is the whole system, not an afterthought. This breakdown of synthetic grass base material gives a good picture of why the support layer matters so much.
Common Austin clues
Austin adds a few local tells that generic repair guides miss.
Window glare is a big one. South- and west-facing glass can focus sunlight onto one patch of turf and melt fibers without any fire source at all. Heat from metal furniture, portable fire features, and grill parts can do the same thing.
Drainage is another. In heavy rain, water will always expose the weakest grade or the least compacted area. If the same spot keeps puddling, don't assume you only need more infill.
A lifted seam and a sunken seam are not the same job. One may need bonding. The other may need base correction first.
Why diagnosis affects safety
Poor repair work isn't just ugly. It can create trip hazards, unstable footing, and hard spots. A review in PMC notes that modern synthetic turf requires routine maintenance and reports that lower-extremity injury rates on synthetic game-day fields were 16% higher than on natural turfgrass in one NFL-related analysis, which reinforces the importance of maintaining seams, infill, and surface consistency, as discussed in this PMC review of synthetic turf history and safety.
That statistic comes from sports research, but the practical takeaway applies to backyards and commercial properties too. A repair that leaves a lip, hollow, or loose edge behind isn't finished just because it looks greener from the patio.
A quick diagnosis table
| Problem you see | What it often means | DIY or pro |
|---|---|---|
| Small visible seam | Adhesive failure in a limited area | Often DIY-capable |
| Melted patch | Heat damage to fibers | Often DIY-capable if isolated |
| Flat, tired-looking turf | Grooming and infill issue | Usually DIY-capable |
| Repeated low spot | Base settlement or drainage issue | Usually pro territory |
| Wrinkles across a wider section | Stretching or sub-base movement problem | Pro territory |
Gathering Your Turf Repair Toolkit
The right toolkit saves more frustration than most DIYers expect. Turf looks forgiving until you use the wrong blade, the wrong adhesive, or the wrong brush. Then you end up with fuzzy cuts, visible seams, or glue that doesn't hold once the weather turns hot.

What belongs in a basic kit
For minor artificial grass repairs, these are the essentials:
- Utility knife with fresh blades: Dull blades tear backing and create ragged edges that never hide well.
- Seaming tape: This supports the joint from underneath instead of relying on a top-surface fix.
- Turf adhesive: Use adhesive made for turf, not a generic construction product.
- Stiff bristle brush or nylon broom: This lifts pile and helps blend a repair.
- Measuring tape: You need precise patch sizing and clean layout.
- Spare turf remnant: Nothing blends better than material from the original install.
- Infill that matches the existing system: Texture and resilience depend on this final step.
The tool mistakes that cause bad repairs
A lot of failed DIY repairs trace back to shortcuts, not effort.
- Using household glue: It may grab at first, then fail under heat and moisture.
- Cutting from the face side: That slices fibers and leaves an obvious repair line.
- Skipping infill replacement: The patch may sit in place, but it won't feel or perform like the surrounding lawn.
- Using a wire brush: That can damage synthetic fibers instead of reviving them.
One overlooked part of repair planning is infill quantity. Turf maintenance guidance notes that infill should stay at manufacturer specifications, often around 2 to 3 lb/ft², which gives a practical benchmark when replenishing a repaired section so it matches the surrounding feel and resilience, as explained in this guide to artificial grass installation and maintenance steps.
The real trade-off with DIY
For one tiny patch, buying materials may still make sense. For anything beyond that, the math changes fast. You're sourcing specialized adhesive, matching infill, cutting cleanly, weighting seams, and hoping your patch orientation matches the turf grain.
That's why a lot of homeowners start with good intentions and then hit the wall at material selection. Turf repair isn't impossible. It's just less forgiving than people think.
Worth weighing: If you'll use the toolkit once, professional service often buys you better materials, cleaner seam work, and less risk of redoing the repair later.
Buy once, repair carefully
If you still have leftover turf from the original installation, store it flat and dry. That single remnant can make the difference between a patch that disappears and one that always catches your eye.
And if you don't have spare material, be realistic. Matching older turf by color, blade shape, and wear pattern is one of the hardest parts of repair work, even when the damaged area is small.
How to Handle Minor Artificial Grass Repairs
A lot of Austin homeowners notice the problem on a hot afternoon. One spot by the grill looks scorched, or a seam near the dog run starts to show. The repair might stay simple, but only if the base underneath is still firm and the surrounding turf has not shifted.

Re-fluff matted traffic areas
Flattened fibers are often maintenance, not damage. In our area, heat, foot traffic, and compacted infill can make a healthy section look worn out long before it requires a patch.
Start here:
- Brush against the grain with a nylon broom or spring-tooth rake.
- Change direction and make a few passes from different angles.
- Add matching infill if the spot feels softer or sits lower than the turf around it.
- Brush again so the infill settles and the blades stand back up.
As noted earlier, regular grooming and infill top-offs solve more "repair" calls than people expect.
For routine upkeep between spot fixes, this guide on how to clean artificial turf helps keep debris and buildup from turning into bigger problems.
Check the area after brushing and after it cools off. Midday heat can make fibers look flatter than they really are.
Patch a small burned spot
Burn marks from grills, fire pits, reflected window light, or dropped tools usually need a cut-out repair. Melted blades do not recover.
Use a careful, small-patch process:
- Remove the loose infill from the damaged area.
- Cut a clean square or rectangle around the burn.
- Cut from the backing side when possible, and follow stitch rows for straighter lines.
- Use a matching piece from leftover turf.
- Confirm the grain direction before setting the patch in place.
- Dry-fit the piece first. It should sit tight without buckling the edges.
- Slide seaming tape below the opening, apply adhesive, and place the patch.
- Pull any trapped fibers upward so they do not get glued into the seam.
- Weight the repair while the adhesive cures.
- Add infill back and brush the area to blend it.
This is the part DIY repairs usually lose points on. A patch can be cut cleanly and still look obvious if the blade lean is wrong or the replacement piece has weathered differently than the older turf around it.
Make the patch disappear as much as possible
Grain direction matters as much as color. In strong Austin sun, turf leaning the wrong way can stand out from across the yard.
I tell homeowners to check a patch from standing height, not from kneeling right over it. From two feet away, almost every repair looks better than it really is.
A useful comparison is how to get DJI repair service. Small equipment repairs and turf patches have the same basic truth. Once alignment and material matching matter more than the obvious damage, the finish quality decides whether the fix holds up visually.
Re-secure a short loose seam
A short seam opening can be handled at home if the turf on both sides still feels stable and level. If the edges are curling, the base feels soft, or the gap keeps widening, stop before you glue over a larger problem.
Use this method:
- Clean the seam thoroughly: Remove infill, dirt, and loose adhesive.
- Fold the turf back carefully: Rough handling can distort the backing.
- Center the seam tape under both sides: Each edge needs equal support.
- Spread adhesive in a controlled layer: Extra glue often squeezes up into the fibers and leaves a shiny mess.
- Set the edges together without overlap: The goal is a tight meeting line, not pressure.
- Weight the repair and leave it alone while it cures: Foot traffic too soon can ruin the bond.
- Brush the fibers up once cured: That helps hide the joint.
What a successful minor repair should look like
Use three checks after the repair is done:
| Result | What you want |
|---|---|
| Appearance | The repair blends from normal viewing distance |
| Foot feel | The area feels even underfoot |
| Stability | The patch or seam stays in place during normal use |
If the repair passes one test but fails the other two, keep working or call for help.
Stop if the problem changes shape
Minor repairs stay minor only when the issue is isolated. If you open the turf and find wet base material, repeated washout, loose edges beyond the original spot, or a depression that extends farther than expected, the job has moved out of DIY territory.
That happens a lot in Austin yards with expansive clay soil and hard summer heat. The surface problem may be small. The cause underneath may not be.
Major Repairs That Need an Expert's Touch
There's a clear line between homeowner maintenance and structural turf repair. The line isn't whether the damaged spot looks bad. The line is whether the problem involves base correction, broad seam alignment, drainage, or large-area replacement.

Jobs that usually need a crew
These are the ones I'd caution homeowners against taking on alone:
- Large tears or holes: Matching shape, grain, and seam visibility gets much harder as the repair area grows.
- Widespread seam failure: If multiple seams are opening, the problem may involve installation method, contamination, movement, or all three.
- Ripples and wrinkles: Those often point to stretch issues, anchoring problems, or movement in the layers below.
- Recurring low spots: If a depression comes back, surface grooming won't solve it.
- Persistent drainage trouble: Water problems rarely stay isolated. They move material and undermine the whole turf system.
- Full panel replacement: This takes precise layout and blending work to avoid obvious transitions.
Why settling is rarely a surface problem
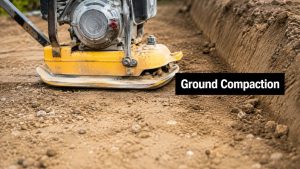
When turf sinks, the repair usually has to go deeper than the fibers. A standard expert workflow for settling involves removing infill, cutting along stitch lines, exposing the base, clearing loose material, then rebuilding the depression with crushed stone, decomposed granite, or class-2 road base in 1-inch lifts compacted after each lift before the turf is re-secured, as outlined in this DIY artificial grass repair guide.
That's the part many DIY articles gloss over. A low spot that comes from poor compaction won't stay fixed just because the turf above it looks flat again for a week.
The comparison that makes sense
People understand this better when they compare it to other repair categories. Replacing a battery is one type of task. Rebuilding internal components after impact is another. The same logic shows up in drone ownership, where a basic issue may be manageable but advanced damage calls for a service workflow, which is why resources like Dronedesk's guide on how to get DJI repair service are useful. Turf repair follows that same divide. Cosmetic touch-up and system correction are different jobs.
A seam can fail because glue let go. It can also fail because the surface beneath it moved. Those repairs don't use the same playbook.
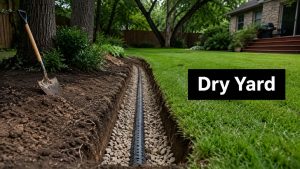
Drainage and base problems need a broader fix
If your turf has puddling, washout, or repeated softness, don't focus only on the damaged patch. Water takes the easiest path available, and it usually exposes grading weaknesses that extend past the visible trouble spot.
Drainage knowledge matters as much as turf knowledge. If you're seeing water hold or migrate through the yard, this explanation of how to fix yard drainage is worth reviewing before anyone cuts into the turf.
The real risk of doing too much yourself
The biggest cost of a failed DIY repair isn't the adhesive or the wasted afternoon. It's losing the chance to make a clean correction while the problem is still contained.
Once the backing gets cut poorly, the grain is mismatched, or the base gets refilled without proper compaction, a later professional repair often becomes more complex. That doesn't mean homeowners shouldn't do minor work. It means the smart move is knowing when the repair has crossed from surface-level to system-level.
Keep Your Turf Flawless Year-Round
The best artificial grass repairs are the ones you never need because the turf never gets to that point. In Austin, prevention matters more than people think. Heat, dust, pets, and intense downpours can all wear on the same lawn in a short stretch of time.
A simple maintenance rhythm
A good year-round routine is straightforward:
- Brush high-traffic lanes: This keeps fibers standing and helps distribute infill more evenly.
- Rinse dust and debris away: That matters after dry spells, pet use, and windy weeks.
- Check edges and seams: Small movement is easier to correct before it becomes a tripping point.
- Watch for glare zones: New windows, shiny metal, and reflective surfaces can create heat damage.
- Pay attention after storms: Water will show you where the weak spots are.
- Inspect furniture footprints: Heavy items left in one place too long can flatten pile and stress the surface.
Repair or replace over the long term
One question most homeowners eventually face is whether they should keep repairing an aging turf area or start over. That decision doesn't have a one-size-fits-all answer because repair frequency changes with UV exposure, foot traffic, and heat, which is why a practical repair-versus-replacement framework is so important, as discussed by Artificial Grass Recyclers on repairing artificial turf.
That's also why durability matters from the beginning. If you're thinking about long-term wear, this overview of artificial grass durability helps frame what quality materials and proper installation are supposed to do over time.
Long-view advice: If you're making the same repair repeatedly, stop treating it like a spot problem. It's usually telling you something about the whole system.
Protect the investment
Artificial turf earns its value when it stays consistent. It should look clean, feel even, drain well, and hold up under regular use. That doesn't happen by neglect. It happens when maintenance and repairs are handled before failure spreads.
If you're unsure whether your issue is a brush-and-infill fix or a deeper correction, trust that instinct. Most expensive turf problems started as a homeowner wondering if a small flaw was worth paying attention to. It was.
If your lawn has a lifted seam, a burn mark, a low spot, or a drainage issue you don't want to guess at, talk with the team at Modern Yard Landscapes. They can help with anything from a professional assessment to a full repair plan, so you can protect the turf you already paid for and avoid a small issue turning into a bigger one.