You walk outside, glance at your turf, and spot it right away. A seam has lifted. A grill ember left a melted spot. One corner looks wrinkled, or a patch near the dog run has gone flat and dark.
That reaction is normal. You invested in a clean, low-maintenance yard because you wanted fewer headaches, not a weekend repair project.
The good news is that most turf damage doesn't mean the whole lawn is ruined. A lot of synthetic turf repair work is manageable when the problem is small, isolated, and clearly cosmetic. The tricky part is knowing when a quick fix is the wrong move. In Austin, heat, UV exposure, heavy downpours, and shifting soil can turn a simple-looking blemish into a base problem if you misread it.
Your Beautiful Turf Has a Blemish Now What
A damaged area on artificial grass feels bigger than it is. Homeowners often assume a tear or burn means the turf failed early, but that's usually not the case. Synthetic turf has a service life, and repairs are part of that lifecycle. Modern synthetic turf is commonly expected to last about 8 to 10 years when it's maintained properly, and that maintenance schedule matters for both performance and warranty expectations, as noted in this review of synthetic turf lifespan and maintenance requirements.
That point holds greater significance than is often appreciated. Turf isn't maintenance-free. It responds well to routine care, and it shows neglect first in the areas that get hammered every day.
What homeowners usually notice first
Small problems tend to show up in predictable places:
- Entry points and edges where foot traffic starts and stops
- Pet zones where repeated use affects infill and cleanliness
- Around grills or fire features where heat can melt fibers
- Play areas where turning, dragging, or sharp objects stress seams
- Shady or damp spots where trapped debris changes how the turf looks and drains
If your lawn has gone a while without brushing, cleaning, or debris removal, that doesn't mean it can't be repaired. It just means the visible damage may not be the only issue.
Practical rule: Fix the cause, not just the scar. A neat-looking patch won't last if the turf is moving, the seam is under tension, or the base is soft underneath.
A lot of homeowners do well with light upkeep and simple spot cleanup. If you're trying to prevent a small repair from becoming a larger one, start with basic care like the methods in this guide on how to clean artificial turf. Clean turf is easier to inspect, easier to repair, and far less likely to hide early warning signs.
The real decision
The question usually isn't "Can this be repaired?" It usually can.
The better question is, "Can this be repaired once, cleanly, and without creating a more obvious problem?" A sloppy glue job, a mismatched patch, or a rushed seam repair often stands out more than the original damage. If the fix affects warranty coverage, drainage, or the look of the lawn, it's worth slowing down before you start cutting.
First Diagnose the Damage Like a Pro
Before you buy adhesive or cut a patch, inspect the turf like a technician would. Surface damage and structural damage can look similar from a few feet away. They aren't the same repair.

Start with what changed
Ask three simple questions:
- Did the turf get cut, melted, or torn?
- Did the turf move, wrinkle, or sink?
- Does water behave differently in that area now?
That first question points to cosmetic damage. The second and third often point to installation, drainage, or sub-base trouble.
Surface damage usually has clean boundaries
A burn mark from a hot ember, reflected window glare, or dropped tool usually affects a specific spot. The turf around it still feels stable. The fibers may be melted, brittle, or missing, but the backing nearby often stays in place.
Cuts from tools are similar. They tend to have a visible line, a known cause, and no broader movement around the area. These are often good candidates for patching if the damage is limited and the surrounding turf is solid.
Pet damage can be a little less obvious. If a spot looks worn, smells off, or stays damp, the issue might not be the face fiber alone. It can involve trapped debris, contaminated infill, or a drainage problem inside that section.
Seam trouble has a pattern
A seam failure rarely happens in isolation. If one edge is lifting, check whether the seam tape below has released, whether adhesive failed, or whether the turf panels are under tension.
Look for these signs:
- Visible line opening up between two sections
- One edge curling upward while the other stays down
- Fibers laying in different directions near the split
- Repeated separation after a prior repair
- Loose infill collecting directly along the seam
If the seam is near an area with movement underfoot, don't assume glue alone will solve it.
Press down with your hand and walk across the area slowly. If you feel a hollow spot, bounce, or shifting base, the seam may only be showing you where the deeper problem is.
Wrinkles and low spots usually start below the turf
DIY repairs often encounter difficulties. A wrinkle isn't always a loose carpet problem. A sunken area isn't always just missing infill.
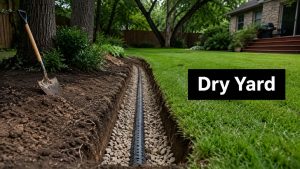
Persistent wrinkling or settling that comes back after a fix often indicates sub-base failure rather than a turf-only issue, as discussed in this guide on seam fixing and recurring base-related problems. In Austin, expansive clay soils make that distinction even more important. If the ground moves, the turf above it tells on it.
If you're unsure what sits under the grass or why one area keeps shifting, it helps to understand the role of the foundation. This overview of synthetic grass base material gives a useful picture of why some repairs hold and others fail fast.
A quick field check before you decide
Use this short test before choosing DIY or professional help:
| What you see | What it often means | First response |
|---|---|---|
| Small melted or cut spot | Cosmetic surface damage | Consider a patch repair |
| Edge lifting near border | Attachment issue or traffic stress | Inspect fasteners and edge support |
| Seam opening in middle of lawn | Bond failure or movement below | Investigate before gluing |
| Repeated wrinkle or dip | Base settlement or water movement | Stop cosmetic repair and reassess |
| Damp, smelly patch in pet area | Drainage or infill contamination | Clean, inspect, then decide on replacement section |
Gathering Your Synthetic Turf Repair Toolkit
Good repair work starts before the first cut. Homeowners usually get into trouble here, not because they lack effort, but because they use the wrong materials. A generic construction adhesive, a dull knife, or random infill from a leftover bag can turn a minor blemish into a permanent eyesore.
The basic DIY kit
For small repairs, you need a clean, controlled setup:
- Sharp utility knife: Clean cuts matter. Ragged cuts leave visible edges and make patch lines harder to hide.
- Replacement turf piece: The pile height, color blend, and fiber direction need to match as closely as possible.
- Seam tape: This supports the joint from below instead of asking glue to bridge a gap unsupported.
- Turf-specific adhesive: Not all adhesives tolerate outdoor heat and moisture the same way.
- Stiff brush or power broom alternative: You need to lift fibers before and after the repair.
- Matching infill: The repaired area won't blend if the surrounding infill level and type are different.
- Weights: Pavers, sandbags, or other flat weight help hold the repair while adhesive cures.
- Gloves and rags: Turf adhesive is messy, and cleanup gets harder once it starts setting.
What pros bring that DIY kits usually don't
A professional setup isn't just "more tools." It's better control.
Pros usually work with cleaner patch geometry, more consistent seam support, and materials chosen to match the actual turf system already installed. That includes compatible adhesive, the right tape width, infill that behaves like the surrounding field or lawn, and grooming tools that blend the repair instead of flattening it.
A professional also checks what caused the damage in the first place. If a seam opened because the panels were stressed, or a low spot formed because the base settled, the visible repair is only one part of the job.
Cheap adhesive is one of the most expensive mistakes in turf repair. It can leave a hard edge, fail in heat, or release when moisture gets underneath.
Material matching matters more than homeowners expect
The patch itself is only part of the visual match. The repair also has to match:
- Fiber direction
- Face weight and density
- Infill depth
- Color tone after sun exposure
- How the surrounding turf stands up after brushing
If the existing lawn has weathered in the Austin sun, a brand-new patch can look darker or shinier even when it's technically the same style. That's one reason repairs near the center of the yard are harder to hide than repairs along an edge or in a less visible corner.
If you're already gathering supplies for a repair, it's worth comparing your materials against how the turf should have been assembled in the first place. This guide on how to install artificial turf helps explain why seam support, base prep, and infill consistency matter so much during repairs too.
Your Step-by-Step Guide to Common DIY Repairs
Some synthetic turf repair jobs are reasonable for a careful homeowner. Small burn spots, isolated cuts, and a short section of lifting edge can often be fixed at home if the turf around the area is stable.
The key word is careful. Turf repair rewards patience and punishes shortcuts.

Repairing a small burn or cut patch
If the damaged area is localized and the base feels firm, use this workflow.
Clean the area first. Remove debris, loose fibers, and infill from the repair zone. You need to see the exact limits of the damage, not the dirty version of it.
Cut the damaged section cleanly. Follow existing stitch lines where possible. Straight, deliberate cuts are easier to hide than jagged ones.
Prepare a matching patch. Cut the donor piece to the same shape as the opening. Before you install it, check the grain direction. If the fibers lean the wrong way, the patch will always catch your eye.
Dry-fit before gluing. Set the patch in place without adhesive. Make sure the edges meet cleanly and don't overlap or leave gaps.
Install support below the joint. Place seam tape under the edges so both the existing turf and the patch are supported.
Apply turf adhesive carefully. Keep adhesive controlled and even. Too much squeezes upward into the fibers and creates a shiny, stiff scar.
Set the patch and press it flat. Pull fibers away from the glue line so they don't get trapped.
Weight the repair and leave it alone. For a durable seam repair, the standard process is to cut the damaged section, center seam tape under both edges, apply a turf-specific adhesive, then weight the area for at least 24 hours before adding infill and grooming, according to this DIY artificial grass repair guide.
Add infill and brush to blend. Once cured, restore infill gradually and brush the fibers so the patch sits like the surrounding lawn.
Re-gluing a short lifted seam or edge
This is one of the most common homeowner repairs, and one of the easiest to botch.
A seam or edge repair works best when the turf hasn't stretched and the underlying area is dry and stable. If dirt, old glue, and loose infill stay trapped below, the new bond won't last.
Use this sequence:
- Lift only what you need to lift. Don't peel back more turf than necessary.
- Clear out contamination. Remove infill, dust, old adhesive chunks, and any damp material.
- Check alignment before bonding. If the two edges no longer meet naturally, something is pulling or shifting below.
- Set seam tape under both sides. Unsupported glue joints are weak.
- Press, align, and weight evenly. A repair that cures with one side high or one side twisted will remain visible.
If the seam wants to spring apart the moment you let go, stop. That's usually tension, movement below, or both. More glue won't solve that.
Addressing minor infill loss or compaction
Not every rough-looking area needs cutting and adhesive. Sometimes the turf fibers are intact, but the infill has shifted or compacted.
You can often improve these spots by:
- Brushing against the grain to lift matted fibers
- Adding compatible infill slowly instead of dumping it in one pile
- Working the material in evenly so the area doesn't feel spongy or look raised
- Checking neighboring zones to make sure the transition is gradual
This works well in play lanes, pet paths, and places where patio traffic always enters the yard. It does not work when the area feels hollow, dips underfoot, or stays wet after the rest of the lawn dries.
The two biggest DIY mistakes
Homeowners usually regret one of these:
- They rush the cure time. Walking on a seam or patch too early weakens the repair before it has a chance to set.
- They focus on appearance only. If the patch looks centered but the base is unstable, the repair may still fail.
For small fixes, DIY can absolutely make sense. Just don't confuse "small visible damage" with "simple cause."
When to Put Down the Tools and Call for Backup
The smartest repair decision isn't always the cheapest one today. It's the one that avoids doing the same repair twice and paying for the visible mistake in between.
Some turf problems look patchable but aren't. If the issue involves movement, drainage, broad seam failure, or anything returning after a prior fix, professional help usually protects the lawn better than another round of adhesive and hope.
Red flags that usually need a pro
Call for help when you notice any of these:
- Wrinkles that come back after smoothing
- A low spot that keeps returning under foot traffic
- A seam splitting through the middle of the lawn
- Water sitting in or around the repaired area
- Damage tied to irrigation, electrical, or underground access
- Pet-area repairs where odor and moisture are part of the problem
- A repair that could affect warranty coverage
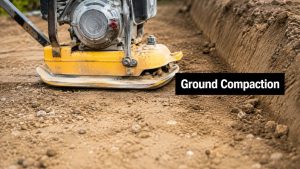
Base-related repairs are where training really matters. Practical installation guidance also points out that settling areas need the base exposed, cleaned out, and rebuilt in compacted 1-inch lifts, and that turf is typically secured with spikes or nails at roughly 4 to 6 inches on center at edges and seams. The same guidance notes commonly cited infill ranges of about 4 to 5 kg per square meter in one DIY source and 2 to 3.5 lb per square foot in another, which shows how important correct system matching is during a repair. That workflow is summarized in this video on repairing low spots and securing synthetic turf properly.
DIY vs. Professional Turf Repair Decision Matrix
| Damage Type | DIY Approach (Risk/Outcome) | Professional Approach (Benefit/Outcome) |
|---|---|---|
| Small isolated burn or cut | Often workable if you can match turf direction and keep glue controlled | Better visual blending and cleaner seam support |
| Short lifted edge near a border | Possible, but easy to leave a stiff glue line or poor alignment | Stronger attachment and less visible finish |
| Seam opening across a main lawn area | High risk of repeat failure if tension or movement exists | Better diagnosis of bond failure versus base issue |
| Recurring wrinkle or sunken section | Cosmetic fix often fails because the turf isn't the root problem | Base can be lifted, corrected, compacted, and re-secured properly |
| Standing water near a damaged area | Surface patch may trap more moisture and worsen the issue | Drainage path and repair materials can be evaluated together |
| Pet area with odor after damage | Patch may look better but still hold moisture or smell | Repair can be planned around drainage and hygiene performance |
| Underground utility access | Cutting without a reinstallation plan can distort the lawn | Turf can be pulled back and reinstalled with proper re-compaction |
When "good enough" isn't good enough
A small visual flaw near the edge of a side yard is one thing. A failed repair in the middle of the main lawn is another. The more visible the location, the more precision matters.
This is also where local labor experience counts. In Austin, some turf failures are really soil and water problems wearing a turf costume. If the same area keeps shifting, don't keep treating it like a seam-only issue. If you want experienced local help, start with a company that regularly handles these systems, not just general grounds crews. This page on synthetic turf contractors near me is a useful place to compare what specialized service should include.
The repair that costs the least upfront is often the one that leaves the clearest line, the weakest bond, and the fastest return visit.
Austin-Specific Tips for a Long-Lasting Lawn
Austin isn't gentle on exterior materials. Turf repairs here have to survive high heat, hard sun, sudden rain, and soil movement. A repair that looks fine on day one can start telegraphing through the lawn fast if the patch, adhesive, infill, or base work weren't chosen for local conditions.

Heat and sun expose bad material choices
In Central Texas, color mismatch gets worse over time. A patch may look close enough on install day, then stand out once the sun hits it week after week. That's why fiber quality and UV stability matter during repair, not just original installation.
Adhesive choice matters too. If the glue line hardens poorly or loses bond during heat cycles, you end up with a seam that's visible before it fully fails.
Drainage matters after the repair, not just before it
A lot of repair guides stop at "the patch is in." That's not enough for Austin yards, especially pet spaces and low-lying areas near patios. The repaired section still has to move water the same way the rest of the lawn does.
Most repair advice focuses on appearance, but one of the key performance questions is whether the patch, backing, and adhesive preserve the original drainage path well enough to prevent odor and moisture buildup, especially in pet areas, as explained in this discussion of synthetic turf repairs and drainage concerns.
Three local habits that help repairs last
- Brush traffic lanes regularly: Fibers that stay matted hide wear until the backing starts taking abuse.
- Watch for post-storm changes: If a repaired area suddenly feels soft or holds moisture, check it early.
- Treat pet zones like performance areas: Cleanliness, drainage, and infill condition affect repair success as much as appearance.
A repair in Austin has to do more than disappear visually. It has to stay bonded, drain correctly, and feel consistent underfoot after heat and rain cycles. That's where experienced local repair work makes a visible difference.
If your turf has a lifted seam, a low spot, a burn mark, or a repair that already failed once, Modern Yard Landscapes can inspect it and give you a clear recommendation on whether it needs a simple fix or a deeper correction. No pressure, no guesswork. Just practical help from an Austin team that understands how synthetic turf behaves in Central Texas conditions.