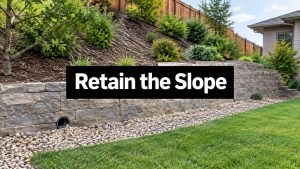

If you're looking at a slope in your yard and thinking the visible block or stone is the big decision, you're focusing on the wrong part of the wall. The face matters for appearance. The retaining wall base material decides whether that wall stays straight, drains properly, and still looks good years from now.
Most wall problems start below grade. A wall that settles, leans, bulges, or separates usually doesn't fail because the block looked wrong at the store. It fails because the base was treated like filler instead of part of the structure. In Austin, that mistake gets expensive fast. Clay movement, runoff, and hard rain expose weak work in a hurry.
The Unseen Foundation of a Lasting Retaining Wall
A retaining wall base is the wall's foundation. That's not a metaphor contractors use to sound technical. It's the truth. The base has to do three jobs at the same time: create a level starting plane, spread the wall's load into the ground, and help move water where it needs to go.
If the first course sits on a sloppy base, every course above it inherits that error. You can shim a paver. You can't fake a retaining wall. The first row has to start on a surface that's flat, compacted, and strong enough to resist settlement.
The base also carries weight from the wall and from the soil behind it. That load isn't static under actual conditions. Soil gets wet. Clay expands. Dry periods shrink the ground. The base has to bridge those changes and keep the wall from dropping unevenly.
Why the Base Is a Structural Element
Colorado State University doesn't describe the base as a casual leveling layer. Its guidance says retaining walls should be built on a structurally sound, compacted foundation sub-base material, and that the foundation material should extend at least one foot beyond the front and back of the wall base width. It also notes that structural walls need gravel backfill or drainage blankets and drain pipes to move water away from the wall, with compaction treated as engineered work rather than loose fill in the trench. You can review that guidance in Colorado State University's retaining wall design considerations.

That lines up with what experienced installers already know. The base isn't just there so the blocks don't sit in mud. It controls settlement and drainage from day one.
Practical rule: If someone talks about wall blocks for half an hour and barely mentions excavation, compaction, drainage stone, or drain pipe, they're talking about the least important part of the system.
What Failure Usually Looks Like
Homeowners usually notice the symptoms before they understand the cause:
- A front lean means the wall is losing support or fighting trapped water.
- Stepped cracks or gaps often point to uneven settlement below the first course.
- Bulging sections usually show that water and soil pressure are overpowering what the base and drainage should've handled.
- Sunken areas at one end suggest the trench bottom or compacted base wasn't consistent.
A lot of good outdoor construction starts with what nobody sees. That's especially true with retaining walls. If you want a deeper look at how drainage and foundation prep affect outdoor builds, this guide to hardscapes, drainage, and site foundation work is worth reading.
A Head-to-Head Comparison of Base Materials
Walk into a yard supply store and you'll hear broad advice like "use gravel" or "just get base rock." That isn't enough. Different materials behave very differently once you compact them, load them, and ask them to drain.
For most segmental retaining walls, the professional standard is a well-graded, compactable aggregate. Allan Block's commercial specifications describe base material for modular walls as aggregate sized about 0.25 to 1.5 inches with no more than 10% passing the #200 sieve, compacted to create a stiff bearing platform. You can see those specifications in Allan Block's commercial installation product specifications.
What Works Best and What Doesn't
Angular crushed stone or a well-graded base aggregate usually performs best because the particles lock together under compaction. That gives you two things you want under a wall: stiffness and predictable drainage.
Pea gravel is where many DIY projects go sideways. It drains, but the rounded pieces don't lock together the same way. Under load, round stone wants to move against itself. That's fine for decorative surfacing. It isn't what you want under the first course of a retaining wall.
Sand is another common bad idea. It has uses in hardscape work, but under a retaining wall it can hold water, shift, and wash where water concentrates. Native soil alone is worse. If the trench bottom becomes the "base material," the wall is already compromised.
Crushed concrete can be a workable option in the right situation if it's clean, consistent, and compactable. The problem isn't that recycled material is automatically bad. The problem is quality control. If the product has too many fines, inconsistent sizing, or contamination, it won't behave like a true retaining wall base.
Retaining Wall Base Material Comparison
| Material | Best For | Pros | Cons (Why We're Cautious) |
|---|---|---|---|
| Well-graded angular crushed stone | Most segmental retaining walls | Compacts well, locks together, supports alignment, drains predictably | Must be installed and compacted correctly to perform |
| Open-graded stone | Sites designed for free drainage | Moves water efficiently | Can be the wrong choice if the drainage path isn't properly planned |
| Pea gravel | Decorative areas, not structural wall bases | Easy to spread, drains | Rounded shape reduces interlock and stability |
| Crushed concrete | Select projects with verified clean material | Reuse option, can compact well | Quality varies too much from load to load |
| Sand | Bedding in other applications, not wall foundations | Readily available | Can wash, retain moisture, and shift under wall loads |
| Native soil | Temporary or informal uses only | Already on site | Poor drainage, inconsistent support, unreliable compaction |
The best retaining wall base material isn't just "rock." It's rock with the right gradation, the right shape, and the right compaction behavior for the site.
If you've compared aggregates for other outdoor projects, you'll notice some overlap in language. This breakdown of synthetic grass base material is a good reminder that not all gravel products perform the same just because they look similar in a pile.
Getting the Specs Right Depth Compaction and Size
A lot of wall failures start before the first block is set. The crew digs a trench, dumps in gravel, gives it a few passes, and starts stacking. It looks fine that day. Then an Austin summer dries the clay, a hard rain follows, and the wall begins to settle out of level because the base system was never built to handle movement under it.
Material still matters, but the bigger issue is whether the base is built as a bearing system. That means the trench is cut to consistent grade, unsuitable soil is removed, the aggregate is placed in controlled lifts, and each lift is compacted before the next one goes in. On Austin sites, that discipline is what separates a wall that stays straight from one that starts showing a stair-step crack line and a lean.

Size Matters, but Gradation and Compaction Matter More
Homeowners often ask for a single gravel size. On the job, that is the wrong first question.
A central question is whether the base aggregate has enough size range and enough angularity to compact into a stable platform. A wall base needs stone that locks together under a plate compactor and stays put under load. Rounded material tends to shift. Uniform stone can drain well but may not build the same firm, level bearing surface under the first course unless the whole wall system is designed around it.
You can feel the difference during installation. Good base stone tightens up. Poor material keeps moving under the plate, and the first course rocks while you try to level block after block.
Depth Is Site-Specific. Compaction Is Not Optional.
Base depth depends on wall height, soil conditions, slope, and what the wall is supporting. In practice, many retaining walls use a base thick enough to spread the load, allow accurate leveling, and provide some embedment for the first course. Taller walls, soft subgrade, and problematic clay usually call for more excavation and a better-prepared foundation, not wishful thinking.
Compaction has less wiggle room. Stone should be placed in thin lifts and compacted layer by layer. Dumping the full base thickness in one shot leaves loose pockets buried underneath a surface that only looks firm. That is a common shortcut, and it shows up later as settlement, rotation, and blocks that refuse to stay aligned.
Three field checks matter every time:
- Subgrade condition: Build on undisturbed native soil or properly compacted structural fill, not loose spoil or organic material.
- Lift thickness: Place aggregate in thin, manageable lifts so the compactor can densify the full layer.
- Level tolerance: Get the top of base flat and consistent, because the first course sets the line for everything above it.
A hand tamper has its place for corners and tight spots. It does not replace a plate compactor on a retaining wall base of any real size.
On many Austin projects, the hidden problem is moisture variation in the clay beside and beneath the trench. If water is allowed to collect near the wall, the subgrade can soften, swell, or shrink with weather swings. That is why I treat the base, compaction, separation fabric, and drainage path as one assembly. If the site also has runoff problems, solve those at the property level with yard drainage solutions that control water before it reaches the wall.
The expensive mistakes are rarely dramatic during install. They show up months later, after the wall has already been paid for.
Mastering Drainage a System Approach
Water is what turns a decent-looking wall into a failing wall. Soil alone pushes on the back of a retaining wall. Wet soil pushes harder, and trapped water adds pressure the wall was never meant to absorb casually.
That's why the best retaining wall base material is only one part of the answer. The full answer lies in a system: base aggregate, drain pipe, drainage backfill, geotextile separation, and a discharge path that functions on that property.

How the Pieces Work Together
A proper wall doesn't try to hold water back. It collects water, moves it down through permeable material, funnels it toward a perforated drain pipe, and sends it to a safe outlet.
Geotextile fabric matters because soil fines migrate. Without separation, fine particles work their way into the stone over time and reduce drainage performance. The pipe matters because water needs a deliberate path out, not a vague hope that it'll disappear into the soil. The base matters because it supports the wall and contributes to that drainage path under the first course.
Colorado State University also notes that structural walls need gravel backfill or drainage blankets and drain pipes to move water away from the wall, which reinforces that this isn't optional detailing. It's part of the wall's function.
Open Graded or Dense Graded
Many online guides often oversimplify the topic. There isn't one universal answer.
Contractor guidance shows the choice between open-graded and dense-graded base often depends on drainage direction and discharge conditions. An open-graded base works when water can drain away to a lower area. A dense-graded base is often preferred when the slope drops toward the wall and the drain needs to daylight through the wall's face. That trade-off is discussed in this contractor video on open-graded versus dense-graded wall base choices.
Some walls need more drainage capacity. Some need a tighter, more compacted bearing layer tied to a specific outlet plan. The site decides.
That nuance matters in real yards. The same "gravel base" recommendation can produce very different results depending on whether the property sheds water away from the wall or traps it behind the wall. If yard runoff has been a problem on your property, this guide to drainage solutions for yards helps connect the wall discussion to the broader site drainage picture.
The Austin Factor Why Our Soil and Weather Demand a Better Wall
Austin isn't forgiving to lazy retaining wall work. A generic wall detail that might survive in a mild, stable soil environment can struggle here because local conditions keep changing under and around the structure.
The biggest local issue is movement. Clay soils expand when they take on moisture and shrink when they dry out. That means the support under a wall isn't always behaving the same way month to month. A weak base doesn't just settle once. It gets stressed repeatedly.

Why Texas Guidance Matters
The Texas Department of Transportation treats foundation reliability as a serious design issue. Its retaining wall guidance states that soil pressure on walls increases downward at about 40 psf per foot of depth, and it recommends a safety factor of 2.0 in bearing capacity. That guidance makes the point clearly: the base has to distribute load reliably, especially on Texas soils. You can review that in TxDOT's retaining wall geotechnical guidance.
Those aren't abstract engineering values. They translate directly into field reality. As wall height increases or soils get wetter, the demand on the foundation system rises. If the base isn't prepared like a structural layer, small installation errors stop being small.
What Austin Weather Does to a Weak Wall
Austin weather adds another stress cycle. Dry stretches harden and shrink the ground. Then a heavy rain hits and saturates the soil behind the wall. That combination creates movement below and pressure behind.
A weak installation usually shows itself in one of these ways:
- Post-rain leaning: Water wasn't moved out of the system quickly enough.
- Seasonal settlement: Clay movement found weak spots under the base.
- Toe washout or erosion: Surface water wasn't controlled around the wall.
- Separated caps or uneven courses: The wall is moving at different rates along its length.
Local experience matters because site grading, clay behavior, and runoff patterns vary from yard to yard. A wall that works on one lot can be the wrong detail for the next one down the street.
The Professional Installation Process Step by Step
A retaining wall usually fails long before anyone sees a crack or a lean. It starts on day one, when the trench is a little uneven, the clay underneath stays loose, or the crew dumps base stone in one thick layer and calls it good. In Austin, that shortcut shows up later after a hard rain, a dry spell, or both.
Professional installation is a sequence, not a pile of materials. The base stone matters. So do compaction, drainage stone, geotextile fabric, and the way the first course is buried and leveled. If one part is weak, the whole wall pays for it.
What the Process Looks Like on Site
The work starts with excavation to the right width and depth for the wall system and site conditions. The trench bottom has to be uniform. If the trench rises and falls, the base thickness changes, and that creates weak spots that settle at different rates.
Next comes subgrade preparation. On Austin clay, this step separates a wall that lasts from one that starts moving in a season or two. Crews need to compact the native soil before any aggregate goes in. Base stone cannot fix soft, pumped-up, or disturbed soil underneath it.
Then the system starts taking shape. Separation fabric goes where soil migration is a risk. Base aggregate is installed in thin lifts and compacted between lifts. Drainage components are placed so water has a planned path out of the wall instead of building pressure behind it.
That is the part many property owners never see.
Where Good Installers Separate Themselves
Experienced crews keep checking grade, level, and compaction as they build. They do not wait until the block is stacked to find out the base is off. Small errors at the trench become bigger errors at the top of the wall, especially on long runs or sloped sites.
A solid installation sequence usually looks like this:
- Excavate the trench to the proper dimensions for the wall and the reinforced base area.
- Compact the subgrade so the wall is bearing on firm, prepared soil.
- Place geotextile fabric where needed to keep clay from contaminating the stone layers.
- Install base material in controlled lifts so it can be compacted.
- Compact and re-check each lift instead of guessing from appearance.
- Set the first course dead level and bury it correctly because every course above follows that line.
- Install drainage stone and outlet details as part of the build rather than treating drainage like an add-on.
The hidden work is the structural work. Laying block is the visible part. The base system below it decides whether that wall stays straight.
For a general overview of how to build retaining walls, you can review the standard sequence, but field conditions change the details. That is especially true on steep or irregular lots. Teams that handle sloping block construction services treat excavation, drainage, and load paths as one problem, which is the right approach for retaining walls on challenging grades.
Is This a DIY Job or Time to Call the Pros
Some retaining walls are manageable for a skilled homeowner. Many aren't. The dividing line isn't confidence. It's risk.
A low decorative wall in a simple location is one thing. A wall on a slope, in moving clay, or in an area with drainage issues is a structural feature. Once that wall supports grade, protects a patio, or controls runoff, failure isn't just cosmetic.
You should strongly consider professional help when any of these are true:
- The wall is taller or carries more load than a basic garden edge
- The yard has obvious drainage problems or runoff concentration
- The wall sits on a meaningful slope
- The wall supports a driveway, patio, fence line, or other important feature
- You want the base, drainage, and layout done once instead of rebuilt later
It's also smart to look at how other specialists approach difficult grades. For example, teams that focus on sloping block construction services treat slope conditions as a design and construction problem, not just a labor problem. That's the right mindset for any serious retaining wall project.
The primary choice isn't DIY versus pro. It's whether you're comfortable gambling on the hidden part of the wall. The visible face can look fine for a while. The base tells the truth later.
If you're planning a retaining wall in Austin and want it built for local soil, drainage, and long-term stability, talk with Modern Yard Landscapes. They handle the site prep, drainage planning, and retaining wall installation details that keep walls straight, functional, and low-maintenance. Schedule an appointment and get a professional assessment before a small grade problem turns into a costly rebuild.