Water is probably showing up where it shouldn't. Maybe it's pooling next to the patio after a hard Austin rain. Maybe the lawn stays soggy long after the rest of the block dries out. Maybe you've started noticing damp soil along the foundation, mulch washing out, or a low strip in the yard that never seems usable.
That's usually when homeowners start looking up drain tile system installation and find a lot of oversimplified advice. Dig a trench. Drop in pipe. Cover it up. Problem solved.
Real drainage work isn't that forgiving. A drain tile system can protect a yard and foundation for the long haul, but only when the layout, slope, gravel, outlet, and surrounding terrain all work together. In Austin, clay-heavy soil makes that even less forgiving. Water doesn't move through dense clay the way it does through sandy soil, so small installation mistakes turn into big performance issues.
Assessing Your Drainage Needs and Planning Your Project
A good drainage job starts with diagnosis, not excavation. If you don't identify where the water comes from, where it wants to go, and what's blocking it, you can spend good money on the wrong fix.

Start with the pattern, not the puddle
One puddle doesn't always mean one problem. Sometimes the low spot is only the symptom. The underlying issue might be roof runoff, poor grading, a blocked discharge route, or water collecting against the foundation and moving sideways through the soil.
Walk the property during rain if you can. If that's not possible, inspect right after a storm and look for:
- Foundation trouble spots: damp soil against the house, splashback marks, staining on masonry, or mulch pushed away by runoff
- Surface flow paths: worn channels in the yard, exposed roots, or gravel washed out of beds
- Persistent saturation: lawn sections that stay soft, smell musty, or grow differently from the surrounding area
- Hardscape clues: water sitting along patios, against walkways, or at the base of retaining walls
If the problem is around the house, it's worth taking seriously. Data from the American Housing Survey cited by InterNACHI shows that approximately 11.7 million homes in the U.S. experience water leakage from outside the structure, with 2.8 million facing issues in basements and crawlspaces according to this foundation drainage overview.
Check what the soil and grade are doing
In the Austin area, clay often changes the whole strategy. Clay can hold water, move slowly, and expand when wet. That means a drainage plan that looks fine on paper can still underperform if the grade is marginal or the outlet is weak.
A few practical checks help before anyone digs:
- Watch roof discharge points. Downspouts that dump near the house can overload one area fast.
- Identify the high point and low point. A drain line needs a destination, not just a trench.
- Look at adjacent features. Fences, patios, edging, tree roots, and walls can trap or redirect water.
- Decide whether the issue is surface water, subsurface water, or both. That affects pipe depth and system design.
Practical rule: If water keeps returning to the same place after each storm, don't just treat the surface. Figure out what upstream condition keeps feeding it.
For broader grading context, this guide on yard erosion prevention techniques is useful because erosion and drainage failures usually show up together.
Handle safety and code issues before layout begins
This part gets skipped in too many DIY projects. It shouldn't.
Before trenching, request utility locating through 811. Gas, electric, communications, irrigation, and private lines can all be in the work zone. A damaged line can shut down the project fast and create real risk.
If the system ties into foundation drainage or involves structural areas, code matters. The same InterNACHI overview notes that IRC Section R405 requires drainage tile or perforated pipe to rest on not less than 2 inches of washed gravel or crushed rock, be surrounded by appropriately sized material, and be covered with not less than 6 inches of the same material. Those aren't decorative details. They affect performance and longevity.
If your drainage issue includes standing water, washout, or foundation moisture, it helps to compare options before choosing a system. This breakdown of how to fix yard drainage gives a good overview of where drain tile fits and where it doesn't.
The Core Installation Process Unpacked
Once the plan is right, execution becomes everything. Most drain tile failures don't come from the pipe itself. They come from trench shape, uneven bedding, poor slope, clogged aggregate, or a discharge point that was never thought through.

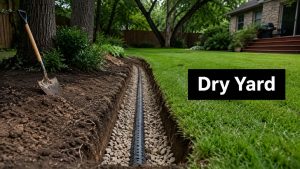
Trenching has to be precise
A drain line can't be installed by eye and expected to work for years. The trench has to hold a consistent grade from start to finish, and the bottom has to be smooth enough that the pipe doesn't belly in one section and rise in the next.
The benchmark that matters most is slope. The core requirement for success is a minimum 1% slope, or 1 foot of drop per 100 feet of run, and best practices also call for drain tile to sit on a 2 to 3 inch gravel bed, at or below the foundation footing, with trenches at least 16 inches wide to accommodate the pipe and gravel surround, as outlined in this drain tile installation guide.
That sounds simple until you're trenching around roots, existing irrigation, tight side yards, and changing elevations.
Here's what matters most on the ground:
- Straight trench bottom: bumps and dips create standing water inside the system
- Correct depth: too shallow and water bypasses the pipe, too deep and you may conflict with footing conditions or outlet elevation
- Stable sidewalls: collapsed trench edges contaminate the gravel envelope with soil
- Verified grade: string line, line level, and laser transit all beat guessing
A drain line with the right pipe and wrong slope is still a failed system.
Pipe orientation and gravel placement matter more than most guides admit
A lot of homeowners focus on which perforated pipe to buy. That matters, but not as much as how the pipe is bedded and surrounded.
The pipe needs a clean gravel base so water can move to the line instead of pressing directly against mud. Then the gravel has to continue around and over the pipe so the system can collect water along the run, not just at one point.
The perforations also need proper orientation. In most exterior drain tile applications, the holes face downward or to the side so groundwater can enter while the pipe remains supported on the gravel bed. Put the pipe in upside down, or bury it in native clay without enough clean stone around it, and performance drops fast.
Filter fabric is where many installs quietly go wrong
Good filter fabric keeps fine soil from migrating into the gravel and clogging the system over time. Bad fabric selection, or sloppy installation, creates its own problem. If the fabric tears during backfill or gets folded in a way that channels fines into the trench, the pipe may flow well at first and then lose capacity.
That's one reason many basic tutorials leave readers with false confidence. A resource like the Bulls Eye Repair French drain tutorial can be helpful for understanding the general sequence, but a professional install goes further by checking fabric overlap, gravel cleanliness, trench uniformity, and outlet protection before the trench ever gets closed.
The outlet decides whether the whole system can breathe
Every drain tile system needs a legitimate place to send water. Many residential plans break down at this stage. Homeowners focus on collecting water but not on discharging it.
A proper outlet might be daylight on a lower grade, a tied-in drainage route where allowed, or another engineered collection point based on site conditions. What doesn't work is sending water to a dead end, a flat area, or a place that creates a new problem for a patio, fence line, or neighbor.
A practical field checklist looks like this:
| Installation checkpoint | What to verify | Why it matters |
|---|---|---|
| Trench grade | Continuous fall from inlet area to outlet | Prevents pipe bellies and standing water |
| Gravel bed | Even support under the full pipe run | Keeps the pipe stable and open |
| Pipe placement | Correct depth and perforation orientation | Improves water capture |
| Fabric wrap | Complete separation between soil and aggregate | Reduces clogging risk |
| Outlet condition | Clear, protected, and lower than the line | Allows the system to drain fully |
The difference between a short-term fix and a long-term system is usually boring, technical, repetitive quality control. That's exactly why it matters.
Backfilling Testing and Finishing Touches
The pipe is in. The gravel is placed. That's not the end of the job. It's the point where a careful crew protects the work that just happened.
A rushed finish can undo a solid installation. Trenches settle. Surface grades get disturbed. Fine soil gets pushed where it doesn't belong. Then the homeowner sees a trench line months later and assumes the system failed, when the problem was the closeout.
Backfill in layers, not in a hurry
The first priority is protecting the gravel envelope and pipe location while closing the trench. Don't drop heavy clumps of wet soil directly onto the system. Don't mix topsoil into the stone layer. Don't leave voids that later collapse.
The top of the trench should match the surrounding grade in a way that sheds water naturally. In lawn areas, that means restoring a smooth finish, not leaving a shallow depression that collects runoff right above the new drain.
Field note: The last few inches of finish grading decide whether the yard looks repaired or looks patched.
Before final surface restoration, run water through the system. This isn't complicated, but it is important. Introduce water at the collection side, confirm it moves toward discharge, and check that no section holds water unexpectedly. If the line slows down, burps air oddly, or fails to discharge cleanly, fix it before sod, turf base, or decorative gravel covers the evidence.
Finish the surface for long-term usability

The surface treatment depends on how the yard is used. Sod needs stable grading and good soil contact. Seeded areas need protection from washout. Bed areas may need edging adjustments so runoff doesn't re-enter the trench zone. If the next phase includes hardscape or turf, that transition has to be planned before the final surface is closed.
This is also where the investment mindset matters. Agricultural drainage research offers a useful lens here. Tile drainage systems are described as long-term infrastructure designed to function for 50 to 100 years, with investment decisions hinging on whether the improved yield justifies the upfront cost in this University of Wisconsin Extension drainage reference. In a residential yard, the “yield” isn't crop output. It's protection, usability, and preserving the value of the property and structure.
A proper finish usually includes these checks:
- Surface grade restored: water should move away from structures and not settle over the trench
- Outlet visible and serviceable: you need to be able to inspect it after storms
- Material transitions clean: sod, mulch, gravel, and paving edges should not funnel debris into the system
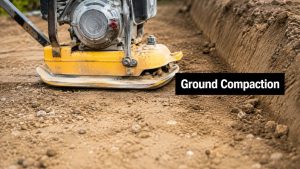
- Settlement allowance considered: disturbed soil often needs careful compaction and final tuning
A clean finish isn't cosmetic. It's part of how the system keeps working after the crew leaves.
Integrating Drainage with Your Modern Landscape
Many online guides stop being useful at this stage. They treat drain tile as if it lives by itself in an open yard with no retaining wall, no artificial turf, no patio edge, and no decorative grading. That's not how most Austin properties are built.

A review of installation guides found zero guidance on integrating exterior drain tile with artificial turf, retaining walls, or hardscaping, and identified a blind spot where improper sequencing and material incompatibility can cause 50%+ cost overruns and system failures in this analysis of the gap. That tracks with what experienced installers see in the field. The drain itself may be fine. The surrounding site construction is what compromises it.
Artificial turf changes the sequencing
If a property is getting artificial turf, the drain tile layout has to be decided before the turf base is finalized. Otherwise, someone ends up cutting through finished base work, disturbing compaction, and mixing materials that should stay separate.
Fine base material used under turf can migrate into drainage stone if the separation layers aren't handled correctly. Once that happens, water movement slows and the base can hold moisture where it shouldn't.
Good sequencing usually means:
- Drain route first: establish collection and discharge before turf base elevations are locked in
- Material separation: keep drainage aggregate and turf base distinct with proper fabric strategy
- Elevation coordination: finished turf height must still work with adjacent patio and edging levels
Retaining walls need drainage that protects the wall, not just the yard
A retaining wall without proper drainage is carrying more than soil. It's carrying water pressure. Drain tile placed poorly near a wall can undermine the footing or fail to relieve pressure where it's needed.
What works is a coordinated wall-and-drain approach. The wall base, backfill stone, fabric placement, and outlet path all need to support each other. What doesn't work is adding a random perforated line after the wall is already built and hoping it solves trapped moisture.
Walls fail for drainage reasons more often than homeowners realize. The failure may show up as movement, staining, bulging, or erosion around the ends.
Patios and hardscape affect how water enters the system
Hardscape changes runoff speed and direction. A sloped patio can help a drain system by feeding water toward a collection zone, or hurt it by concentrating flow into one overloaded edge.
That's why integrated planning matters more than product selection. A beautiful paver patio with poor edge drainage can push water toward the house. A drain tile line installed without considering future hardscape can end up too high, too shallow, or inaccessible for maintenance.
For homeowners comparing options beyond a basic trench-and-pipe approach, this overview of yard drainage solutions is useful because it frames drainage as part of the full property environment rather than a standalone fix.
The best projects don't treat drainage, turf, walls, and hardscape as separate trades working in conflict. They treat them as one coordinated build. That's the difference between a yard that stays dry and usable, and a yard that needs part of it torn out later to fix what should have been planned upfront.
The Real Cost of Drain Tile Installation
Drain tile work is rarely cheap, and it shouldn't be evaluated on pipe price alone. Homeowners often compare a bundle of perforated pipe and some gravel to a contractor quote and assume the difference is just labor markup. It isn't.
The cost includes diagnosis, excavation, spoil handling, grade control, material delivery, outlet planning, restoration, and the risk of getting one technical detail wrong. In drainage, one wrong detail can mean redoing most of the work.
Why the cheapest number is often misleading
Agricultural drainage offers the clearest framework for thinking about cost. The same Wisconsin Extension reference notes that tile drainage is a substantial infrastructure investment, with typical agricultural installation costs around $800 per acre, systems designed to function for 50 to 100 years, and payback in suitable fields potentially occurring in 3 to 10 years when yield gains justify the expense, as shown in this drainage economics summary. The useful takeaway for a homeowner isn't the farm math. It's the principle. Drainage has to be judged as long-term infrastructure, not a quick patch.
That's why the lowest bid can become the highest eventual cost if the line has poor slope, no real testing, or a weak outlet.
For homeowners comparing drainage to other exterior water-management work, this breakdown of gutter pricing can help frame how collection and conveyance systems each affect the overall water plan.
DIY vs professional installation cost factors
| Expense Item | DIY Estimate | Professional Service (Included) | Notes |
|---|---|---|---|
| Site assessment | Time and guesswork | Included | Misdiagnosis is the most expensive DIY mistake |
| Utility locating coordination | Homeowner handles | Included or coordinated | Must happen before trenching |
| Excavation tools | Rental cost | Included | Trencher access is not always feasible in tight yards |
| Laser or grade verification tools | Rental or omitted | Included | Grade control is a major failure point |
| Pipe, gravel, fabric | Purchased separately | Included | Material quality and compatibility matter |
| Delivery and hauling | Often extra | Included or quoted | Gravel and spoil movement adds up fast |
| Soil disposal | Often overlooked | Included or planned | Wet spoil is bulky and heavy |
| Surface restoration | Additional labor and materials | Included | Sod, bed edges, and finish grading affect appearance |
| Rework if the system underperforms | Full added cost | Reduced risk | This is where DIY savings often disappear |
What a professional quote is really buying
A serious quote should account for more than trenching. It should reflect how the installer handles drainage as a system.
Look for these items in the scope:
- Grade verification: not “sloped by eye,” but measured and checked
- Material sequencing: gravel, fabric, pipe, and finish layers installed in the correct order
- Outlet planning: water has a clear destination that won't create another problem
- Restoration work: the trench line won't be left as a scar across the yard
- Accountability: if something isn't performing correctly, you know who owns the fix
A DIY approach can make sense for a simple, open-area drainage swale or a short run with excellent fall. A drain tile installation near a foundation, wall, patio, or future turf project is different. The margin for error gets much smaller, and the cost of correction gets much larger.
Your Top Drain Tile Questions Answered
Can a drain tile system fix every wet yard problem
No. It fixes the problems it's designed for. If the main issue is poor surface grading, roof runoff dumping in the wrong place, or hardscape that traps water, a buried drain line by itself may only mask the symptom. Good drainage work starts by matching the system to the water source.
How do you know if the line has enough slope
You don't know by looking at it. That's the short answer. Proper slope has to be measured during installation and rechecked before backfill closes the trench. In a tight side yard or a flat backyard, even a small grading error can leave water sitting in the pipe.
Should drain tile go in before a new landscape project
Usually yes, especially if the project includes turf, retaining walls, or hardscape. Drainage should shape the build sequence, not get squeezed in afterward. If you're planning a project in the area, working with a drainage installer in Georgetown Texas or the broader Austin market can help you coordinate those trades before one decision creates another problem.
Don't judge a drainage plan by how neat it looks on paper. Judge it by whether every part of the yard around it still works after the first heavy storm.
If water keeps collecting near your home, along a wall, or under a future turf area, it's worth having the property evaluated before the next storm tests a guess.
If you want a drainage plan that fits the way your whole yard works, schedule an appointment with Modern Yard Landscapes. Their team handles drain tile, grading, turf, retaining walls, and hardscape as one coordinated system, so you're not paying twice to fix a preventable mistake.