A lot of turf repair calls start the same way in Austin. A homeowner steps outside, sees a seam lifting near the patio, notices a melted patch by the grill, or feels a soft dip underfoot after rain. The first reaction is usually worry that the whole lawn is failing.
Most of the time, it isn't.
Artificial turf is durable, but it isn't maintenance-free. Modern synthetic turf systems can last 15 to 25 years with proper care according to ProGreen's maintenance guidance, and that same guidance makes something else clear: repair is part of normal upkeep, not a sign that you made a bad investment.
What matters is how you respond. A small issue fixed early is usually straightforward. A small issue ignored through a Texas summer can turn into visible damage, drainage trouble, odor problems, or a repair that costs more than it should.
Your Guide to Flawless Artificial Turf Repair
Artificial turf repair works best when you treat it like preserving a system, not hiding a flaw. Turf has face fibers, backing, seams, infill, edging, and a compacted base underneath. When one part starts slipping, the visible symptom is only part of the story.
That matters in Austin because our conditions are hard on outdoor surfaces. Heat stresses fibers. Sudden heavy rain exposes drainage weaknesses. Pets can turn one favorite bathroom spot into a matted, smelly area if the infill isn't handled correctly. A repair that looks fine on day one can still fail if the base is soft or the seam was glued over dirty infill.
What homeowners usually notice first
Most repair requests start with one of these:
- A lifted seam that's catching a toe or creating a visible line
- A burn mark from reflected sunlight, fireworks, a grill, or something hot set on the lawn
- A matted path where people or dogs always travel
- A low spot that feels uneven or holds water
- A pet area that still smells even after rinsing
None of those problems automatically means full replacement. It does mean you need an honest diagnosis before you reach for glue.
Practical rule: If you only fix what you can see and ignore what's happening underneath, the same area usually comes back worse.
The difference between a clean fix and a recurring problem
DIY can make sense for very small, isolated issues. If you have a short seam opening, a tiny patchable burn, or infill that needs to be redistributed, a careful homeowner can sometimes handle it well.
But turf repair goes sideways when the job calls for matching blade direction, rebuilding a settled base, or correcting pet contamination below the surface. That's where people often waste a weekend, buy the wrong materials, and still end up calling for help after the repair becomes more visible.
A good repair should do three things:
- Restore appearance
- Protect safety
- Prevent the same failure from repeating
That's how we approach artificial turf repair in the field. Not with scare tactics, and not with the old line that every problem needs a crew. Some repairs are manageable. Some aren't. The trick is knowing which is which before you cut into your lawn.
First Look Identifying Your Turf Repair Needs
Before you repair anything, walk the yard slowly and look at it like an installer would. Start at the edges, move through the center, then check the areas that get the most foot traffic, pet activity, and water runoff. Wear rarely shows up evenly.
Maintenance guidance points out that high-traffic zones take the biggest hit, including common pathways and activity-heavy areas, which is why AstroTurf's care guide highlights those zones for more frequent grooming and infill checks. That same pattern shows up in residential yards around Austin. The gate entrance, the strip beside the patio, the path from the back door to the dog run, and the space under play equipment usually tell the story first.

Read the symptom before you choose the fix
A seam problem and a base problem can look similar from a distance. Up close, they behave differently.
If the turf edge is lifting but the ground underneath feels firm, you're likely dealing with a seam or edge-bond issue. If the surface looks wrinkled, feels loose under multiple steps, or rises and falls when you walk across it, the cause is usually bigger than adhesive. That points to movement below the turf or a broader installation issue.
Use this quick field check:
- Look for line-shaped damage. Straight or slightly curved openings often mean seam trouble.
- Check for circular or sharply defined damage. That usually suggests a burn, melt, or isolated patch area.
- Step on the area. A firm surface with surface separation is different from a soft area with settling below.
- Brush the fibers by hand. If they stay flat and the infill feels depleted, the issue may be wear rather than tearing.
For a broader sense of how wear shows up over time, it's worth reviewing how artificial grass durability changes with use patterns.
The most common Austin-area repair clues
Pet damage doesn't always show up as discoloration. More often, you see matted fibers, compacted infill, and an area that stays musty even after rinsing. Dogs return to the same zone, the infill gets packed down, and odors settle deeper than the surface.
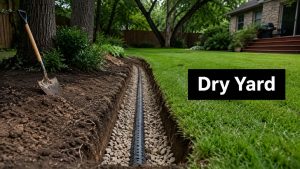
Drainage problems are also easy to miss until the next storm. Watch for spots that stay dark longer, feel squishy, or collect fine debris after rain. If water lingers in one area, the repair plan has to address more than the turf face.
A repair diagnosis should answer one question first: is the turf itself damaged, or is the turf revealing a problem below it?
A simple inspection routine that works
Walk your yard in this order:
- Edges and transitions near patios, planters, fences, and concrete
- Traffic lanes where people and pets repeat the same route
- Heat-risk spots near grills, fire features, reflective windows, and metal furniture
- Low areas after irrigation or rain
Take photos before touching anything. That helps you compare changes and makes it easier to get a professional opinion if you decide not to DIY.
If you're seeing multiple symptoms in the same area, like odor plus matting plus a low spot, don't assume it's one simple fix. Those combo problems are where a quick patch usually fails.
Essential Tools and Materials for DIY Repairs
A good turf repair starts on the garage floor, not out in the yard. In Austin, rushed repairs usually fail for three reasons: the adhesive was wrong for the heat, the patch did not match the existing turf, or the problem under the turf was bigger than it looked from the surface.

What belongs in a real repair kit
For a simple seam, small patch, or lifted edge, keep these tools and materials nearby before you cut or lift anything:
- Sharp utility knife with fresh blades. Dull blades tear backing and leave fuzzy cuts that are harder to hide.
- Seam tape rated for artificial turf. The tape needs full support under the joint.
- Outdoor turf adhesive. Use a product made to stay flexible in sun and heat.
- Stiff broom or power brush. This lifts flattened fibers so the repair blends better.
- Heavy weights such as sandbags or bricks. Even pressure matters while the adhesive cures.
- Galvanized nails or U-shaped staples for edge resets where the original fastening has loosened.
- A matching turf remnant for burns, tears, or chewed spots.
- Matching infill so the repaired area sits and drains like the surrounding lawn.
If the damaged area has sunk, add a hand tamper and base material. If the area smells strongly, stays wet, or feels soft underfoot, stop before buying glue. That usually points to a drainage or pet-saturation issue below the turf face, and patching the top alone rarely holds up.
Seam work rewards precision
Seam repair looks simple until the adhesive is open. Then every small mistake shows.
The joint has to be clean, dry, and lined up before the edges touch glue. Loose fibers caught in adhesive leave a visible scar, and stitch lines that drift out of alignment stand out even more in full Texas sun. I see that a lot on homeowner repairs done late in the day when the light is forgiving, then the seam shows up the next afternoon.
If you cannot keep the edges straight, the fibers clear, and steady weight on the seam while it cures, hand the repair off. A visible seam is much harder to correct after the glue sets.
Matching materials is half the repair
A patch only disappears when the replacement turf matches the original product closely. Blade shape, pile height, color mix, and sheen all affect the final look. Even the infill changes how the fibers stand up and how the repaired spot drains after rain.
If you are not sure what you have, compare it against different artificial grass types used for lawns, pets, and putting greens before ordering a remnant online. That extra step saves a lot of wasted time.
This is also where DIY has a real limit. Small repairs make sense if you already have leftover turf from the original install and the base is still solid. If you are guessing on material match, dealing with pet damage in the same area more than once, or trying to fix a seam across a high-traffic path, a pro usually gets a better result for less total cost than doing it twice.
A short tool list does not make turf repair easy. Clean cuts, good alignment, and the right materials do.
How to Fix Seams Patches and Pet Damage
A lot of Austin turf repairs start the same way. The seam opens after a stretch of hard heat, the dog has worn one potty spot down to the backing, or a small burn turns into the one spot your eye goes to every time you walk outside. The repair itself is usually straightforward. Getting it to disappear is the hard part.

Repairing a lifting seam
Seam repairs fail when the joint is dirty, misaligned, or rushed in the heat. In Central Texas, adhesive also behaves differently on a hot afternoon than it does in a shaded garage, so timing matters.
Use this order:
- Clear infill and debris from both sides of the seam so the bond line is clean.
- Lift the turf edges carefully without stretching or creasing the backing.
- Place seam tape centered under the joint.
- Spread adhesive evenly across the tape.
- Set the edges together without overlap or a gap.
- Pull stray fibers out of the glue line before the adhesive starts to grab.
- Weight the seam and leave it alone until it cures.
Check stitch rows and blade direction before the edges touch the glue. In full sun, a seam that looks acceptable at first can flash bright the next day if the grain is off by even a little.
DIY works for a short, clean seam where the base is still firm. If the seam runs through a walkway, has opened more than once, or sits over a soft base, call for a quote. Re-gluing over movement rarely lasts.
Patching a burn or tear
Burns, melted spots, and backing tears need a patch. Brushing will not fix them.
Cut the damaged section into a simple shape with clean edges. Squares and rectangles are easier to line up than jagged cuts, especially when you are matching stitch rows. If I have leftover turf from the original install, I always dry-fit the piece first and check it from two angles, because a patch can match color and still look wrong if the grain turns the opposite direction.
Use a clean process:
- Cut from the backing side when you can for better control
- Trim the damaged section neatly
- Dry-fit the new piece before glue goes down
- Match pile direction and stitch spacing
- Set the patch over seam tape with adhesive
- Weight it flat while it cures
- Return infill gradually and brush the fibers up
Small patches can come out well. The trade-off is visibility. If you do not have matching material, or the damaged area sits in a wide open lawn with strong afternoon sun, the patch may always read as a patch.
A good repair disappears because the cut lines are clean, the grain matches, and the infill supports the fibers the same way as the surrounding turf.
Fixing pet odor and matted dog areas
Pet damage is where homeowners spend time and still get poor results. The smell often lives below the face fibers, inside contaminated infill or against the backing, especially in yards that get heavy summer heat and only occasional deep rinsing.
Start by figuring out whether the problem is mostly matting, odor, or both. For homes with repeat pet wear, artificial turf designed for dogs holds up differently than a standard turf product and usually drains better.
For a targeted repair:
- Pick up solids and remove loose debris
- Rinse the area heavily
- Brush against the grain to lift matted fibers
- Remove infill if odor stays after cleaning
- Treat the backing and base with a turf-safe cleaner
- Add fresh infill in light passes and brush again
If odor returns fast, the issue may be below that one spot. I see this a lot in small dog runs where urine has spread wider than the visible wear pattern. At that point, a surface repair may help appearance but not solve the smell.
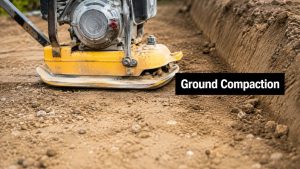
Correcting a low or sunken area
A dip underfoot usually points to base movement, not just missing infill. That distinction matters because adding more infill to a soft spot can hide the problem for a week and make the area feel uneven later.
If the surface feels firm and only looks a little low, a light infill correction may be enough. If it feels spongy, sinks under body weight, or holds water after rain, pull the turf back and rebuild the base before resetting the section. LitaGrass repair guidance also notes that low areas tied to settled base and weak infill support need more than a cosmetic top-up.
This is one of the clearest DIY dividing lines. A shallow surface touch-up is manageable. A sunken area near drainage paths, downspouts, or repeated pet use usually needs a proper base correction if you want the repair to last.
Preventing Future Repairs in the Texas Climate
Austin turf doesn't fail for one reason. Repairs usually come from a combination of heat, traffic, moisture, and neglect in one stressed area. If you want fewer repair bills, the goal isn't just reacting faster. It's reducing stress before the turf starts showing damage.

Heat changes how repairs should be handled
In hot climates like Texas, repair isn't only about visible damage. Goat Turf's repair discussion notes that high heat, poor drainage, and pet urine can degrade turf systems in ways many repair articles skip, including concerns around restoring cooling or antimicrobial performance after a patch.
That's a real issue in Central Texas. A patch may solve the visual problem while still leaving you with a hot spot, a smell problem, or a section that behaves differently after summer exposure.
Watch these risk points closely:
- Reflective windows and glass doors that can focus heat onto one spot
- Grills, smokers, fire features, and metal furniture placed directly on turf
- South- and west-facing sections that take prolonged sun
- Pet relief areas where heat intensifies odor
The maintenance habits that actually help
You don't need a complicated program. You need consistent basics.
- Brush high-use zones regularly to keep fibers upright and prevent infill compaction
- Rinse pet areas often so waste doesn't linger in the surface system
- Remove leaves and debris before they block drainage
- Check seams and edges by hand so small movement doesn't turn into a lifted joint
- Pay attention after storms because drainage weaknesses show up fast in heavy rain
A lot of recurring repairs come from homeowners doing one big cleanup instead of small, steady upkeep. Turf performs better when the load is spread out over time.
Well-maintained turf usually gives you warning signs before it gives you a major repair bill.
Prevention is cheaper than repeated touch-ups
The same area shouldn't need the same repair over and over. If it does, one of three things is usually happening: the traffic pattern hasn't changed, the underlying base issue wasn't corrected, or the cleanup routine isn't keeping pace with the way the yard is used.
That's especially true for family yards in Austin where kids, dogs, and summer heat all hit the same strip of turf every day. In those cases, prevention can be as simple as brushing that lane more often, changing where a kennel or grill sits, or dealing with drainage before the next rainy stretch.
When a DIY Repair Isn't Enough Call Modern Yard Landscapes
The smartest part of DIY isn't doing everything yourself. It's knowing when to stop before a manageable problem turns into a visible patchwork repair.
Small, clean issues are often worth trying on your own. A short seam opening. A minor isolated burn if you have matching remnant turf. Light infill touch-up in a worn path. Those are reasonable projects for a careful homeowner.
Bigger problems usually aren't about effort. They're about precision, access to matching materials, and being able to fix the cause instead of only the symptom.
Signs it's time to bring in a pro
Call for help if any of these are true:
- The damaged area is spreading instead of staying isolated
- The turf feels soft or sunken beneath the visible damage
- You don't have matching turf for a patch
- Several issues overlap in one area, such as odor, matting, and drainage
- The seam runs long or crosses a prominent part of the yard
- You're dealing with older faded turf where a new patch may be obvious
- You suspect the original installation was part of the problem
If you're comparing providers, this is the stage where most homeowners start looking for artificial turf contractors near me because the job has moved past a simple home repair.
DIY vs Professional Turf Repair Decision Matrix
| Factor | DIY Repair | Professional Repair (Modern Yard Landscapes) |
|---|---|---|
| Small seam lift | Reasonable if the area is short, clean, and stable | Better if the seam is highly visible or alignment is tricky |
| Burned patch | Possible if you have an exact turf remnant and can match grain direction | Better when color match, age fade, or cut precision matters |
| Pet odor area | Limited success if odor is only surface-level | Better when infill contamination or drainage is involved |
| Sunken spot | Risky unless you're comfortable exposing and rebuilding the base | Strong choice when settling is causing repeat failure |
| Large visible area | Often ends up looking patched | Better for blending, securing, and long-term appearance |
| Time and cleanup | Your weekend, your tools, your material sourcing | Handled as a service visit with a clear repair plan |
What a trustworthy repair visit should look like
A good contractor shouldn't jump straight to replacement. They should inspect the affected area, explain what failed, tell you whether repair is realistic, and be honest if a patch will still show because of age, fading, or product mismatch.
That's the kind of conversation homeowners deserve. Clear diagnosis. Straight answers. No pressure.
If the repair is simple, you should hear that. If the problem involves base correction, traffic wear, pet contamination, or difficult seam blending, you should hear that too. Turf is a major part of how your yard looks and functions. Protecting it means choosing the right level of repair, not the cheapest-looking fix in the moment.
If your turf has a lifted seam, a pet-damaged area, a burn mark, or a low spot that keeps coming back, Modern Yard Landscapes can take a close look and tell you plainly whether it makes sense to repair it or replace part of it. That kind of honest assessment is what saves homeowners money and frustration in the long run.