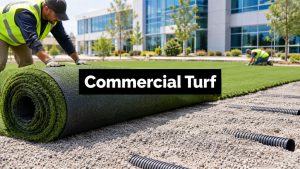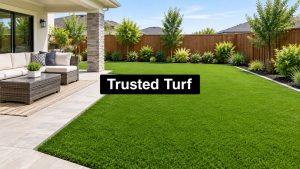

You're probably closer to a backyard green than you think. A lot of Austin homeowners already know where it would go. Off the patio. Beside the pool. In that part of the yard that never quite became as useful as they hoped. The hard part isn't imagining it. The hard part is making sure it plays well a year from now, not just the week it's installed.
That's where most generic advice falls apart. It focuses on the color of the turf and skips the parts that decide whether the ball rolls true, whether water drains correctly, and whether the surface stays smooth through heat, dry spells, and heavy use. If your goal is one of the best backyard golf greens, you're not buying a patch of artificial grass. You're building a small practice environment that has to be designed like a system.
In Austin, that matters even more. Soil movement, drainage, and intense sun expose shortcuts fast. A green that looks clean in a photo can still feel soft underfoot, hold water, or develop subtle dips that ruin putts. Homeowners usually call after they've already seen one of those failures in a neighbor's yard or after they've priced a bargain install that leaves too many questions unanswered.
From Dream to Reality Your Personal Putting Green
Stepping outside with a cup of coffee and rolling a few putts before work is exactly why people start this project. The appeal is simple. No drive time. No waiting. No guessing whether the public practice green is crowded. You get repetition, convenience, and a backyard feature that people use.

The part many homeowners miss is that a putting green has two jobs at once. It has to be enjoyable as a yard feature, and it has to perform like a practice surface. If either side gets ignored, the whole investment feels off. A green that looks attractive but rolls inconsistently won't get used. A green built only for speed, with no thought for layout or surrounding materials, can feel dropped into the yard instead of designed for it.
That's why I always tell clients to look past the top layer first. Turf matters, but not before the design intent is clear. Are you building a serious short-game area? A family-friendly entertaining space? A clean focal point with occasional putting? The answer changes the contours, cup placement, fringe treatment, and traffic patterns around it.
What homeowners usually want
Most projects are some version of these goals:
- Better short-game practice: Homeowners want a green that gives honest feedback on pace and line.
- Low-maintenance outdoor use: They're done fighting patchy grass, muddy areas, and constant upkeep.
- A finished backyard: They want the green to tie into patios, plantings, edging, and walkways instead of feeling isolated.
- Year-round usability: They want something they can enjoy without the maintenance burden of a natural green.
If you're still gathering ideas, it helps to look at backyard turf ideas for usable outdoor spaces before locking into a shape or location.
A backyard green should solve more than one problem. It should improve practice, simplify maintenance, and make the yard feel more complete.
The homeowners who are happiest with the result usually make one smart shift early. They stop asking, “What's the cheapest way to get a green?” and start asking, “What will still look and play right after seasons of heat, traffic, and weather?” That question leads to better decisions every time.
The Anatomy of a Perfect Putting Green
A putting green works a lot like a house. People notice the paint and finishes first, but the foundation decides whether the whole thing stays level. With a green, the visible turf gets the attention. The hidden layers decide whether it drains, holds shape, and keeps a consistent roll.

The base is where quality starts
The most important construction decision is below the surface. USGA guidance for synthetic backyard putting green construction indicates a base of 2 to 4 inches of gravel topped by 6 to 8 inches of compacted aggregate, which improves load-bearing stability and drainage. That matters because standing water changes ball roll and long-term settlement changes contours.
In practical terms, that means the green can't be treated like decorative turf. A shallow or loosely compacted base often leads to three problems homeowners notice fast:
- Soft spots underfoot
- Water holding after rain or irrigation
- Subtle settling that turns a clean putt into a wobble
If you want a surface that keeps its contours, the compaction work has to be deliberate. That's one reason experienced installers spend so much time on excavation, grading, aggregate placement, and mechanical compaction before turf ever goes down.
What each layer actually does
Here's the simple version of the system:
| Layer | Job |
|---|---|
| Subgrade | Supports the whole build and must be shaped and compacted correctly |
| Drainage layer | Moves water away so the surface stays playable |
| Performance base | Creates firmness, contour stability, and long-term support |
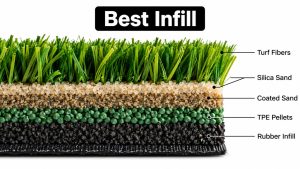
| Infill | Influences ball interaction and helps stabilize the turf system |
| Synthetic turf | Provides the visible playing surface and roll characteristics |
A lot of low-price quotes blur these layers together. That's where homeowners get into trouble. “Base included” can mean very different things depending on depth, material, and compaction method.
Practical rule: If an installer can't explain the base build clearly, they haven't earned your trust on the visible finish either.
For Austin properties, I'd also pay close attention to how the crew handles drainage transitions at the edge of the green. Water needs a path. If it doesn't have one, it will find one. Usually in the wrong place.
If you want a deeper look at how these systems are built under synthetic surfaces, synthetic grass base material options and their purpose are worth reviewing before you compare bids.
Choosing Your Turf for a True Roll
This is the part homeowners tend to over-focus on and under-understand. Turf brochures make everything sound high performance. On a putting green, the specs that matter most are the ones tied directly to ball behavior. If the turf is too tall, too loose, or too soft, the surface may look lush but it won't putt well.
What short pile and density really mean
For putting performance, shorter is usually better. Flooring Inc.’s putting green turf guidance notes that the best-performing putting green turf typically uses a short pile height and a face weight of 40 to 60 ounces per yard to support a true, smooth ball roll. That combination has become a practical benchmark because it balances playability, wear resistance, and lower upkeep.
Here's how that translates in plain language:
- Shorter pile height: Keeps the ball riding more on top of the fibers instead of sinking into them.
- Higher face weight: Adds density, which helps the surface feel more stable and consistent.
- Better structure overall: Produces a cleaner roll and holds up better under repeated use.
A green that's too soft often disappoints serious golfers first. Putts feel slower than expected. Breaks become less honest. The ball can wander slightly because the fibers are doing too much of the work.
Speed matters, but so does usability
Homeowners often ask for a surface that feels fast. That's a fair goal, but “fast” has to be controlled. Professional home putting green installers often target a Stimpmeter reading of about 8 to 10, using short pile heights around 10 to 12 mm and high stitch density. That range is realistic for residential use because it gives you a true practice feel without making the green frustrating for everyday enjoyment.
Some installations often miss the mark. The seller talks about looks. The homeowner assumes playability will follow. It doesn't always.
A good turf selection starts with use case:
| Goal | Turf direction |
|---|---|
| Serious putting practice | Short, dense, more roll-focused surface |
| Family fun and mixed use | Forgiving feel with enough firmness for casual putting |
| Integrated entertainment yard | Surface selected to balance appearance, durability, and usable speed |
If you've ever dealt with a natural lawn that needed leveling work to get rid of small bumps and inconsistent roll, this guide to topdressing for North Georgia lawns gives useful context on why surface smoothness matters so much for ball behavior, even though a synthetic green is built very differently.
The turf should match the way you'll use the green, not the way a sales sample looks under showroom lights.
For homeowners comparing products, artificial turf for putting greens is one category where asking for actual pile height, density, and intended performance is far more useful than asking for the “premium” option.
Designing a Green That Fits Your Game and Yard
The best layout isn't always the biggest one. It's the one that suits your practice habits and how your backyard already works. I've seen small greens become daily-use favorites because the shape, approach area, and cup placement were thought through. I've also seen oversized greens become expensive decoration because nobody planned for realistic shot patterns or movement through the yard.
Start with the way you'll use it
A serious golfer usually wants honest putts, multiple angles, and enough contour to practice reading breaks without turning every putt into a gimmick. A family may want a green that supports putting, casual chipping, and general backyard use during gatherings. Those aren't the same project.
The Motz Group's guidance on artificial grass for putting greens notes that the best artificial grass for putting greens is typically texturized, short pile (about 3/8" to 5/8"), and built with good density. The guidance further points out that turf specs need to be matched to outcomes, because the wrong surface can look good but perform poorly for different goals like family fun versus serious practice.
That design decision shows up in several places:
- Contour style: Gentle movement creates usable challenge. Overbuilt slopes create novelty and frustration.
- Cup locations: Good placement gives variety without forcing impossible putts.
- Surrounding space: A green needs room for stance, approach shots, and circulation.
- Integration with the yard: Planting beds, pavers, and edging should frame the green, not compete with it.
Avoid the common layout mistakes
These are the errors I'd watch for:
- Too much break: Homeowners often think more contour means more fun. It usually means fewer putts feel realistic.
- Poor orientation: If the green is tucked into a corner with no clean approach path, it won't get used the way you expect.
- No fringe transition: A sharp edge can make the feature feel unfinished and less natural in its setting.
- Ignoring non-golf use: Kids, pets, guests, and foot traffic all affect how the area should be planned.
A smart design usually blends challenge with repeatability. You want enough movement to practice line and pace, but not so much that every session feels like a trick-shot contest.
Good putting green design is restraint. The green should be interesting on the tenth session, not just impressive on install day.
In Austin, I'd also think carefully about sun exposure, visual balance with the house, and whether the green should stand alone or connect to a larger hardscape plan. A custom green looks more valuable when it belongs to the whole yard.
The Professional Construction Process Unveiled
A backyard green either gets better with use or starts showing flaws within the first season. In Austin, that usually comes down to the work below the turf. Heat, hard rain, expanding clay, and daily foot traffic expose shortcuts fast. A green can look sharp on install day and still roll poorly six months later if the base, drainage, and edge detailing were handled carelessly.

What a proper build looks like
Good construction follows a sequence, and each step affects playability for years.
Site review and layout
The crew studies drainage patterns, existing grade, access for equipment, and how the green will sit within the yard. In Austin, I also want to know where runoff goes during a heavy storm and which areas stay hot and exposed in late summer.Excavation and rough grading
Soil is removed to make room for the full system, not just the turf layer. The green's long-term shape starts taking form at this stage.Base installation and compaction
The aggregate base is installed in lifts and compacted correctly so contours stay put. If this step is rushed, the surface can settle, soften, or develop low spots that ruin pace and drainage.Turf placement and seam work
Turf sections are aligned carefully, with attention to grain direction, edge fit, and seam visibility. Poor seam work is one of the fastest ways to make an expensive green feel cheap underfoot and under a rolling ball.Infill, brushing, and final speed tuning
The finish is adjusted so putts track consistently and the surface feels true from multiple cup locations. This last step is where a green starts playing like a practice surface instead of a decorative feature.
The order matters because problems compound from the bottom up. An uneven subgrade telegraphs through the base. A weak base telegraphs through the turf. By the time the putting surface is finished, there is no easy fix for bad prep.
Why synthetic usually wins for homeowners
Synthetic greens make sense for most residential projects because they hold performance with far less upkeep. The University of Arkansas Extension notes that natural grass greens require mowing 4–6 times per week, irrigation, and pesticide applications as part of standard care, while a professionally installed synthetic putting green is described as virtually maintenance-free and often less expensive to establish and maintain over its lifespan.
That trade-off is hard to ignore in Austin. Homeowners usually want a green they can use after work, during dry spells, and through summer heat without turning it into a constant maintenance project.
One local company homeowners often compare during planning is Modern Yard, an Austin installer that builds artificial turf and custom putting greens as part of larger outdoor projects. The right contractor should be able to explain base depth, drainage strategy, contour tolerance, seam placement, and edge treatment in plain language. If you are pricing the work, this guide to putting green installation cost in Austin helps frame where the money goes and why the unseen construction work carries so much of the value.
Clear process usually leads to a better result. Vague scope usually leads to callbacks, frustration, and a green that never quite rolls the way you hoped.
DIY vs Professional Installation Calculating the Real Cost
DIY putting greens are tempting for one reason. The material quote can look manageable. What many homeowners don't see at first is that the risk sits in everything around the material. Precision grading, compaction, drainage, seam quality, and finish tuning are what determine whether the surface becomes a practice green or a regret.

What DIY can work for
DIY isn't automatically a bad choice. If the area is simple, the design is modest, and you have experience with excavation, grading, and compaction, it can be a satisfying project. But the standard has to be realistic. A basic recreational surface is one thing. A green with consistent pace, durable contours, and professional finish quality is another.
Here's the honest comparison:
| Consideration | DIY | Professional |
|---|---|---|
| Upfront spend | Usually lower on paper | Higher upfront investment |
| Time required | Significant owner time | Managed by an installation crew |
| Drainage and base risk | Easy to get wrong | Controlled by process and experience |
| Finish quality | Varies with skill | More predictable |
| Long-term peace of mind | Lower | Higher |
Where DIY often goes sideways
These are the mistakes that cost homeowners the most:
- Underbuilding the base: The surface may look fine early, then settle unevenly.
- Poor drainage planning: Water creates soft spots and changes playability.
- Visible seams: Once you notice them, you can't unsee them.
- Misreading the turf choice: A turf that looks good online may not perform the way you want in person.
That's why I tell homeowners to calculate cost in more than dollars. Include your time, equipment rental, waste hauling, rework risk, and the frustration factor if the ball never rolls the way it should.
If you're comparing project paths, putting green installation cost factors can help you frame the conversation around site conditions, materials, and labor complexity instead of just asking for a low number.
Cheap is only cheap if the green works the first time. Rebuilding a failed base is where “saving money” usually disappears.
The professional route costs more upfront. It also tends to cost less emotionally. That matters more than people expect.
Your Austin Putting Green Starts Here
A lot of Austin homeowners call after the same frustrating experience. They saw a green that looked sharp on day one, then one summer later the ball started drifting, water sat along the edge after storms, and the surface felt more like a backyard novelty than a place to practice. That usually traces back to decisions nobody sees once the turf goes down.
A putting green that lasts in Central Texas has to be built for playability first, then durability. Expansive clay soils, intense sun, and fast downpours will expose a weak base, rushed grading, or the wrong turf pretty quickly. Get those parts right, and the green becomes a feature you use for years. It also tends to hold its visual value better because it still looks intentional instead of patched in.
Start with the parts under the surface. Base preparation and drainage control how the green plays in month one and in year five. After that, look at turf construction, roll quality, and how the design fits the way you practice.
Here's the order I recommend:
- Base and drainage: These control stability, firmness, and how well the green handles Austin rain.
- Turf performance: Short, dense putting turf usually gives a truer roll than products chosen mainly for appearance.
- Layout: Cup placement, green shape, fringe area, and approach angles should match how you plan to use it.
- Installer process: Ask how excavation, compaction, seam work, edging, and finish grading will be handled.
For home use, many well-built greens are designed to roll in a realistic practice range rather than chase tournament speed. Faster is not always better in a backyard. If the grade is too lively or the surface is too quick for the space, the green becomes harder to enjoy and less forgiving for family use.
Local judgment matters here. A green has to fit the property, shed water cleanly, handle foot traffic, and sit naturally with patios, planting areas, and the rest of the yard. In Austin, that often means making smart choices about sun exposure, runoff, and edge detailing long before anyone talks about cup locations.
If you want a backyard green that feels good to putt on and still performs after years of heat and storms, build it like a permanent part of the property, not a decorative add-on.
If you want a backyard green that's designed for playability, built for Austin conditions, and planned around how you'll use the space, contact Modern Yard Landscapes to schedule a no-pressure consultation. You'll get clear guidance on layout, turf options, drainage, and construction so you can decide with confidence.