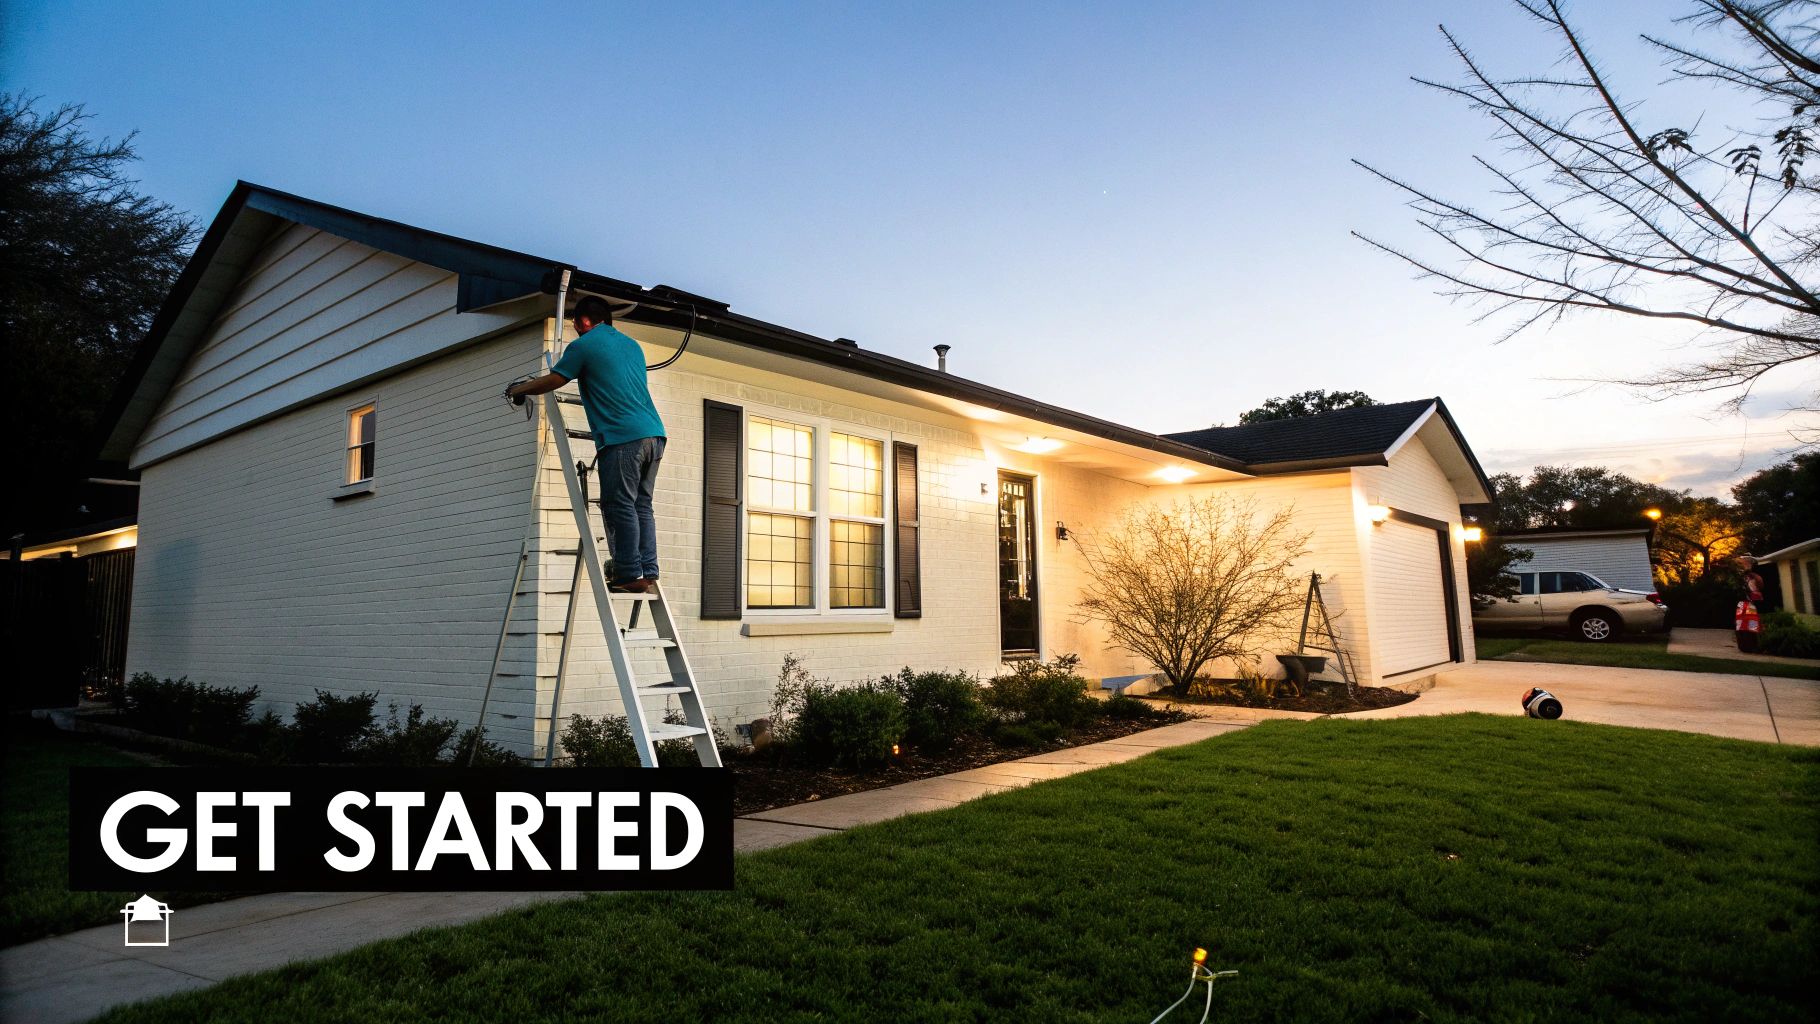
Gutter Lighting Installation In Austin, TX can completely revitalize your home’s curb appeal while keeping everyone safer after dark. Our licensed, insured, and bonded team at Modern Yard Landscapes brings over a decade of local experience to every project, backed by our 100% satisfaction guarantee. In just a few hours, we survey your property, provide a transparent quote, and lock in an installation date you can count on. If you’re ready to brighten your gutter lines and trust a team that values clear communication, you’re in the right place. Call us now to schedule your free consultation!
Getting Started With Gutter Lighting Installation In Austin
When we arrive for our complimentary on-site visit, here’s what we’ll cover:
- Gutter Mapping: Measure runs and note any shaded spots caused by trees.
- Power Assessment: Locate outdoor outlets or plan new conduit paths.
- Style Discussion: Explore options like LED strips, low-voltage spots, or solar fixtures.
- Pricing Preview: Walk through sample tiers and outline your timeline.
By handling these details ahead of time, we streamline installation, protect your landscaping, and eliminate surprises. You’ll receive a clear, written proposal—no hidden fees, no last-minute change orders. Call Modern Yard Landscapes today to lock in your appointment and experience our transparent process firsthand.
Trust And Transparency Grow Confidence
Keeping every cost and detail in clear view prevents unwanted surprises and builds peace of mind.
“Knowing each cost up front helped me book with peace of mind,” says one Austin homeowner.
Schedule And Next Steps
Once you give the green light on our proposal, we’ll lock in a date and send over a quick prep list. You’ll want to clear walkways of debris and secure pets during work hours. Our friendly project coordinator will follow up with you to confirm details and answer any questions—every step is scheduled and communicated clearly.
For more ideas on year-round outdoor lighting, explore our guide on All-Year Outdoor Lighting Installation in Austin TX. It’s packed with seasonal fixture tips, energy-saving options, and before-and-after project photos.
What To Have Ready
Gather these items to keep costs down and move through installation smoothly:
- A rough roof-layout sketch with gutter measurements
- Photos of existing outlets and possible transformer spots
- Style preferences for fixtures and desired light temperature
- A budget range so quotes hit the mark on the first try
Equipping our team with this information means a more personalized lighting plan and faster scheduling. Contact us now to get your prep guide and confirm your on-site visit.
What Happens On Installation Day
Our crew arrives on schedule, protects your plants, and sets up ladders safely. We’ll then:
- Walk the site together to confirm fixture placement
- Run wiring neatly with wire loom and seal connections
- Adjust on the fly for roof angles or shade challenges
- Conduct a final walkthrough, demonstrating each light and answering questions
Installation usually wraps by afternoon, leaving you with a glowing gutter line that highlights architectural details and improves nighttime visibility. You’ll receive our post-install checklist and emergency contact info—so you always know who to call.
Ready to make your Austin home shine? Call Modern Yard Landscapes today for your free consultation.
Exploring Gutter Lighting Options
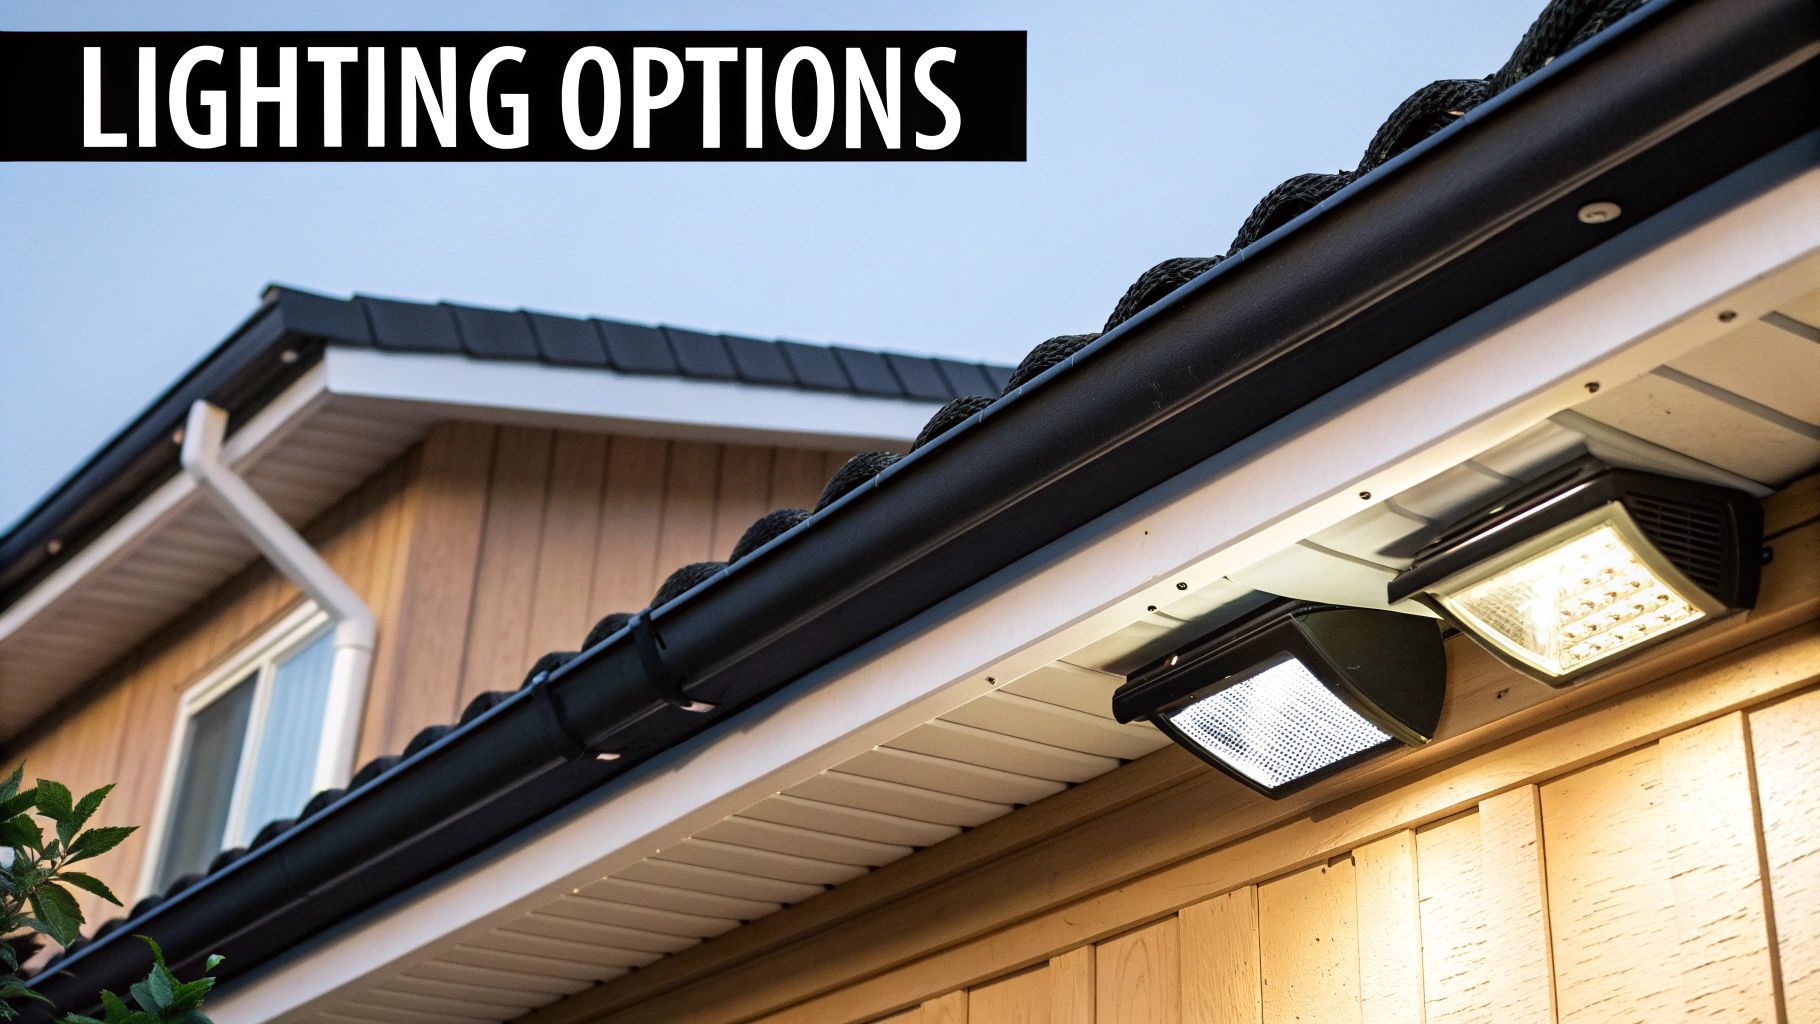
Gutter lights can turn an ordinary roofline into a standout feature. Picking the right system means balancing brightness, power source, and upkeep. Our expert team guides you through each option so you make a confident choice:
Low-voltage setups plug into existing GFCI outlets and deliver 12V of steady illumination with minimal energy draw. They’re a favorite when there’s already outdoor wiring in place.
Solar-powered fixtures combine rooftop panels and an onboard battery pack to run lights for 8–10 hours each evening. A bungalow in Hyde Park slashed its electric bill by 50% after switching over to this green solution. Occasional panel cleaning and battery checks keep performance on track.
Discrete LED strips hug the gutter lip to trace architectural lines. A modern Tarrytown home used self-adhesive, waterproof‐cased strips to highlight its sharp roof edges. Cutting every 3 inches lets you customize lengths without fuss.
Before you buy, focus on quality and weatherproofing. Aim for an IP65 rating (or higher) so fixtures stand up to rain, dust, and the occasional Texas hailstorm.
Key Specifications at a Glance
- Low-Voltage Systems: 12V power via transformer, minimal voltage drop
- Solar-Powered Modules: Panel-to-battery design, 8–10 hours nightly runtime
- LED Strip Solutions: DC wiring through inline transformer, cuttable spans
Installation can be surprisingly straightforward or a bit more involved. Low-voltage wiring usually means running conduit and safeguarding with proper GFCI protection. LED strips mount with clips and sealant for moisture barriers. Solar lights skip the cables but demand prime sun exposure to maximize charge.
Comparison Of Gutter Lighting Types
| Lighting Type | Power Source | Average Cost | Best Use Case |
|---|---|---|---|
| Low-Voltage | Transformer & AC | $10–$20 per ft | Homes with existing outlets |
| Solar-Powered | Solar Panel & Battery | $15–$25 per ft | Eco-conscious properties, remote installs |
| Flexible LED Strips | 12V DC Inline Transformer | $8–$18 per ft | Accent lines, modern architectural designs |
“Our solar retrofit not only cut bills but needed no trenching,” shares an Austin homeowner.
Weighing Maintenance Needs
Energy expenses over time hinge on your choice. Solar systems boast zero utility costs but require new batteries every few years. Low-voltage lights add only a tiny load to your circuit, while LED strips need a correctly sized transformer to avoid flickering or overheating.
Picking the right hardware up front can simplify installation. Our team at Modern Yard Landscapes guides you through fixture selection, layout plans, and wiring details. For more insights on roofline illumination, explore our guide on eave lighting installation in Austin.
Final Checklist
- Assess power availability early to avoid rewiring surprises
- Match fixture type to your home’s design for seamless integration
- Plan maintenance around seasonal checkups to keep lights shining
Start your gutter lighting project today. Let Modern Yard Landscapes light up your Austin home with confidence—call us to schedule your appointment now.
Preparing Your Yard For Installation
Before the installation team shows up, walk your property and take stock of every gutter run. Note where downspouts sit, how low tree limbs hang, and check for the closest power source.
A quick onsite review can reveal surprises early and keep your project on track.
- Measure each gutter segment to the nearest inch
- Observe shade patterns cast by foliage throughout the day
- Pinpoint existing outlets or mark where a transformer will go
Site Survey Essentials
Climbing up a ladder only to find clogged gutters or hidden damage slows progress. Clear out leaves, twigs, and any debris tucked in corners.
Lay down tarps to shield planting beds from falling screws and tools. A few minutes spent trimming overhanging branches translates into a safer, faster install for everyone.
Local Gutter Installation Cost Ranges
Local Gutter Installation Cost Ranges
| Material | Cost per Linear Foot | Total Project Cost Range |
|---|---|---|
| Vinyl | $3–$8 | $689–$1,664 |
| Aluminum | $5–$14 | $1,171–$2,800 |
| Copper | $25–$40 | $3,750–$6,000 |
By comparing these figures before you shop, you’ll zero in on the right budget and avoid mid-project sticker shock.
Safety Preparations
Austin homeowners usually spend between $689 and $2,800 on seamless aluminum gutters for a 180-foot house. Discover more insights about gutter replacement costs in Austin.
Before anyone climbs a ladder:
- Make sure ladders rest on level, firm ground
- Attach ladder levelers on sloping yards
- Keep all gutter runs free of blockages to ensure proper water flow
Proper preparation can cut project delays by over 50%.
A final walkthrough with your crew helps everyone agree on cleared zones and protected landscaping. That way, the install can kick off right away—no detours or last-minute adjustments.
Final Checklist
Right before the truck pulls in, run through these quick checks:
- Verify transformer distance and outlet amperage
- Confirm roof pitch and gutter slope measurements
- Flag irrigation heads and delicate plants
- Keep walkways clear for easy, hazard-free access
Good planning chops site work by hours, not minutes. Take it from a Round Rock homeowner who cleared a pathway in under 30 minutes, slashing prep time by 25%.
Ready to get started? Contact Modern Yard Landscapes now to schedule your prep visit and lock in an installation date.
Navigating Electrical Work And Permits
Electrical prep can stall even the most straightforward gutter lighting project in Austin, TX. A common hiccup? Transformer sizing. You’ll want to add up every LED strip’s wattage, then tack on a 20% buffer so your 12V transformer never runs hot.
- Transformer Sizing with Buffer: Total fixture wattage × 1.2 margin
- GFCI Outlet Placement: Within 50 feet of the gutter run
- Conduit Routes: Neatly routed through soffits or attic spaces
Sketch these details on a clear wiring diagram. That visual roadmap accelerates permit approvals and keeps your electrician on track.
City Permit Requirements
Before you start pulling wires, remember that Austin mandates permits for most low-voltage outdoor circuits. Fees hover around $75, and approvals usually arrive in 3–5 business days.
Your permit packet should include:
- A site plan showing gutter and outlet locations
- A wiring diagram with transformer specs
- Sharp, well-lit site photos
| Permit Component | Required Details | Timeline |
|---|---|---|
| Site Plan | Gutter and outlet locations | 1–2 days |
| Application Form | Transformer specs and wiring plan | 1 day |
| Inspection | Onsite wiring and GFCI check | 3–5 days |
“Submitting crystal-clear photos at the start slashes approval delays by 20%,” notes a licensed Austin electrician.
Modern Yard Landscapes vets every document before you apply, ensuring a smooth, one-shot approval. Once the permit is in hand, schedule your inspection before any wiring begins. The inspector will verify GFCI safety and conduit placement.
Planning Conduit Runs
Mapping your conduit path early saves headaches later. Identify attic or soffit entry points, then secure your PVC or flexible EMT along rafters and roof supports. Every roof or wall penetration deserves a bead of approved caulk to keep moisture out.
Key conduit tips:
- Mark your planned routes on the wiring diagram
- Use ½-inch PVC or EMT in exposed runs
- Fasten straps every 3 feet to meet code
With a tidy conduit plan, wires stay hidden and dry. Modern Yard Landscapes tackles these details so you don’t have to worry.
Inspection Best Practices
Being on-site during inspection makes all the difference. Label each conduit run on your wiring diagram so the inspector can follow along.
- Prepare a checklist for every outlet and connection
- Keep your wiring diagram and site photos at the ready
- Jot down inspector feedback and address any notes immediately
When everything checks out, you’ll be free to enjoy beautifully lit gutters without a hitch. Call today to discuss permit coordination and electrical planning with our licensed team.
Installing Gutter Lighting Fixtures
When it comes to gutter lighting in Austin, TX, form and function go hand in hand. Our team at Modern Yard Landscapes combines tidy wiring, robust hardware, and watertight connections so your installation lasts for years. Clients appreciate our clear communication and the precision we bring to every detail.
Mount your LED strips or spotlights using low-profile brackets along the gutter’s rear lip. Incorporate quick-disconnect connectors to make future repairs a breeze. Don’t forget to seal every splice with UV-resistant heat-shrink tubing or marine-grade silicone—that extra barrier keeps moisture firmly out.
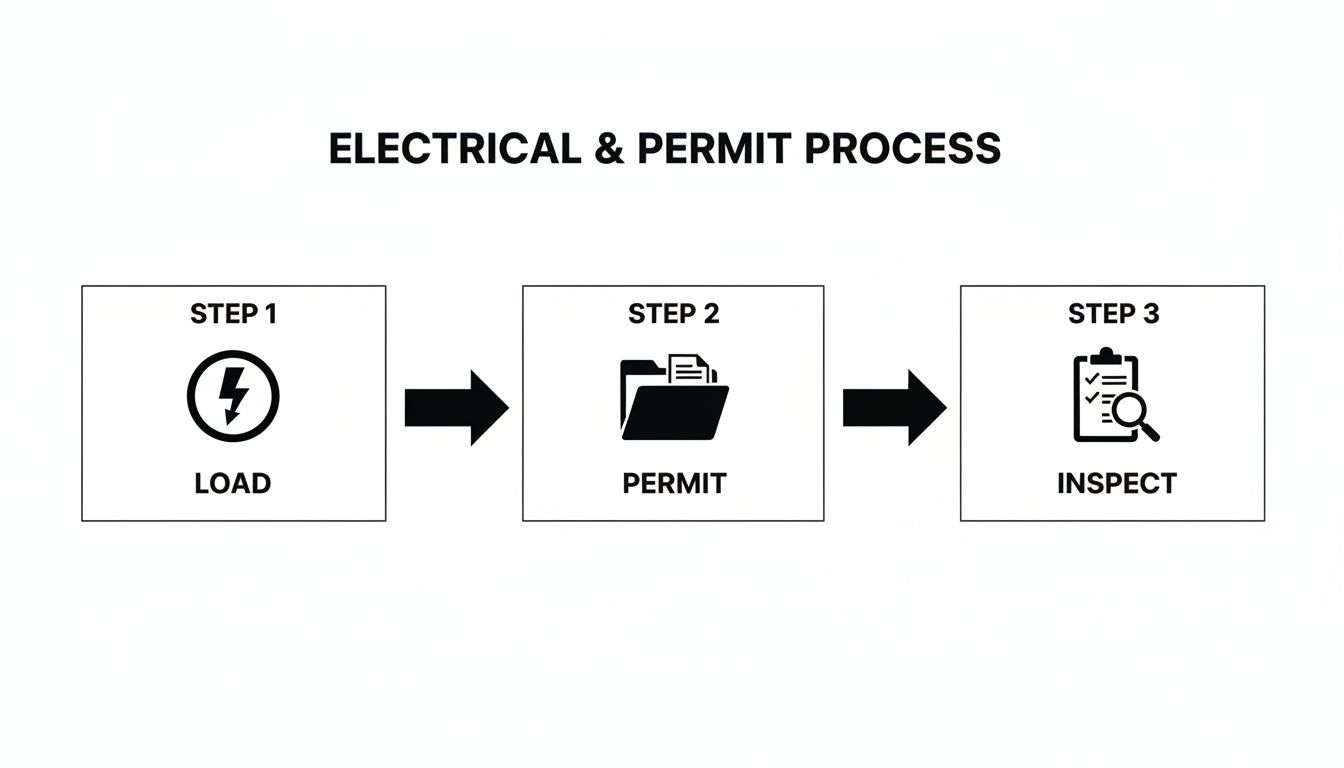
This flowchart breaks down the Load, Permit, and Inspect phases—each typically wrapped up in one business day to avoid unexpected hold-ups. Our project manager will keep you updated at every milestone, so you never wonder what’s next.
Wiring And Sealing Techniques
Routing wires along the gutter’s back edge shields them from wind and debris. If you want a truly polished finish, tuck cables into a protective wire loom. Always fasten at 12-inch intervals to meet code requirements and maintain a clean look.
Proper sealing prevents corrosion and keeps your lights shining longer.
– Secure LED strips with low-profile clips and push them snug against the gutter channel.
– Slide quick-disconnect ends into rubber gasket boots to block water entry.
– Label each run with weatherproof tags for painless future swaps.
Positioning Transformers And Final Walkthrough
Pick a discreet transformer spot near a dedicated GFCI outlet—ideally in a shaded, well-ventilated soffit. This placement reduces heat buildup and boosts safety without compromising aesthetics.
Once everything’s wired and mounted, walk the entire perimeter at dusk. Adjust angles to eliminate glare and even out illumination. We use light meters on site to verify 5–15 lumens per sq ft along the fascia.
| Component | Recommended Placement | Purpose |
|---|---|---|
| Inline Transformer | Shaded soffit area | Keeps device cool and out of sight |
| Quick-Disconnects | Behind downspouts | Simplifies maintenance access |
| Wire Loom | Inside gutter channel | Conceals and protects cables |
Run a full power cycle, double-check GFCI outlets, and confirm every connector is rock solid.
“Seeing each gutter glow evenly gives homeowners real peace of mind,” notes one of our technicians.
Read also for complementary roofline design ideas in our guide on roofline accent lighting installation in Austin, TX.
Maintenance And Troubleshooting Insights
Routine check-ups prevent surprises down the road. Inspect fixtures twice a year—especially after heavy storms. Tighten any loose clips and swap out degraded sealant.
- Wipe contacts clean and look for corrosion at every connector.
- Trim overhanging branches that cast shadows on strip lights.
- Test transformer output with a handheld voltmeter to ensure steady power.
- Examine wire looms for UV damage and replace sections as needed.
- Reapply sealant seasonally to handle Texas temperature swings.
- Clean LED lenses quarterly to remove dust and pollen.
A little upkeep goes a long way. Call Modern Yard Landscapes today to schedule your gutter lighting installation in Austin, TX, and enjoy consistent, beautiful illumination all year round.
Selecting The Right Contractor
Finding a team that truly understands gutter lighting in Austin brings real peace of mind—and keeps surprise costs at bay. The best pros welcome your toughest questions and answer them with confidence. Here’s why homeowners trust Modern Yard Landscapes:
- Fully licensed, insured, and bonded in Texas
- 5-star ratings on local review platforms
- Written warranties on both materials and labor
- Transparent bids with detailed scopes and change-order policies
- Regular project updates via your preferred communication method
“Modern Yard Landscapes walked me through every line item and kept me updated. That clarity made my decision easy,” recalls a satisfied Austin homeowner.
Key Factors To Compare
Always look for crystal-clear bids. Vague scopes or missing electrical credentials are instant red flags. Your choice of gutter and downspout size directly affects performance. The right fit prevents backups when heavy showers hit.
| Material | Cost/Linear Foot | Total for 150–200 ft | Downspout Spacing |
|---|---|---|---|
| Aluminum | $8–$14 | $1,200–$2,800 | Every 35–40 ft |
| Copper | $25–$40 | $3,750–$6,000 | Every 35–40 ft |
Austin contractors typically install one downspout per 600–800 sq ft to handle our torrential rainfalls without fail. For a deeper dive on material trade-offs, explore Austin gutter installations.
Contractor Checklist
Use these pointers to vet bids like a pro:
- Verify a valid Texas contractor license and insurance proof
- Get a written warranty covering parts and labor
- Request a detailed project timeline and preferred communication schedule
- Compare material specifications and downspout count per run
- Ensure every fee and change-order policy is spelled out in writing
Modern Yard Landscapes consistently tops customer satisfaction charts through transparent communication and expert guidance. Check out our guide on permanent ridge lighting installation in Austin, TX to see our step-by-step approach in action. Ready to brighten your gutters in Austin, TX? Give us a call today.
Frequently Asked Questions
When you’re planning gutter lighting in Austin, this section tackles the big concerns so you can move ahead without doubt. Every answer reflects our commitment to clear, accurate information.
- Cost Range: Turnkey projects average $689–$2,800
- Solar Feasibility: High-efficiency modules withstand Austin’s sun
- Permit Process: City of Austin low-voltage permit details
- Maintenance Tips: Quarterly checks keep lights shining
Most installs fall between $689 and $2,800. Choosing solar gear bumps up your initial outlay, but you’ll see those savings on monthly energy bills.
Worried solar won’t hold up? Opt for modules with an IP65 rating (or higher) and a solid battery backup. They shrug off heat, humidity, and sudden storms.
You’ll need a low-voltage permit from the City of Austin. Gather photos of your roofline, sketch a basic wiring plan, and budget about $75 in fees. Approval usually arrives in 3–5 days.
A quick walkthrough every quarter keeps everything humming. Clear debris, tighten any loose mounts, inspect seals—and swap out worn connectors before they cause issues.
Scheduling And Maintenance
“A little upkeep every few months prevents surprises and keeps your lights on schedule.”
Key Insights
- Cost range is $689–$2,800 for turnkey installs
- Solar modules require IP65 rating and battery backup
- Permits take 3–5 days with about $75 fee
- Quarterly checks keep fixtures sealed and bright
- Installation usually wraps up in a single afternoon
These tips will save you time and money, whether you’re comparing bids or gearing up for a DIY weekend. Got more questions about gutter lighting installation in Austin, TX? Give our team a call. We’ll walk you through power choices, fixture placement, and realistic timelines. Our licensed crew handles permits, safety checks, and every fine point to meet local codes.
Call Modern Yard Landscapes today to secure a free consultation and schedule your installation for gutter lighting: Modern Yard Landscapes